Where has the summer gone? Today was the last day for me to spend with all three kids before camps and going back to work invade… and school starts just around the corner! So, I wanted to share our favorite art project from the summer!
Back in May, I read this post by one of my favorite bloggers, Sarah, from Little Bins for Little Hands. Right around the same time, my partners over at Clear Path Paper came out with their Mixed Packs of bond paper! Their bond weight paper is PERFECT for kiddos cutting to create art- because sometimes cardstock is just labor intensive for little hands.
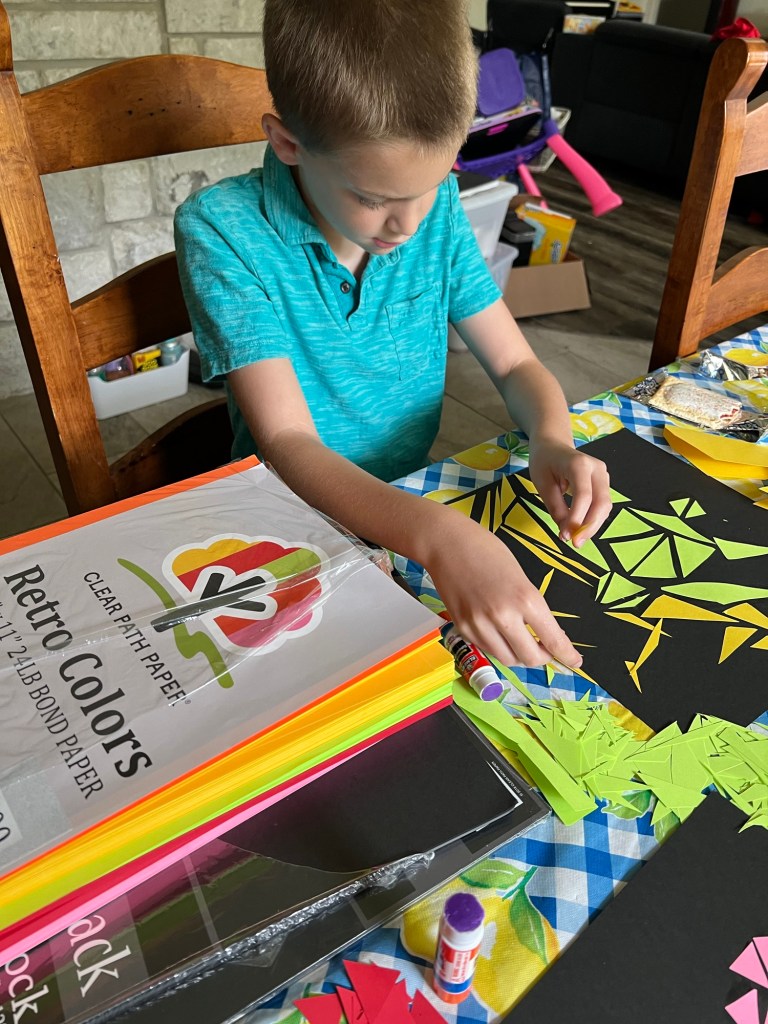
So, I got with Andrew and told him my idea… and once again, Clear Path came thru and made it happen! Their black cardstock is perfect to attach to, and the Retro Colors Mixed Pack just screams summer! My kiddos loved researching Yayoi Kusama, and had never encountered her particular style of art. We just kept enjoying more and more images from our Google search! I set the Retro Colors pack in front of the kids and told them to “think summer and triangles with polka dots.”
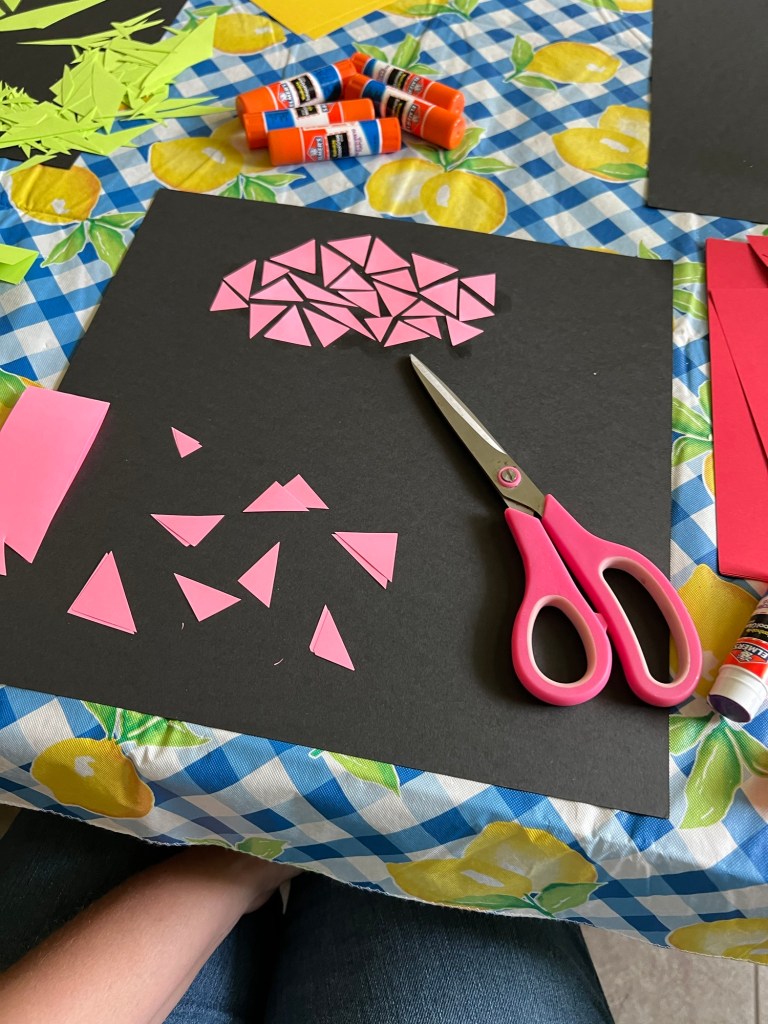
We first grabbed paper and started cutting triangles of all sizes. Both the older kids immediately had a picture in their head that they wanted to make. Elle didn’t really understand the concept, but she had fun cutting and gluing paper. (So I recommed this project for 4th grade and up!) The older two really took the idea and ran with their own concepts, but we didn’t tell each other what we were trying to make… and the three of us enjoyed guessing where the others were going with our art!
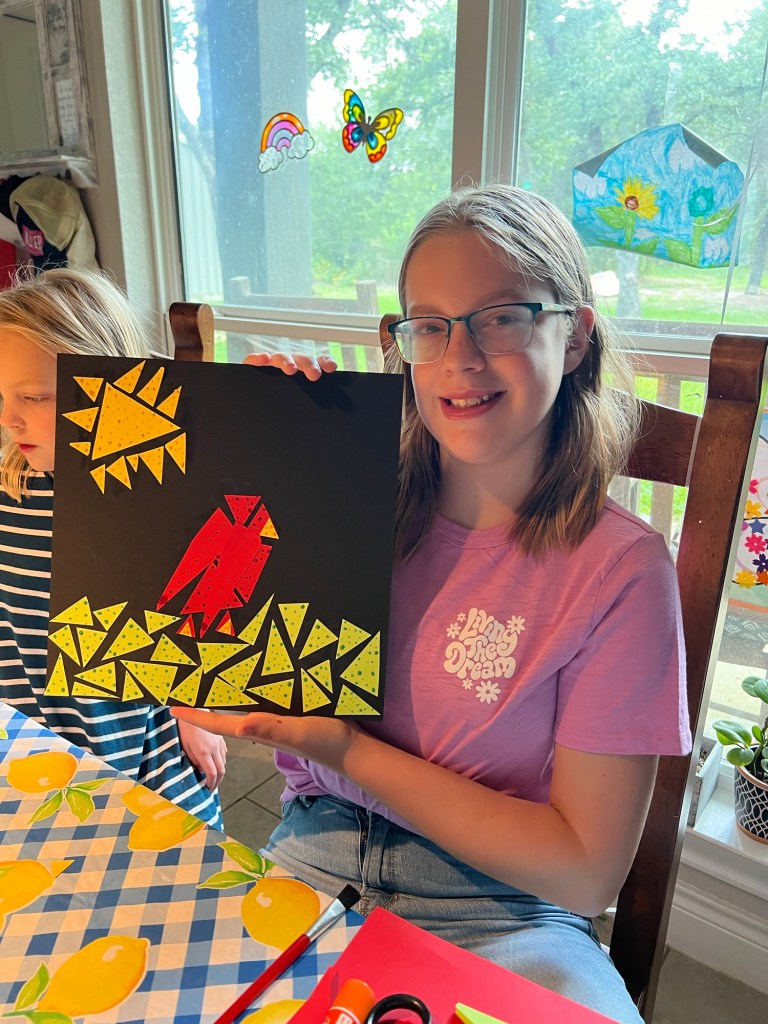
After our glue had fully dried, we went back and painted the polka dots by using the back side of paint brushes of various sizes, and a wide variety of paints we had in the art closet. They then enjoyed hanging them on our ever-changing art wall in their bedroom hallway, so they can enjoy seeing them for a few months til we hang up new art!
Becca loves the Cardinals that live in our backyard each summerThe pink in the retro pack made me think of cotton candy at a summer festivalGrayson’s sea turtle mama is going onto the beach to lay her eggs! The kids’ hallway is the perfect place to display their art!
We had so much fun with it, that we want to use the same pack of paper to make FALL inspired scenes over Labor Day weekend! Becca already has ideas for a basket full of apples, and hay bales!
Want to make your own art with your kids or students? Be sure to shop Clear Path Paper for all of your paper projects!!! And if you need help finding a specific paper for a project, let me know and I can help you find the perfect Clear Path Paper for your project!
You may have heard of selecting a single word to focus your year, and it’s often a great practice either for the beginning of the calendar year, the beginning of the school year, or even on your birthday, to set the focus. Kids need this positivity now more than ever. Especially as they get into upper elementary school- when grades start mattering, tests get more complicated, chores pile on at home, and friendships can get complex. The drama builds with every step closer to puberty. So I sat down last December with one of our school counselors to talk about what we could do to shift their focus from the up coming STAAR testing season (our Texas State achievement tests) to something POSITIVE, and in the form of some digital art work that we could do in my technology classroom.
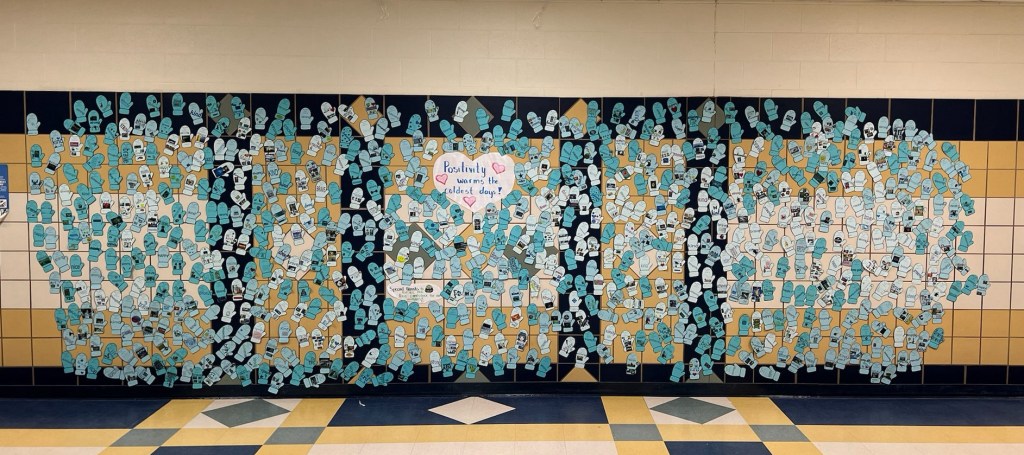
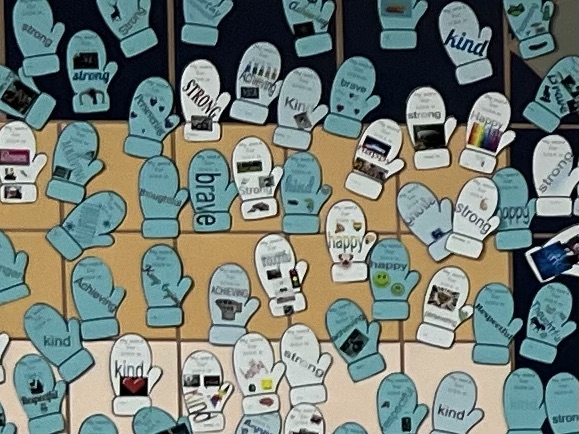
ALL of the completed mittens!
It’s important for kids to learn Google Slides (similar to PowerPoint) skills in a FUN way, and with lots of trial and error… so I wanted to do a digital artwork project that would allow them to play with WordArt, fonts, colors, inserting images, rotation, resizing, and so many more skills. Our counselor loved the idea of a positive word focus, and we decided on a mitten shape, and a set of 8 words they could chose from.
Then I contacted Andrew, my partner over at Clear Path Paper. There was only one way we’d be able to do the project up right, where we could display the mittens in the main hallway. They’d have to be on high quality cardstock, so that kids brushing up against them wouldn’t just rip them. And Andrew not only loved the project, he DONATED all of the paper we needed. Once again, Clear Path Paper showed how they care about teachers and their projects! We decided to do similar shades of light blues, but with a different shade for each of the three grade levels at our school. So he sent over enough 100lb Baby Blue, Light Cadet Blue, and Teal Blue to print two mittens per sheet for 700+ students!!!
Not only were the students intruiged by the project, MANY of them mentioned being surprised that a company would care enough about them and their art work to simply GIVE them paper. So it worked not only to get them in a positive mindset, but also to help them feel like they AND their art/artistic expressions really ARE important. ❤️ Talk about a blessing in so many ways!!
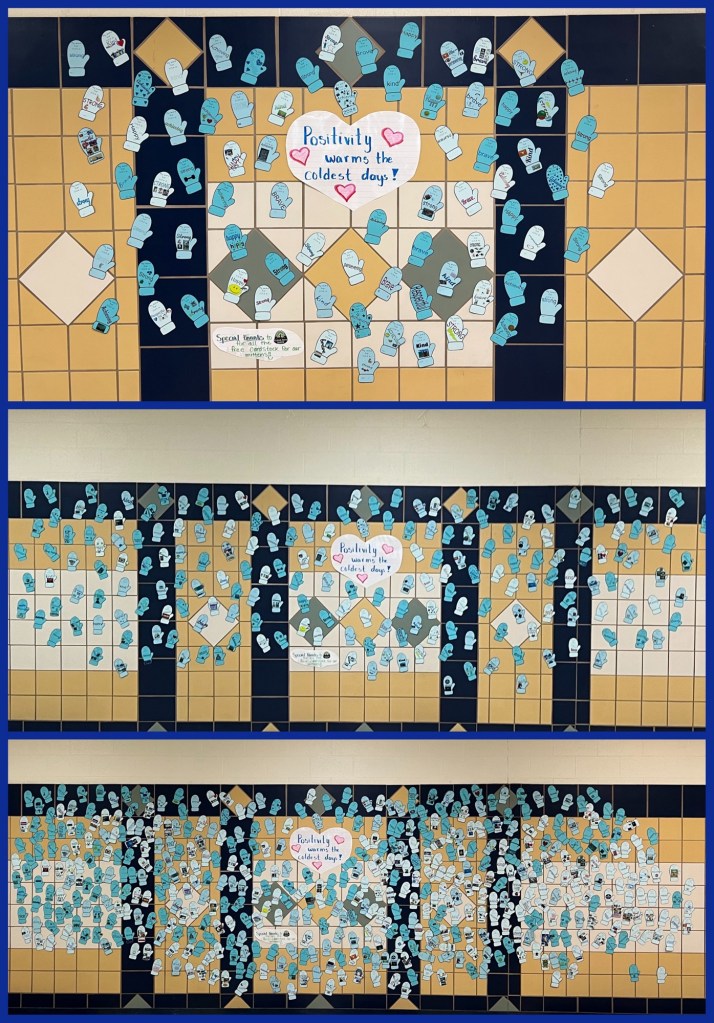
Zoom in of a few sections of the wall
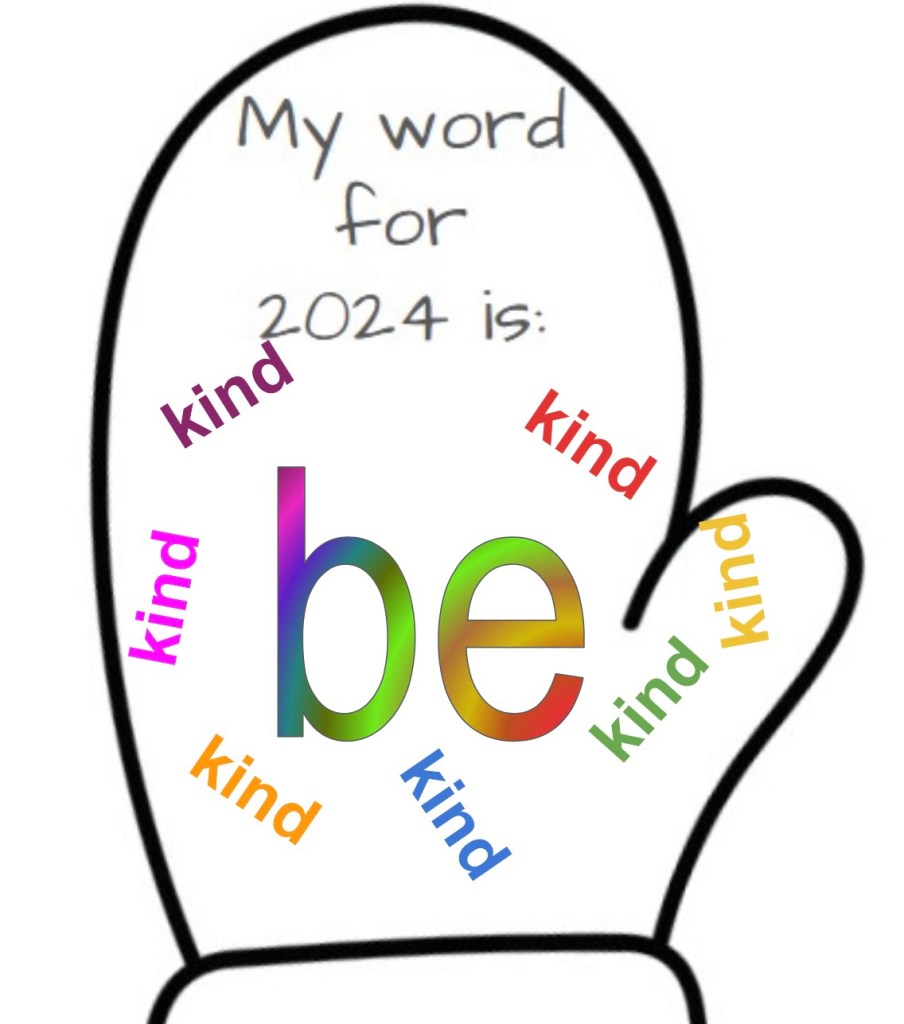
I set up the project in Google Slides, and assigned thru Google Classroom. Because many of my third graders are new to editing in Slides, I set the mitten pattern (with the words “My word for 2024 is:”) as the background of the slide, so it wouldn’t be easy to accidentally delete it. The kids loved learning how to create WordArt colorful fills, and some decided to add clipart or photos that went along with their word, while others just did a theme they like- like dinosaurs, cats, race cars, or their favorite college sports teams. The beauty in each mitten is the individuality, and seeing that while they each selected from a list of the same eight words, there are individual creative touches making each mitten unique, just like it’s designer.
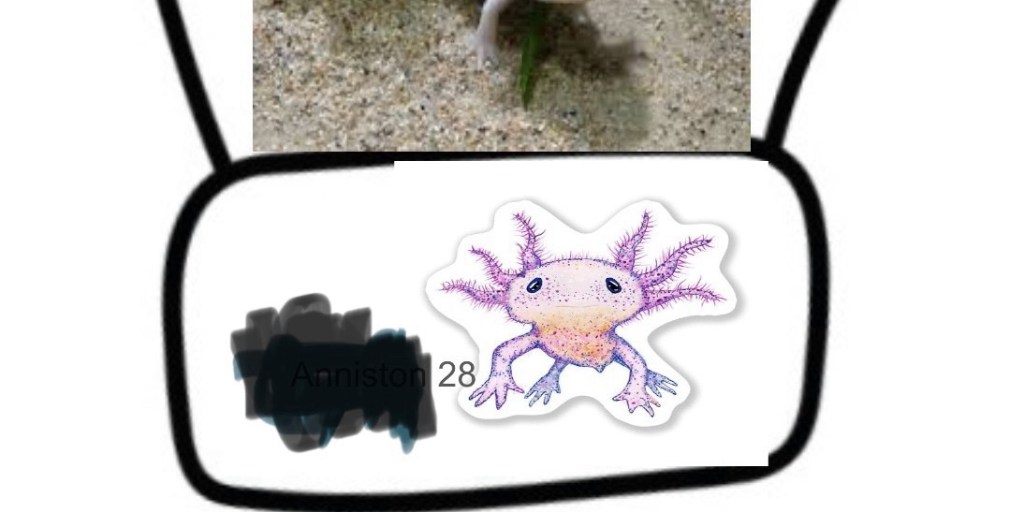
A few random screen shots of designs before printing
The project took longer than I anticipated on the administrative end, and if you decide to do a project like this for your entire school, I have a few tips to suggest:
1) Create a separate Google Classroom for each day of your electives rotation, making it easier to locate with classes and students’ work you’ve printed.
2) Due to privacy laws, we can’t have student work posted in the main hallway with last names or major identifying features. SO! I assigned each classroom teacher a number, and had students put that number next to their first name on their mitten, so that when they come down off the wall in a few weeks, I can get them back to them to take home. With over 700 students, we have LOTS of repeat names… and I’m not going to hunt down the 5 Grayson’s and see whose is whose! (Using that example, b/c that’s my son’s name.)
Here’s a class number example
3) As you print the mittens when they are turned in on Google Classroom, mark off a classlist for each class so that it’s easy to go back and see who you’re missing, who needs to be printed, etc.
4) Make sure you have really good sharp scissors! 100lb cardstock is fabulous for this project, but if you’re cutting a shape, you need to make use of your time and cut at least two at a time, so make sure those scissors are sharp! Better yet, cut into rectangles on your paper cutter to save your handwork!!!
Pre-cutting, when I had only sliced the sheets in 1/2
5) Get a club or class of kids to help you hang them up! It’s very time consuming to put them all on the wall… but it’s so worth it, and getting kids to help hang them adds even more ownership of the project! This might be a fabulous project for your Student Council or other service group!
Seeing the wall get fuller and fuller of mittens over the course of a few weeks was so fun!
6) Differentiation is possibly the most difficult task that teachers face today. We have a select group of students with more extensive need than can be met in the General Education classrooms – both medical and intellectual disabilities – but I wanted them to still be able to participate!! I set up a Google Slide set where I already had each child’s name on their mitten, and had four of the eight words typed into WordArt off to the side, just ready for color to be added. I also selected 20 random cute cliparts that I put on the other side of the slide for them to pick from. I called them to my computer while they were in the lab, and let each of them pick their favorite word, tell me 3-5 colors they like, select a linear or radial color pattern, and then pick all the clipart they liked. Each one really enjoyed not only getting to design their mitten, but find them in the hallway once they were hung up! It’s not always super easy to find ways to include everyone, but it’s always worth it to make them feel just as important as everyone else. ❤️
A few of the mittens our ALE students designed with my help
It’s been a long time since I’ve done an open invitation to play for Elle. Being the third kid has a few perks, but mostly, I end up feeling guilty for all that she DOESN’T get to do that the older two got to experience, since I wasn’t teaching when they were toddlers… and she has only known a mommy who works. So, with colder weather impending and therefore cutting out her bike riding and running around outside to get out energy, I wanted something that will occupy her for longer than 10 minutes at a time.
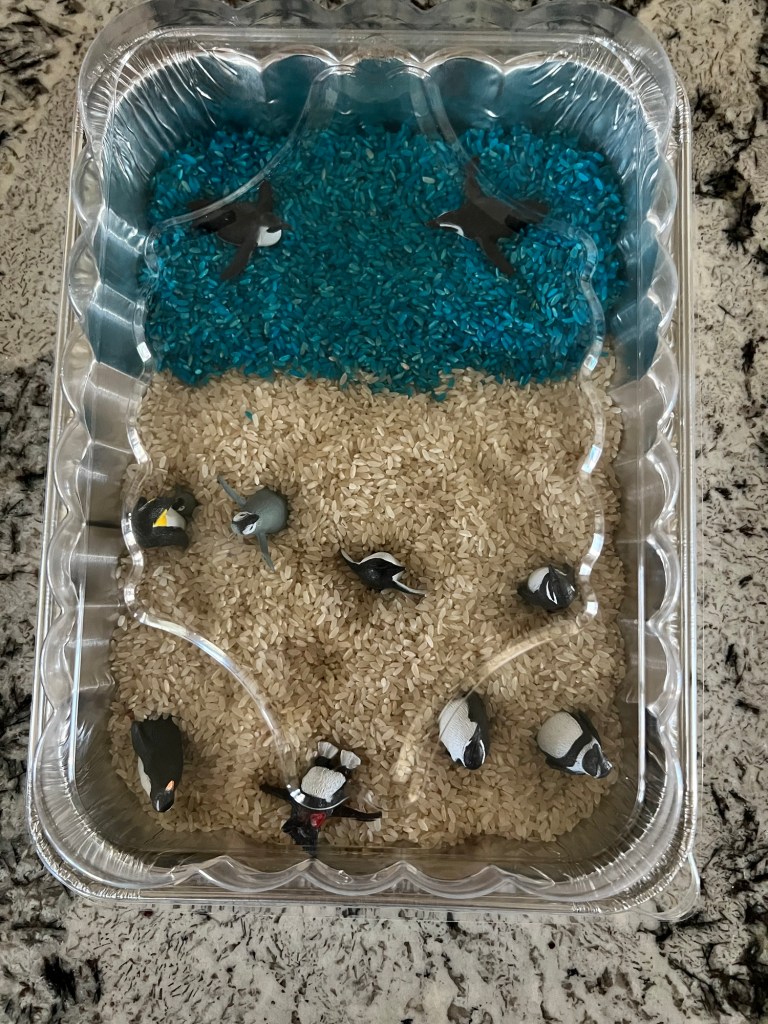
Enter the penguins. YEARS ago (back in 2014, when Elle wasn’t even a blip on our radar of possibility) I had created a penguin habitat box for young Becca, and she used to love playing with it. I have no idea where those penguins are, though I kinda think they got left at the private preschool I taught at for a while… so I bought some new ones. You can get your own here (no longer an affiliate with Amazon, this is just a link… 😉
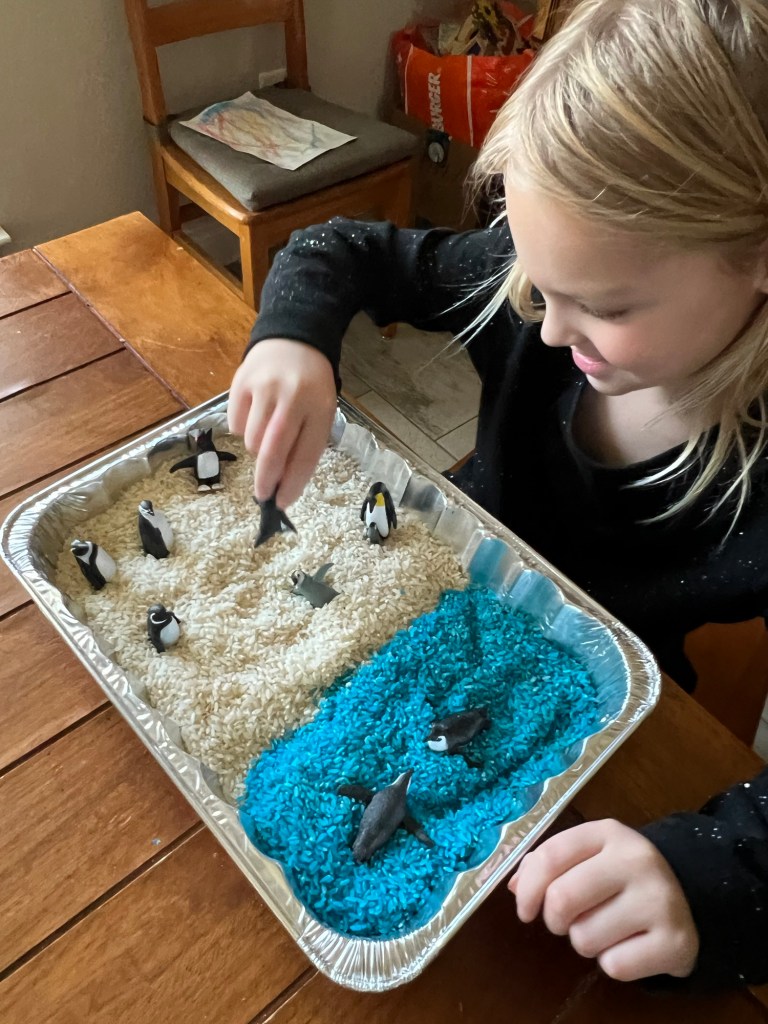
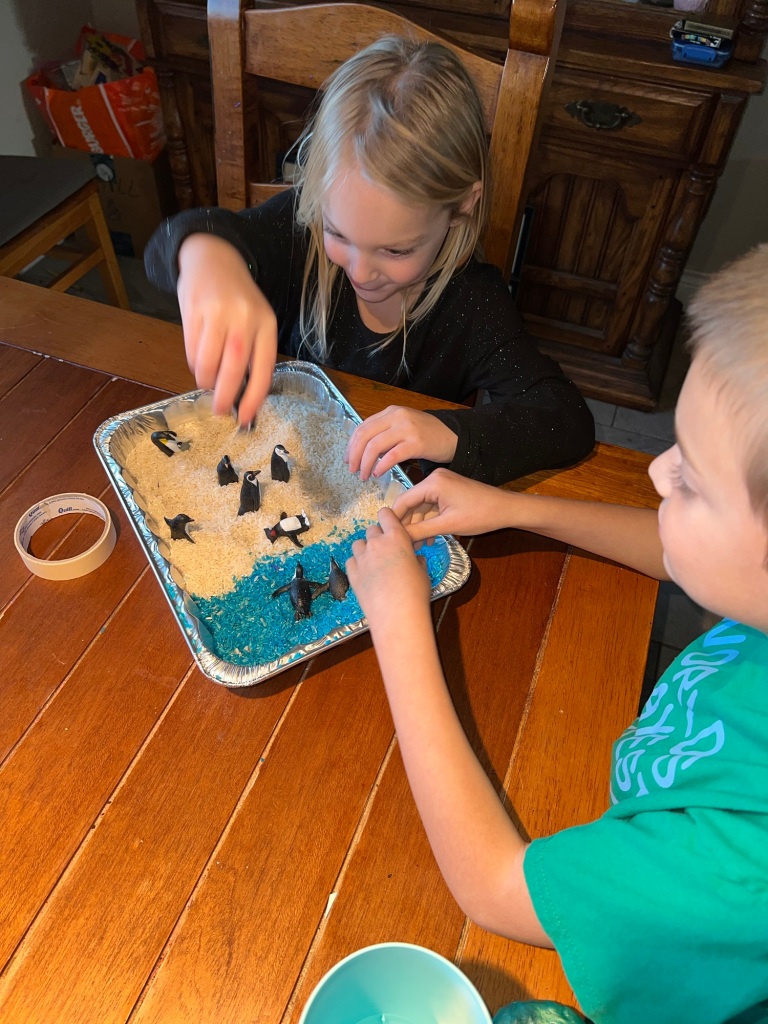
This time, instead of using rock salt, I used a 2lb bag of rice, and colored about a cup and a half or so of it blue. Elle has absolutely LOVED her penguin tub. The pretend play that she has engaged in is SO entertaining, and her brother even sat down with her the other day and they played for a good 40-50 minutes together with them. #WinWin
They were all diving into the water going fishing! ❤️Every now and then something miraculous happens, and they get along, playing happily like best friends. ❤️
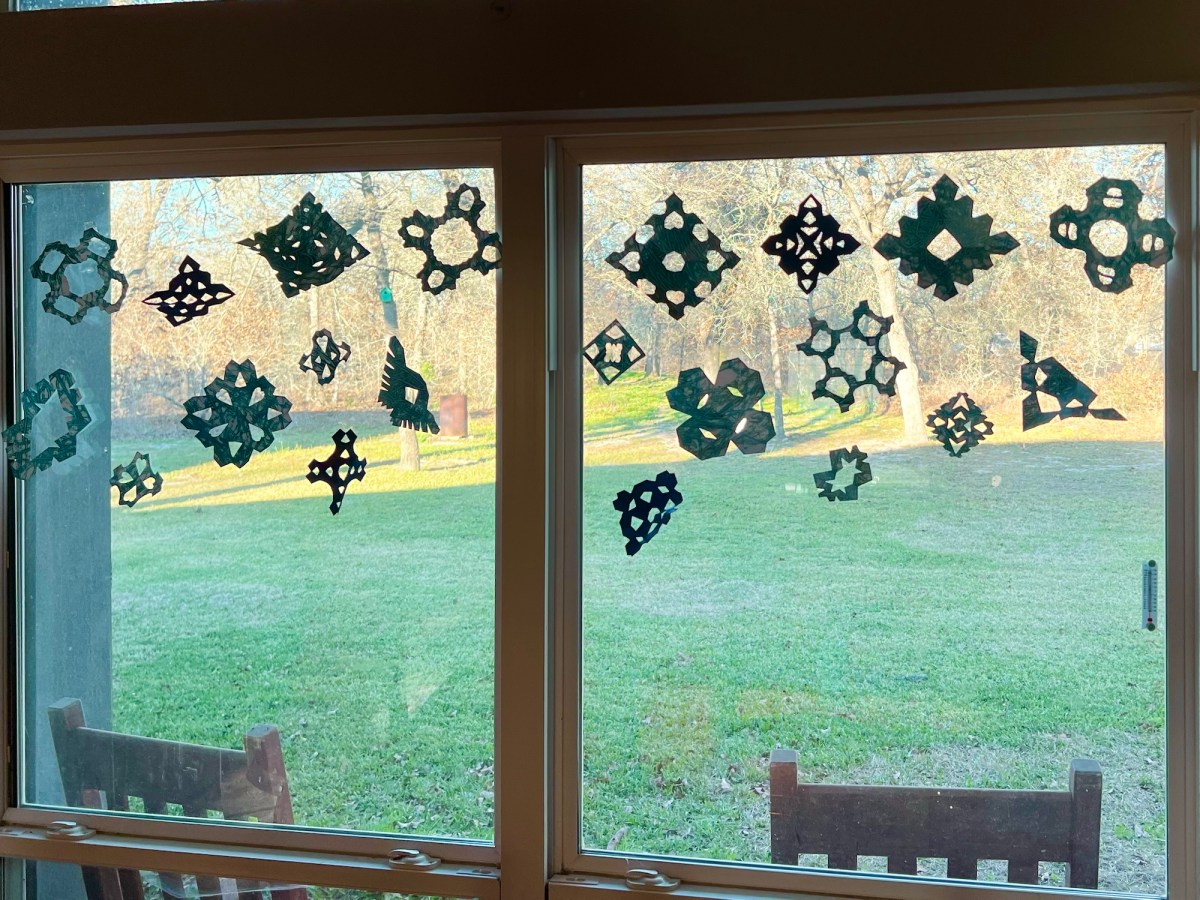
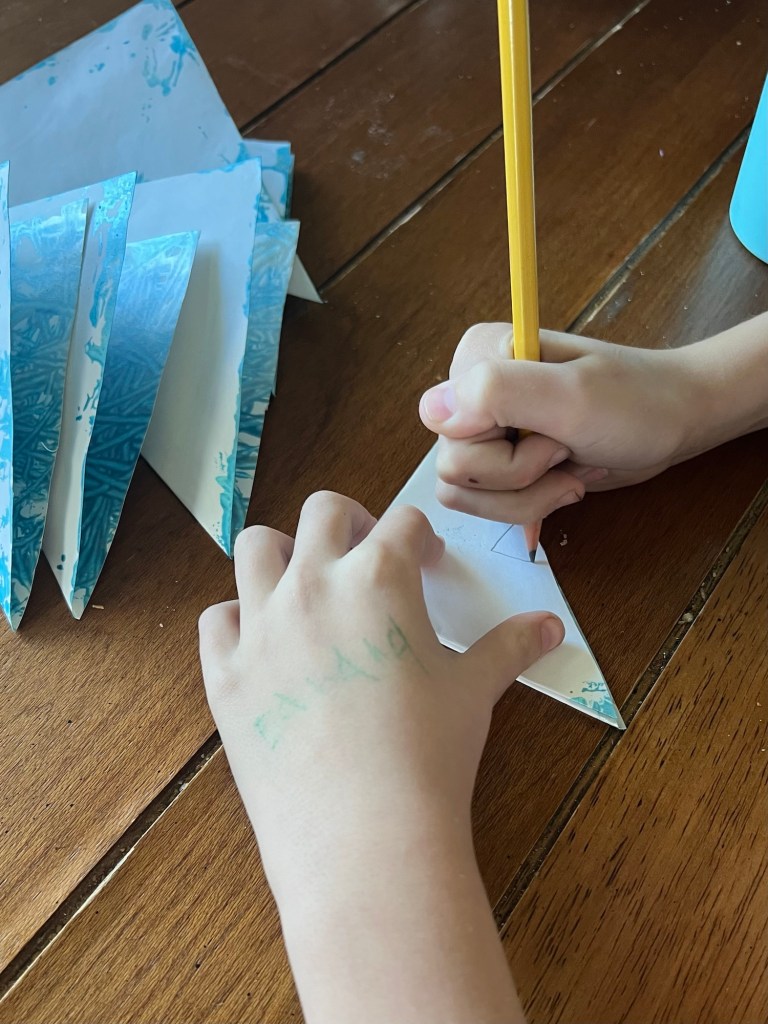
Living in the middle of an almost perpetual summer, we have to get a little creative sometimes to make January actually feel like winter! So while the weather was nice and cool one day (in the low 70s), we got outside to do some marble painting, enjoyed cutting snowflakes from them once it was dry, and now our dining room windows give the appearance of winter… as long as you don’t look out and see all the green grass behind them! HA!
So here’s how we did it…
First off, you know how much I love sharing with you about my partners over at Clear Path Paper. They have so many fabulous products that are perfect for projects of all types. Their 100lb white cover stock is PERFECT for painting – heavy enough to stand up to a LOT of liquid. (It does make cutting for super small hands a bit challenging when folded over several times, though, so I DID cut the snowflakes shapes for my youngest, who is almost 6, where my 9 year old had no problems on his own.)
You’ll need: Clear Path White 100lb Cover, cut in half Aluminum cake or casserole pan Marbles Gray/Blue Paint (we used a washable metallic tempra paint, which has a nice shimmer to it)
Just put a dot of paint on the side of the pan in each color, drop the marbles in, and roll away! Both of my two younger kiddos loved this project, which kept them busy for quite some time while big sis was off at a school extracurricular. My boy loved making this slow-mo video for y’all to see how you can even make curved lines in the paint! Just gotta go slow and steady, and all kinds of fun patterns are possible.
Once the paper is dry, the most basic way to do a snowflake is to fold the paper into a square, cut off the extra, and fold it into quarters. For my little one, she drew where she wanted me to cut, where my middle drew his designs and cut his own snowflake shapes easily. He even cut some squares in half to just play with what he could cut. They don’t look like snowflakes, but they were still fun and we hung them up as “abstract snowflakes” to add a little fun to the window.
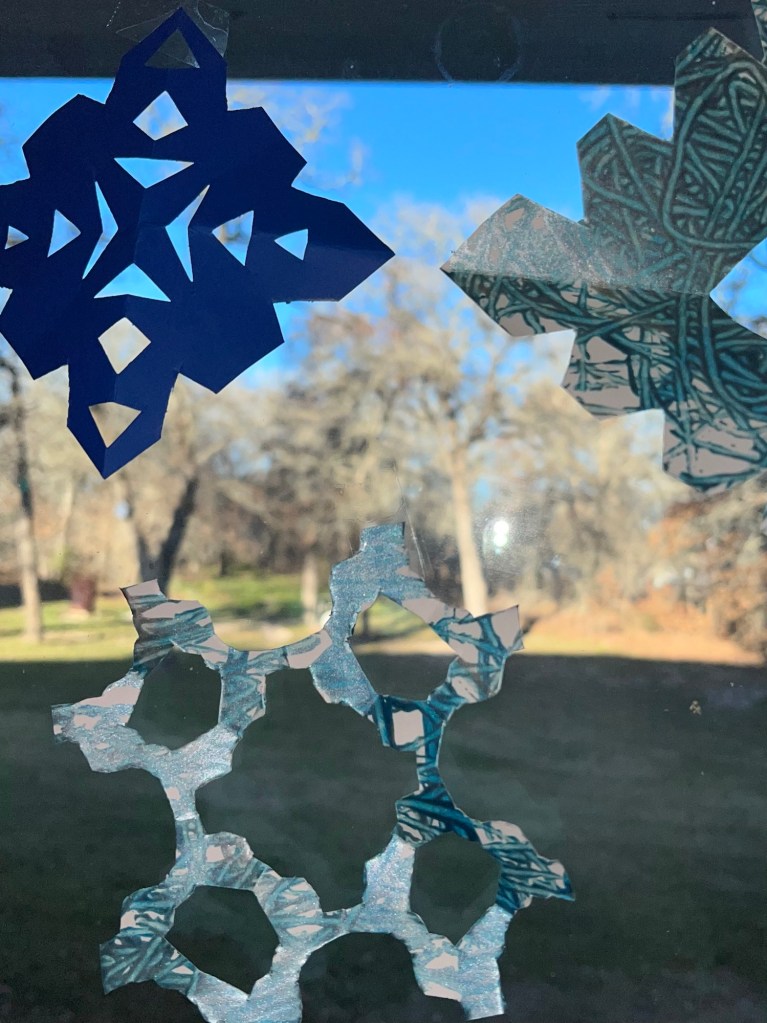
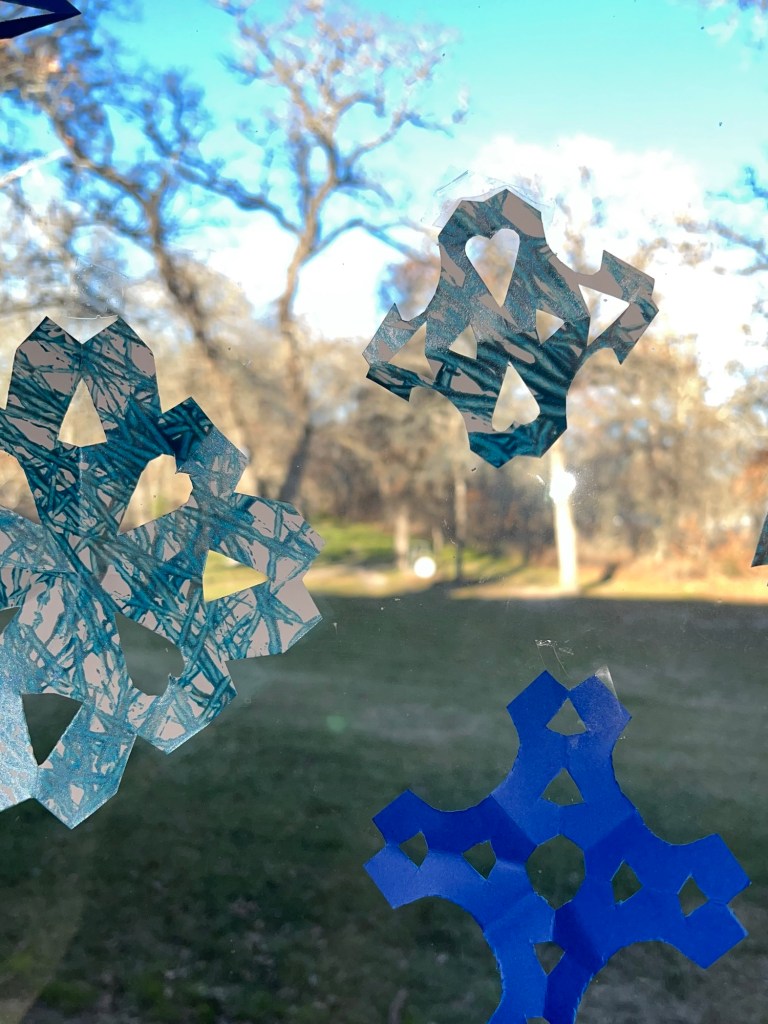
Clear Path Paper is now also offering 4×4 (and 4×6) 65lb card stock, which is really cool for smaller projects! I used their royal blue 4×4 65lb to cut some solid blue snowflakes to mix in with their painted ones, and loved how easy it is to fold and cut… it’ll be perfect for my middle man to use for origami, to, because he gets frustrated with thin paper that rips if he gets rough with it, and he loves making TINY things, vs the sizes that regular origami paper usually makes.
Here’s how the windows look… getting us ready mentally to finally have some cold weather coming up early this next week! It actually got down to 30 last night! Whats up with THAT? We don’t know what this thing called cold is! It’s been a couple years since it actually snowed at all here… the kids are hopeful that maybe since we made snowflakes to hang up, maybe just maybe it will actually snow! Time will tell, ha!
A while back, while thumbing thru Pinterest, I kept coming across different ways to use paint samples. The various shades on each sheet are just beautiful. So I asked Cody to pick some up for me the next time we went to Lowe’s. I wanted fall colors, which was the only perameter I gave him.
He came back with a whole handful of beautiful shades, but each on single sheets. He said they didn’t have the variagated long bookmarks there. So they sat for a few days, and then I decided to make leaves out of them. I used this template, and printed at 50% so the leaves would fit perfectly onto a paint chip.
I traced. And traced. And cut. And cut. And then the leaves sat. And sat. And sat. Because I really didn’t know what I wanted to do with them.
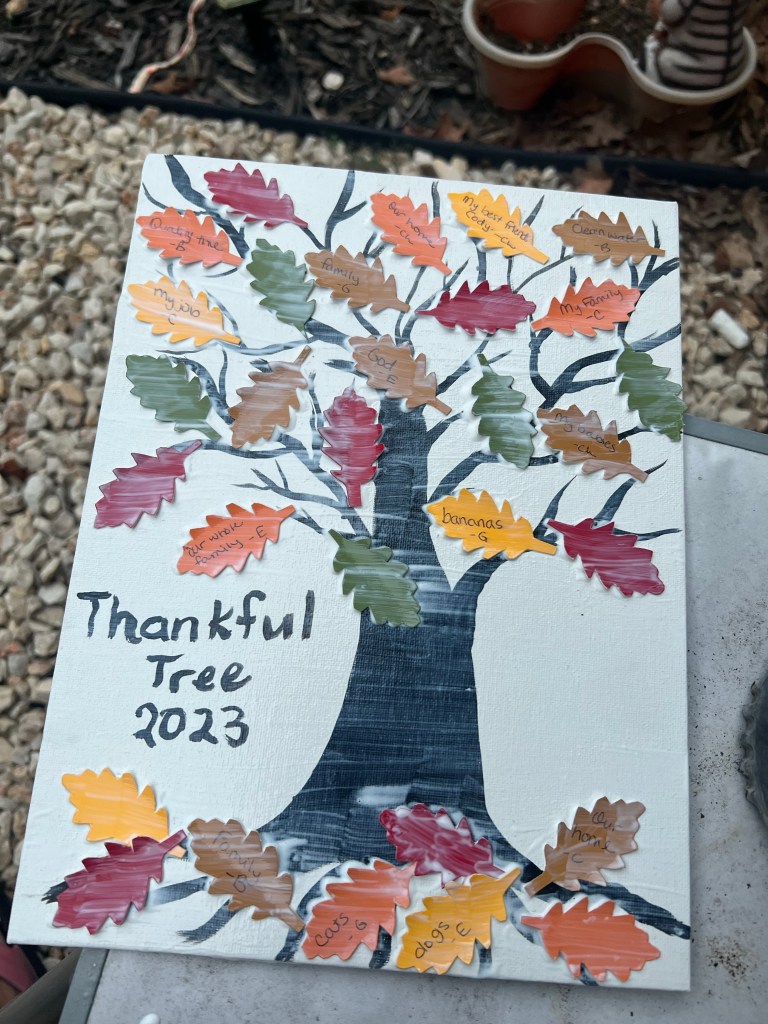
One day it hit me- a Thankful Tree! I got a canvas out of the closet (yes, I’m one of THOSE people who has canvases and paint ready to go at a moment’s notice… but you can purchase them at your local craft store, Walmart, Dollar General, or of course, Amazon) and started painting! At first, I was disappointed that I didn’t have brown acryllic for the tree, but I ended up being super happy with how the black stands out.
Having a great brush makes all the difference for a tree, especially. I recommend a medium camel hair that almost looks like troll hair- broad at the base and thin at the tip.
So, while the tree dried, I grabbed a pen and “interviewed” each person in our family, recording three things they were thankful for, including myself.
Later in the day, I went outside with my Modge Podge, figured out where I wanted all the leaves, and started gluing them down. Then, I made an even layer over the top of the whole entire canvas (the satin finish modge podge just makes the whole thing look nice). I definitely recommend doing this step OUTSIDE, because Modge Podge isn’t something you want to be inhaling inside your home.
Now that it is completely dry, I’ll use a couple of command strips to hang it in the entry way, where guests can see what we are thankful for! One of the kids asked if this will become an annual Thanskgiving tradition. I’m not sure that I’ll do it EVERY year, but I do have plenty more paint samples, and the leaf template, so who knows?
I love how the paint chips curled a bit after being cut, so it has an actual 3d affect!
I would love to know if you create a Thankful Tree with your family! Please comment below! I am thankful for YOU- my readers! Have a blessed holiday as you think about all we have to be thankful for.