Venison Mushroom Rice Bowl

I’m really going to attempt this year to take some of our favorite recipes and modify them to make them healthier, and then share with you here.  We love mushrooms (by far Becca’s favorite veggie) in our house, and in the past we have consumed a lot of cream of mushroom soup in addition to our mushrooms.  For one thing, Becca doesn’t do well with dairy (at all – she’s lactose intolerant), and for another thing – there is so much crap added to those cans, it’s not even funny.  SO, our former go-to meal was beef mushroom pasta – I’d cook ground beef, add chopped mushrooms, onion, and then 2 cans of cream of mushroom soup, and a bunch of noodles.  It was SO good.  And so easy.  But there’s gotta be a way to make it healthier, right?  YOU BET!

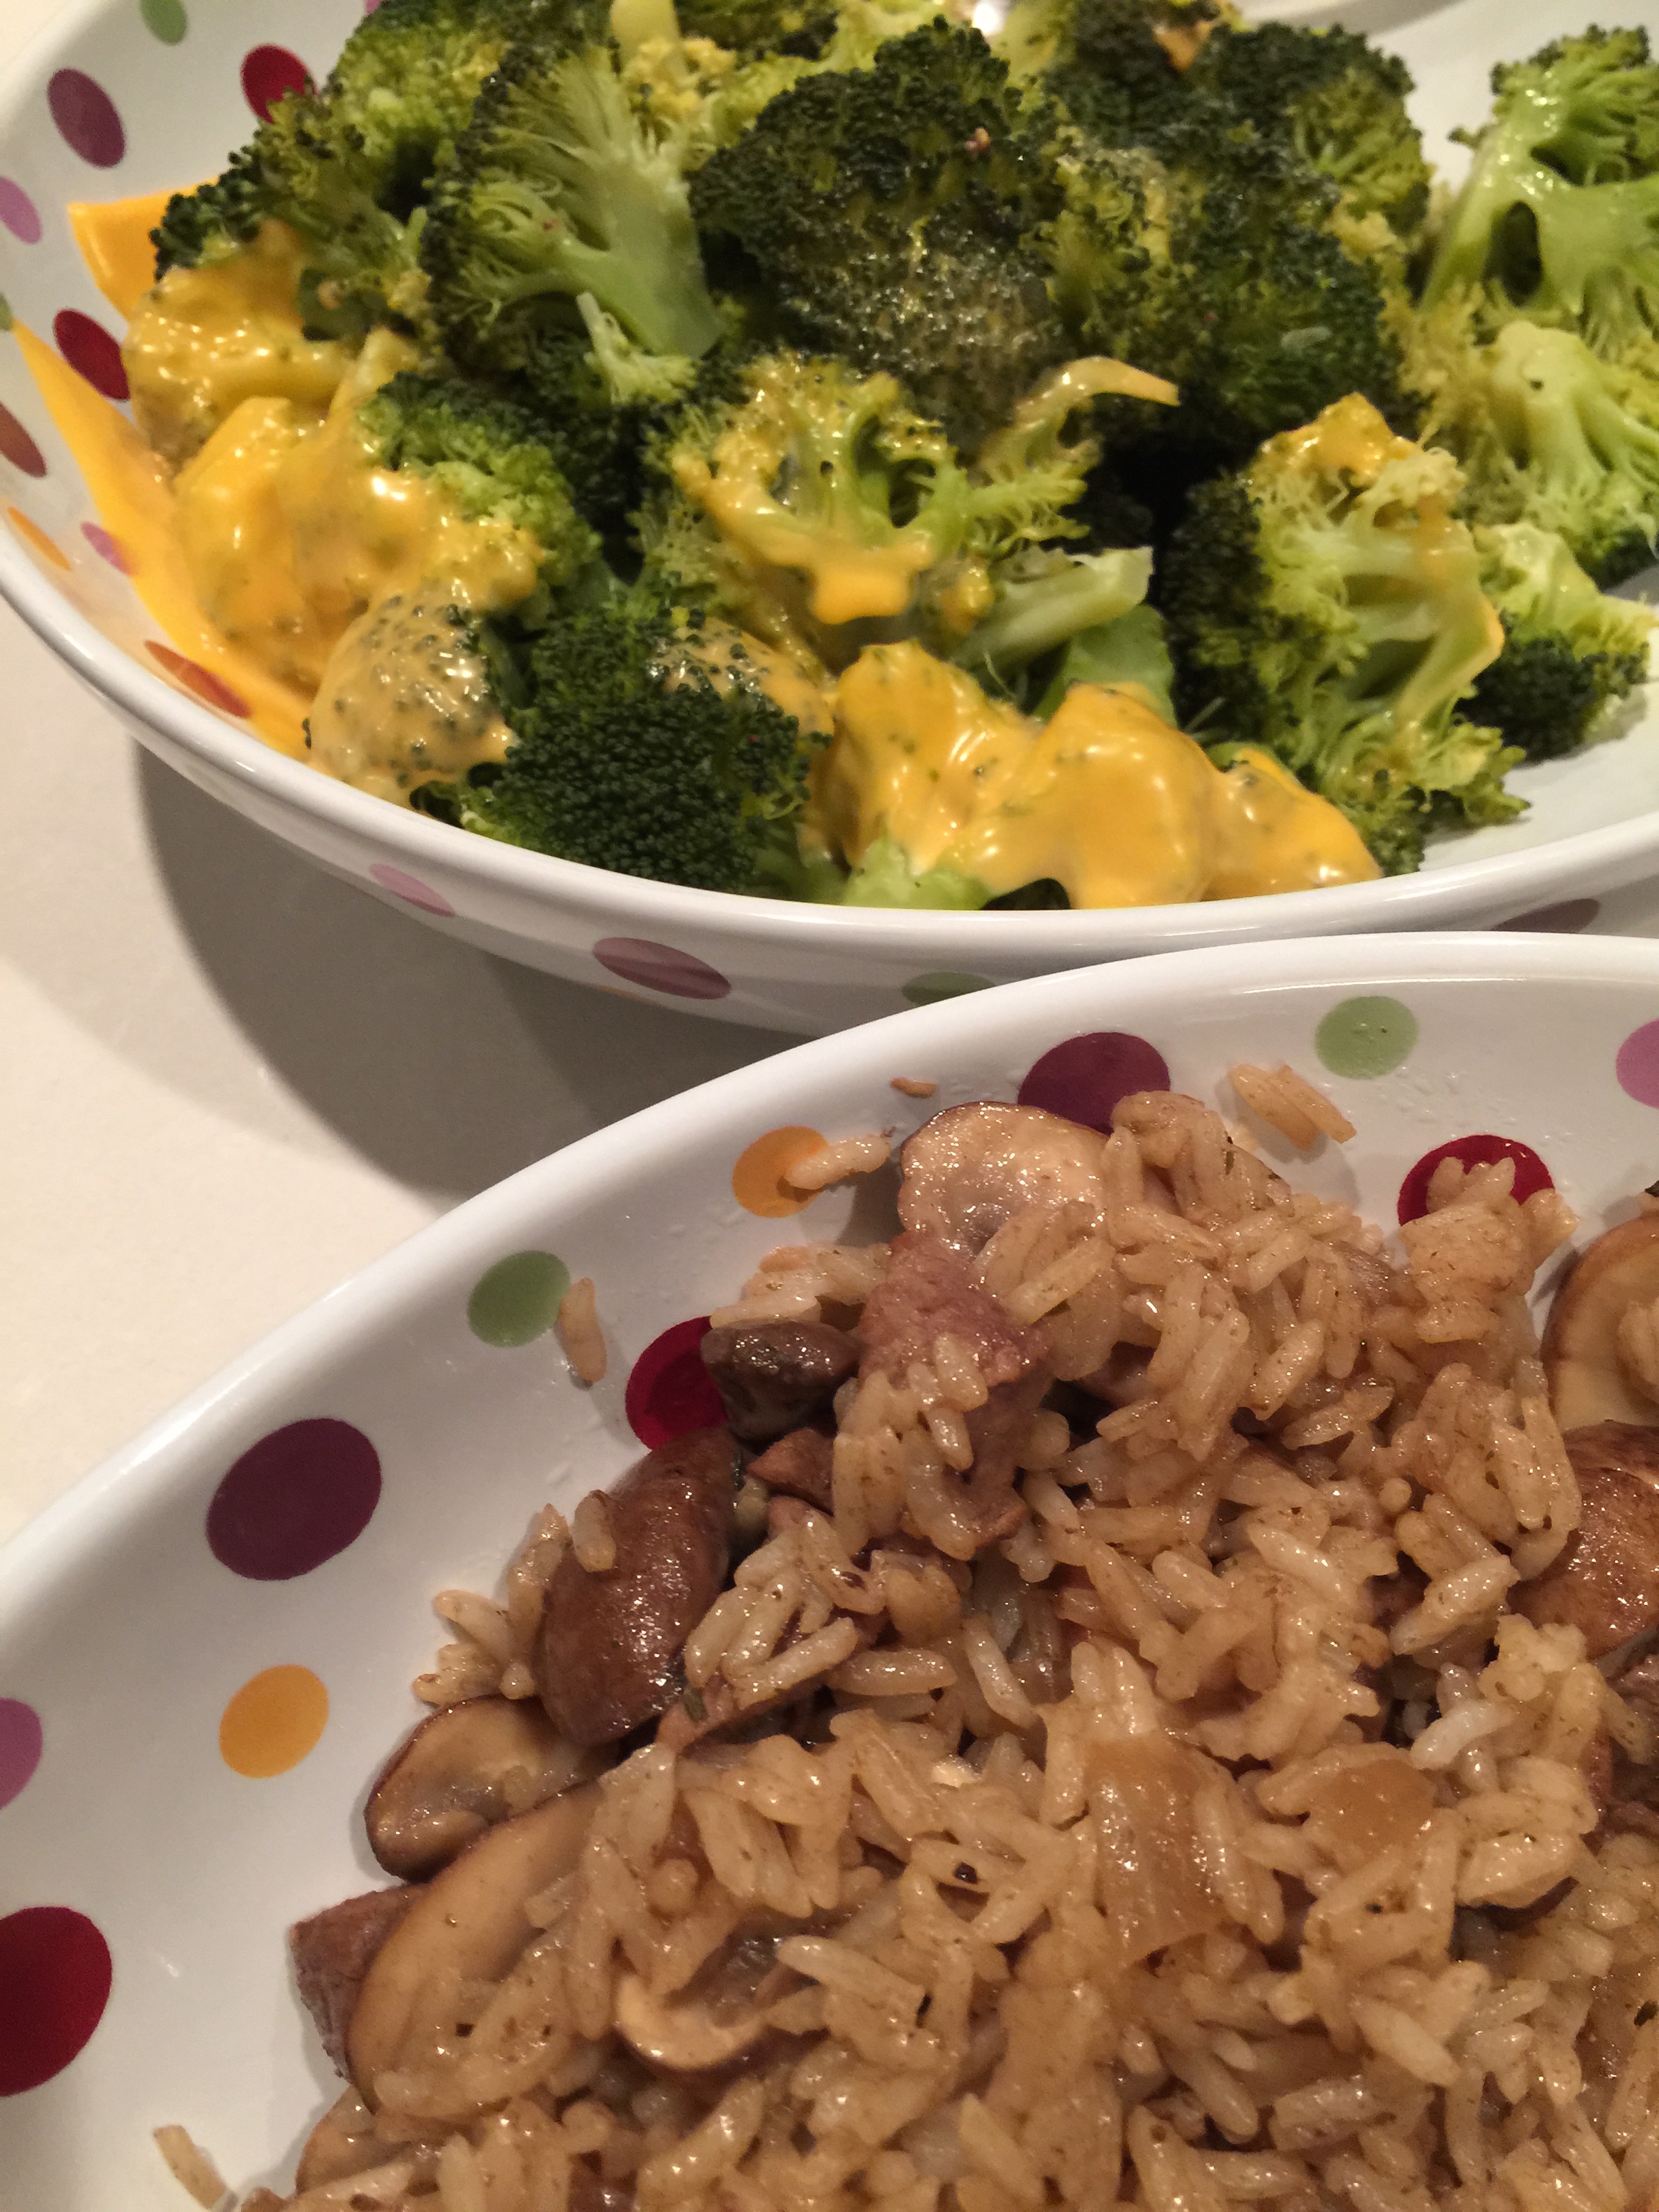
We are blessed to have a large quantity of venison in our freezer, which has practically zero fat.  So, I chopped that up into small chunks (instead of using the ground – because it had to be different enough that Becca wouldn’t think something went wrong with the normal dish) while sautéing 16 oz of beautiful baby Bella mushrooms that I had sliced. I cooked them with a tad of olive oil, a tiny bit of chopped onion, and a very small clove of crushed garlic, salt, pepper, and rosemary.  Then I deglazed the pan with lemon juice.  Added the venison, and turned it all the way down to super low.  Added a good bit of Worcestershire sauce, and put the lid on.  Meanwhile I had also been cooking rice in the microwave (I love my microwave rice cooker from Pampered Chef – perfect rice every time!), and broccoli in my steamer.  Once the rice was done, I put it in the pan with the venison and mushrooms to soak up the juices.  Stirred it all up really well, and when we were ready, served!  It was SO yummy.  Becca of course kept asking for more mushrooms, and actually tried some of the rice as well.  She had several of the tiny chunks of venison, too.  I’m really starting to get impressed with her desire to TRY new foods.  She even choked down one teensy piece of broccoli so she could have some fresh strawberries for dessert. 🙂

SO, here’s the recipe (though there aren’t many measurements because I didn’t measure as I went.. this is art, not science. 😉

IMG_2249

Venison Mushroom Rice Bowl

1 cup uncooked rice
EVOO
16 oz baby Bella mushrooms, sliced
1/4 of a small onion, chopped finely
1 small clove garlic, pressed
salt, pepper, and rosemary to taste
lemon juice
1 lb venison tenderloin, chopped into small pieces (could sub beef tenderloin, just make sure there’s very little fat or you decrease the healthiness of the dish)
Worcestershire sauce

Put your rice on to cook.  Sauté your mushrooms in a small amount of EVOO, add onion, garlic, and seasonings.  When the pan becomes dry, add lemon juice to deglaze the pan (works in a stainless steel pan), about 1-2 Tbsp.  Then turn the heat way down and add your venison.  (Remember that the venison is chopped really small, so it’s going to cook super quickly and will become tough if you cook too long.  The acid of the lemon juice will help make it stay tender, but you don’t want to cook it on very much heat at all.)  Then, douse the whole pan with Worcestershire sauce – about 2-3 Tbsp, maybe more.  Let simmer on super low with the lid on.  When the rice is done, add it to the pan and stir well.  Cover and serve when ready.  (It’s best if you let it simmer with the rice in to collect the flavors for at least a couple mins.)

I served mine with steamed broccoli covered in melted cheese. 🙂


Microwave Puff Paint

kids in the kitchen

Well, I’ve mentioned before how much I love the ideas from Jean over at The Artful Parent… and THIS idea for Microwave Puffy Paint is no exception!  What a super fun way to tie in cooking with art!  Becca really loved this one.  We made the puffy paint (recipe below), and then used Duple blocks to make prints on cardstock paper.  Then, we watched them puff up.  It was amazing. And super, super fun.  I think we’ll have to do it again soon.  Note: this recipe makes a LOT of paint!  We had some left over, which I’m attempting to keep in the fridge.  We’ll let you know how that works out.

We also added colored glitter to ours… which added some sparkle to our pictures, but not as much as I would have thought.  Live and learn.  Probably not a real great idea to add glitter to this paint… it doesn’t really show up, and just wastes glitter.

IMG_9791 IMG_9794 IMG_9798 IMG_9803 IMG_9806 IMG_9810

The recipe:

Microwave Puffy Paint

1 cup flour
1 tsp salt
1 cup water
Food coloring

Whisk your flour, salt, and water together really, really well – so there are no clumps.  Then divide, and add your food coloring.

You can put it into squeeze bottles, or dip items like we did.  Do your painting, then stick the cardstock, cardboard, or paper plate into the microwave for about 30 seconds.  Watch it puff up!  If you don’t have much paint on your page, it won’t take the whole 30 seconds.  If you have a lot more, it might take a little longer.

Enjoy!!!  It’s SOOOO much fun!

Kids in the Kitchen – Banana Bread

kids in the kitchen

I love making banana bread.  But I love eating it even more.  Everybody makes theirs a little different, but this time I made mine very different… didn’t change a single ingredient… I just changed the physical part of HOW it was made.  Because I had help!  Becca loved getting to mash the bananas, loved dumping the ingredients into the bowls and stirring, and she loved watching the mixer beater go around and around and around!  This time we also added in some additional math – because we doubled the recipe.  So we mashed our bananas, measured them, and then saw that we had enough bananas for a double recipe.  So I had Becca help me add the whole numbers together to figure out how many scoops of each item we would need.  Baking is always such a fun and easy way to sneak a math lesson in!

IMG_0038IMG_0040Here’s our recipe:

Banana Bread
2 1/4 cups flour
2 1/4 tsp baking powder
3/4 tsp Kosher salt
3/4 cup shortening
1 1/2 cups brown sugar, packed
2 eggs
3/4 tsp vanilla
dash or two of cinnamon
1 1/2 cups mashed bananas (the riper, the better – ours were black)

Stir together in a medium bowl – flour, baking powder, and salt.  Set aside.
Combine shortening, sugar, vanilla, cinnamon, eggs, and bananas in large mixer bowl, and beat until thoroughly blended.
Add flour mixture, a little at a time, until all is completely mixed.
Place in two greased loaf pans (or I use the 4 mini muffin stoneware pan from Pampered Chef) at 350F for 30-35 mins or until a toothpick comes out clear when placed in the center of the loaf.
Cool and store in an airtight container.

Note – if you’d like to add nuts, pecans or walnuts work great with this recipe.  I just poke them down into the top of the loaves that I chose to add nuts to so that anyone can easily tell that the loaf has nuts and can avoid if they have allergies.

Kids in the Kitchen

I love to cook.  I mean, really love to cook.  A lot of that comes from countless hours I spent in my Grandma’s kitchen growing up.  She was always super patient with me, and always had something I could do to help.  From my youngest years of simply stirring a bowl of dry goods set on a low stool so I could reach, to the last few years they lived in their house when I actually fixed most of the meal, Grandma’s kitchen was always a warm and welcoming place.  And it was through my hours spent there that I came to the determination that my own kids are going to feel the same way about our kitchen.  Which is hard… because on my own, I’m not a very patient person.  God is working on me, but sometimes to gain patience we have to endure many hardships… and for an OCD mama who is very particular about where things go, I’ve received a LOT of stretching through being Becca’s mom.  Most of which has occurred in the last year and a half.

She LOVES to “help,” which is fabulous!  But also time consuming, tiresome, and not always real help.  I started letting her be involved in the kitchen simply by helping me put away plastic containers into “her” drawer.  She learned early on that the rest of the kitchen drawers and cabinets are off limits, and she doesn’t usually push that envelope any more.  She knows what’s in the other drawers/cabinets, and nothing is as fun as the tupperware drawer!  So, she’ll help me do the dishes by putting away containers in there, which will usually result in containers all around her on the floor as she plays while I finish the rest of the dishes.  (See the adorable photo from my “Be Wiling” post here.)

But, I really want her to do more, and she is loving her kitchen helper that Cody built for her!  She wants to help cook everything. So Monday I decided to let her help cook dinner.  (I’ve also read that when kids help cook they are more likely to eat it…)  So, we set out to make a breakfast tator tot casserole.  I turned on the oven as she climbed up.  We washed our hands, and found our recipe in the cookbook.  I got out all the ingredients, and she helped by setting them on the counter as I’d had them to her.  (No, mama’s, I wasn’t brave enough to hand her the entire carton of a dozen eggs.  Mommy did that one.)  Then, I did a very brave thing, and got out my glass mixing bowl – because it has a handle she could hang onto.  I got out a little cutting mat, and her cutter (My Safe Cutter from Pampered Chef – not affiliated, but I used to sell… this is a link to my former director’s page! 😉 ), and let her start in on the butter.  (The recipe calls for melting a stick of butter in the bottom of the pan.)  While she worked on cutting the butter, I browned the sausage, coming over frequently to help her.

IMG_9745

Ultimately, she needed help to slice the butter, but she worked hard on it, and it occupied her quite well while I browned the sausage.  Then, while it drained, we learned about cracking eggs.  She’s seen me do it a million times.  I cracked the first one, and she watched.  Then, she decided it was time for her to crack one.  She did fairly well considering the fact that she’s two and had never done it before.  Only one tiny piece of shell made it into the bowl, but she did end up with egg all over her hand.  She didn’t seem to mind.  We decided it would be awesome if she could stir the eggs while I cracked them, so she used her wooden spoon to “stir em up weal good” while I cracked the rest of the dozen into the bowl.  Then, I whisked them to ensure they were all mixed, and she whisked them some more to make sure that Mommy didn’t miss anything.  I added our milk, salt and pepper, and then the sausage.  She stirred more with her spoon.

IMG_9748 IMG_9749

She had already added our butter and most of the tator tots to the pan, so Mommy poured the egg/sausage on top, and then she helped me sprinkle the last tator tots on top.  She was SO proud of her casserole she made!

IMG_9751

We talked about how hot the oven is, and she did a good job of staying back while I put it in.  I put it in the bottom oven so she could go back and check on it throughout the hour that it was in.  She checked it FREQUENTLY, to say the least.  It was so cute to see how proud she was of her dinner she had made!  So I know you’re wondering… did she eat it?  Well… no.  This is the girl who doesn’t like her food to touch.  She LOVES eggs, sausage, and tator tots… but they have to be separate on her plate.  Sigh.  She ate a few of the tator tots that had been on top.  But that was it.  I’ll keep trying.  This mommy isn’t giving up.

IMG_9753

Want the recipe?

Tator Tot Breakfast Casserole

1 stick butter
1 32 oz (approx) package tator tots
1 dozen eggs
1 cup milk (I used coconut milk so she would try it – she knows regular milk in it’s uncooked form makes her sick, so I didn’t want her to think that this wasn’t made with her in mind… despite the fact that she has no problem with milk that is cooked in.)
2 cups shredded cheese (I did not use this baked in the recipe like usual – because she does have problem with cheese, even cooked.  So, after it came out of the oven, I added cheese on top of half of it and it melted in.)
2 cups browned sausage or diced ham

Melt butter in a 9×13 pan.  Spread 3/4 of potatoes in pan.  Beat eggs and add milk, cheese, and salt and pepper to taste.  Pour over potatoes, then top with remaining potatoes.  Bake 1 hour at 350F if all thawed – if not, add 15 mins.  Note: the grease from the butter and sausage will rise to the top, and can easily be poured off of the casserole before serving.  You could also simply spray your pan with a spray and omit the butter – though I do believe it adds flavor.

Fine Motor Snack Time

I’m not one to do a lot of hands-on cooking projects with Becca… but that’s about to change now that Cody made her a fabulous kitchen helper step stool so that she can stand at the counter!  I’m SO excited that now we can finally do stuff together in the kitchen.  So I decided one afternoon for snack I would let her begin to use a plastic knife for spreading.  I gave her a plate and Mini Nilla Wafer cookies.  I spread a dollop of peanut butter onto the plate, and she used her knife to spread.  She got peanut butter on her fingers, but we giggled a lot and had lots of fun in the midst of also eating and making cookie “sandwiches.”

IMG_8687 IMG_8690