One mom's journey through the crazy world that is parenthood.
Author: Mrs. H
I am a former SPED Teacher turned Technology Paraprofessional who is mom to three beautiful children, a wife to a fabulous man, and blessed beyond compare!
We’re entering the dog days of summer. God has turned up the heater in South Texas, and it’s still three weeks til school. The kids are fried. I’m sick of hearing the word “bored.” So…
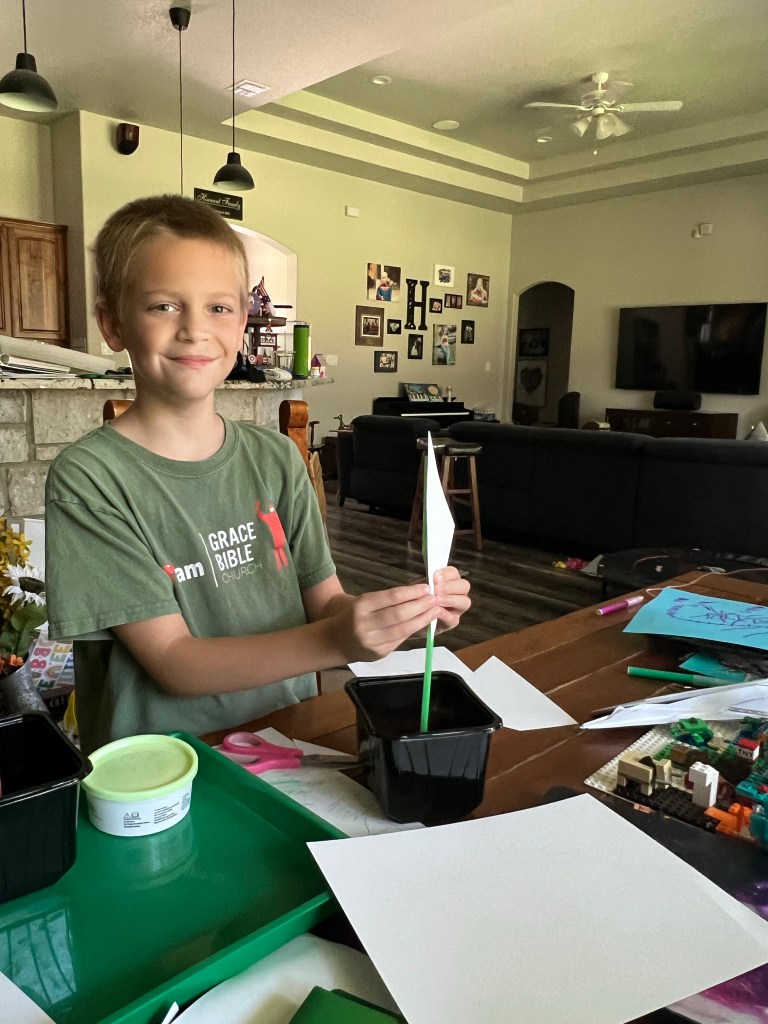
We turned some veggie containers and straws into a lot of fun in the pool this week!! Don’t have a pool? You could also do this in the bathtub!!
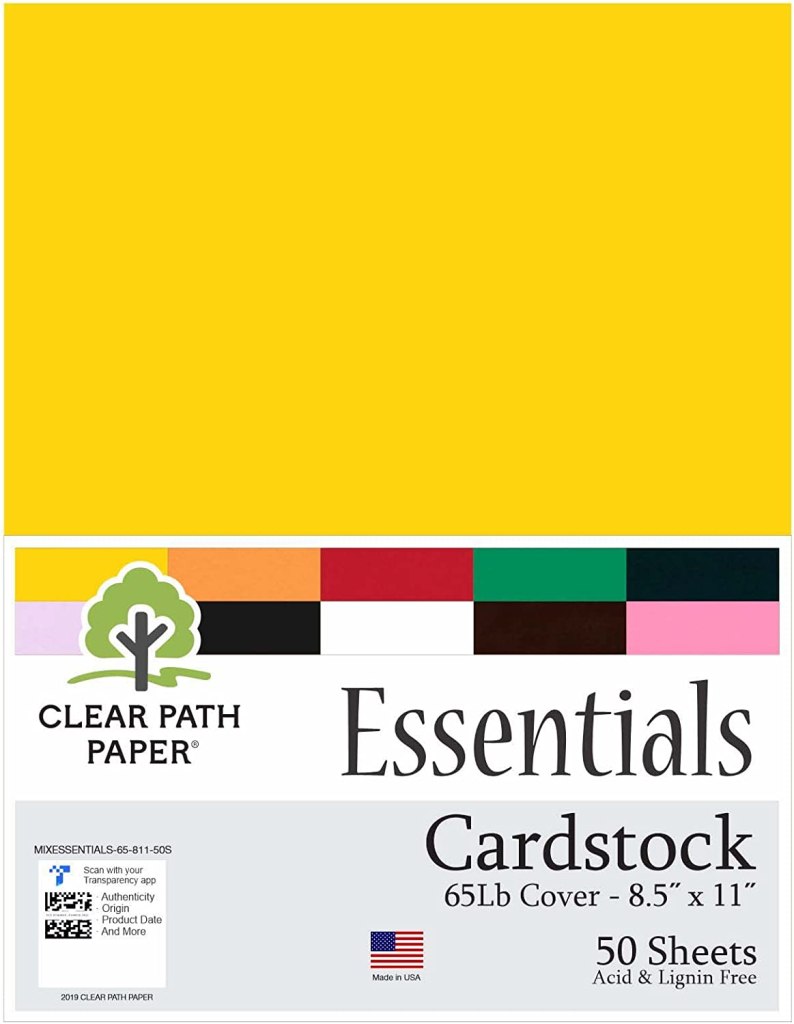
It’s simple- give them some containers, straws, tape, and some of that 100lb cardstock from Clear Path Paper that I mentioned in my last post, and let them make some boats! The super thick cardstock will survive getting wet a couple of times before you need a new sail, too! Let your little engineers have a blast! A boat race is sure to ensue!
The buildIt floats!!“Mine keeps falling over! How can I change it?”We can race them without sails, too!
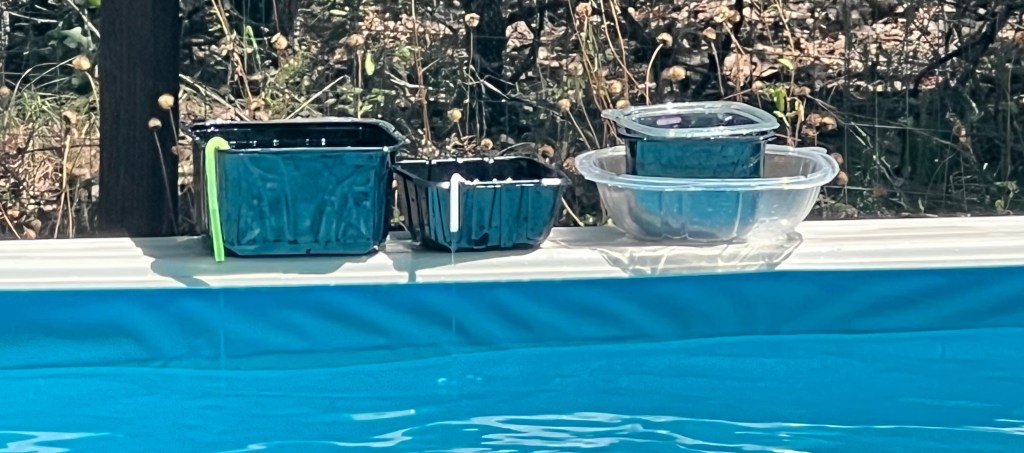
When you’re done, take the tape and paper off and they can learn a little about siphons using their containers and straws! Thanks to Pappy’s kiddie pool last summer, Grayson already knew how to set up a siphon, and he got to be the teacher of this lesson! He set it up on the edge of the pool and showed the girls how cool it was! We also discovered that the black mushroom containers get nice and warm, and the water coming back into the pool was really warm!
Basic siphoning 101!
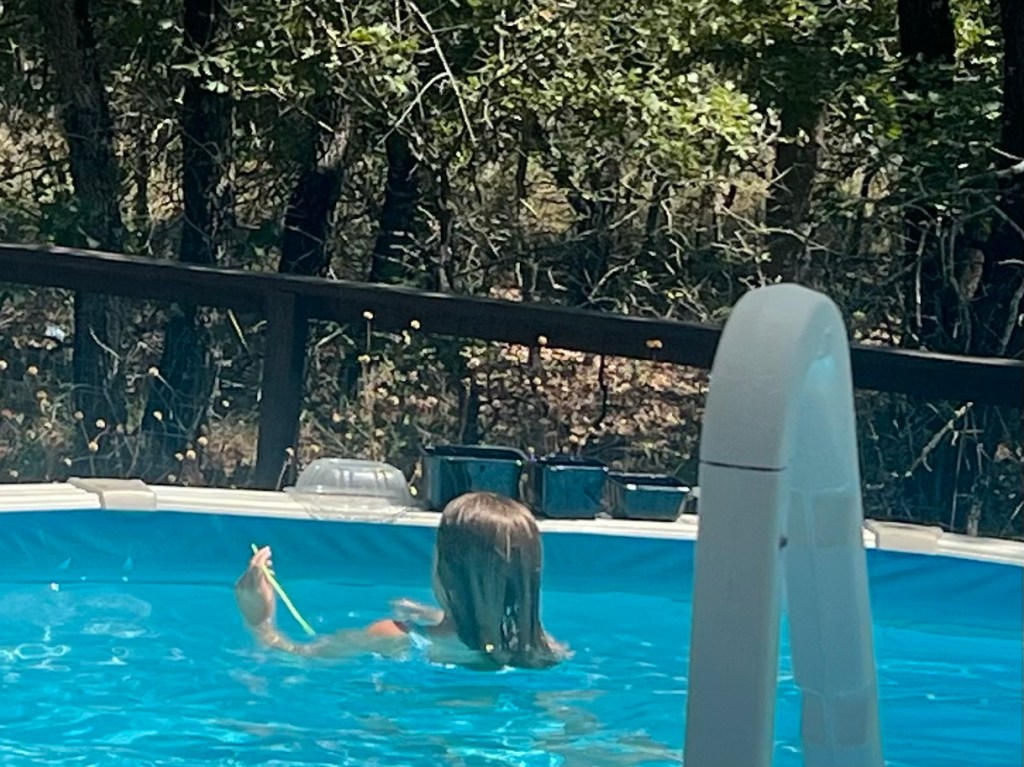
The straws also make really fun snorkels… and work as a fabulous “spoon” for some pretend cooking play! Who needs to buy pool toys?? Try giving them a few containers to reuse and you’ll be amazed with all their imaginations will do! 🙂
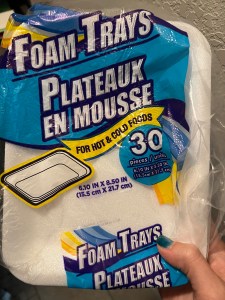
Are you melting this summer like we are and looking for more FUN you can do in the A/C? A Dollar Tree find turned into a super fun summer activity that the kids and I really enjoyed! While walking around the store last week, we came across this big pack of foam trays, which are perfect for turning into large stamps!
What you’ll need: -Foam trays -A dull pencil -Black acrylic paint -A large paint brush OR small roller -100lb weight White Card stock (available here from my partners at Clear Path Paper) -Markers, colored pencils, or crayons (Also at Dollar Tree, we got an 8 count pack of Crayola brand crayons for coloring on dark paper that worked GREAT with the black paint!)
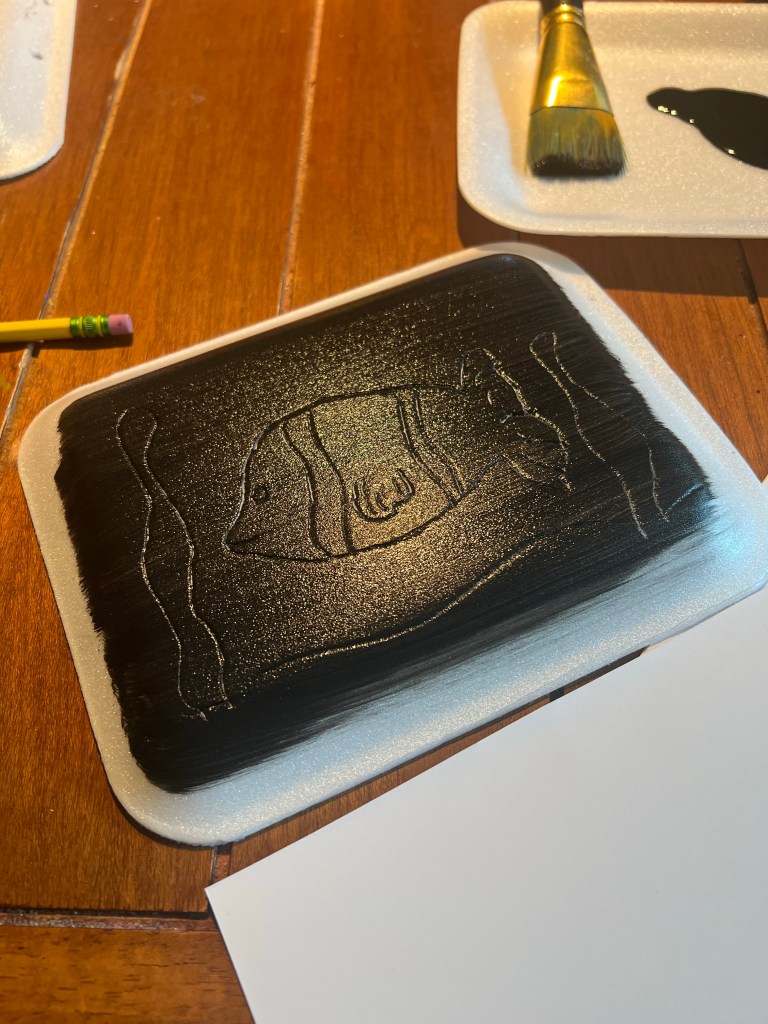
On the back of the foam tray, make your design with your dull pencil. Just be careful to not push too hard and poke a hole in your tray! Your goal is to make a nice thick ridge, but no holes!
My original design
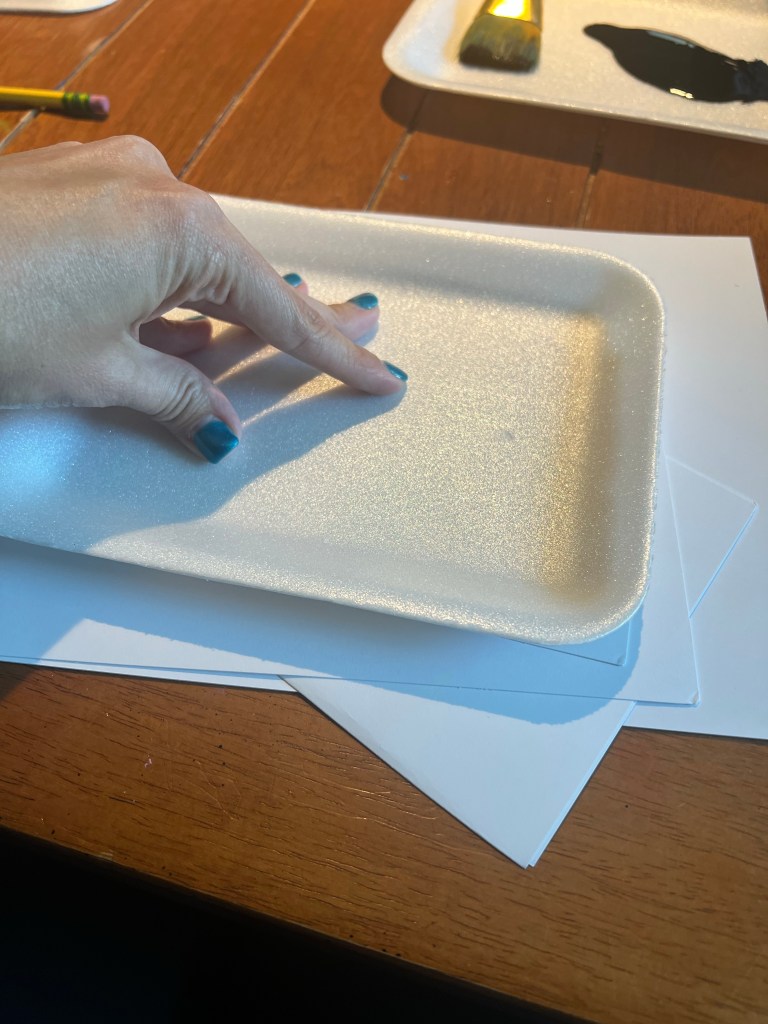
Once your design is done, paint your black paint in a thin, even layer over the whole tray (or the whole design if it’s smaller than the size of the tray). While the paint is still very wet, turn your tray over and press evenly onto your 100lb white card stock. (I cut the sheets in half so that we were using it most efficiently and not wasting any paper.) Then pull off the tray and wave your paper in the air to dry. Acrylic paint will dry really quickly if you’ve done a thin layer, and then in the white space of your design, you can use your markers, colored pencils, or crayons to color – if you so choose. They can look really cool just black and white, too!
These “Bold and Bright” crayons worked awesome over the black paint and sharpie!
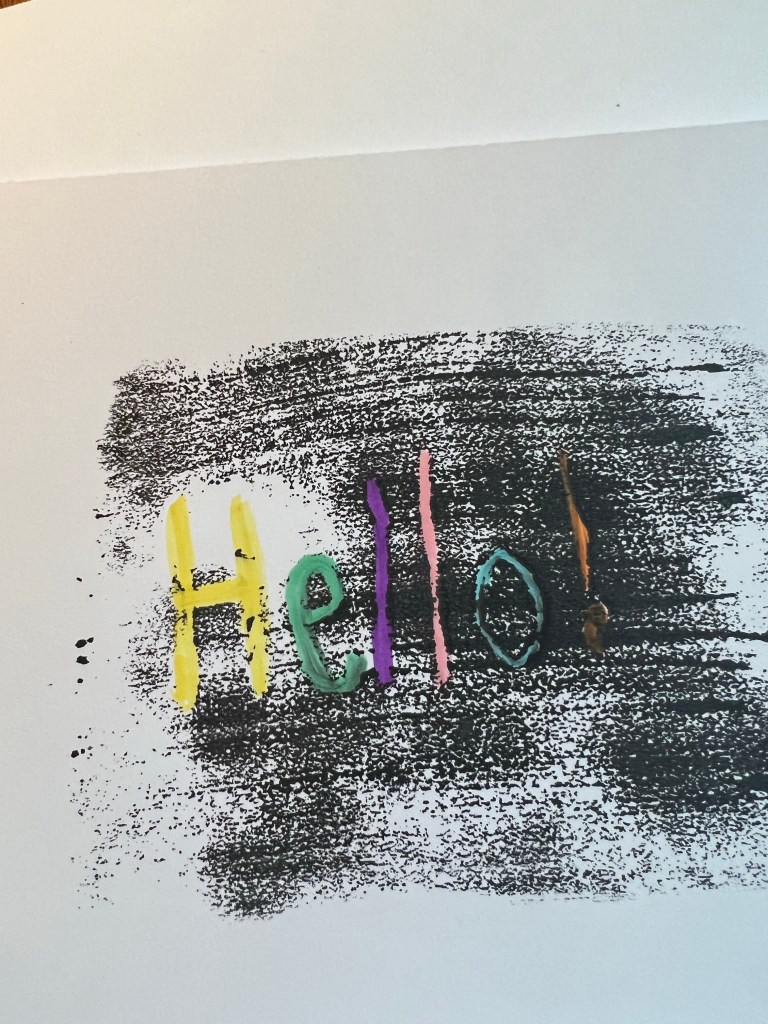
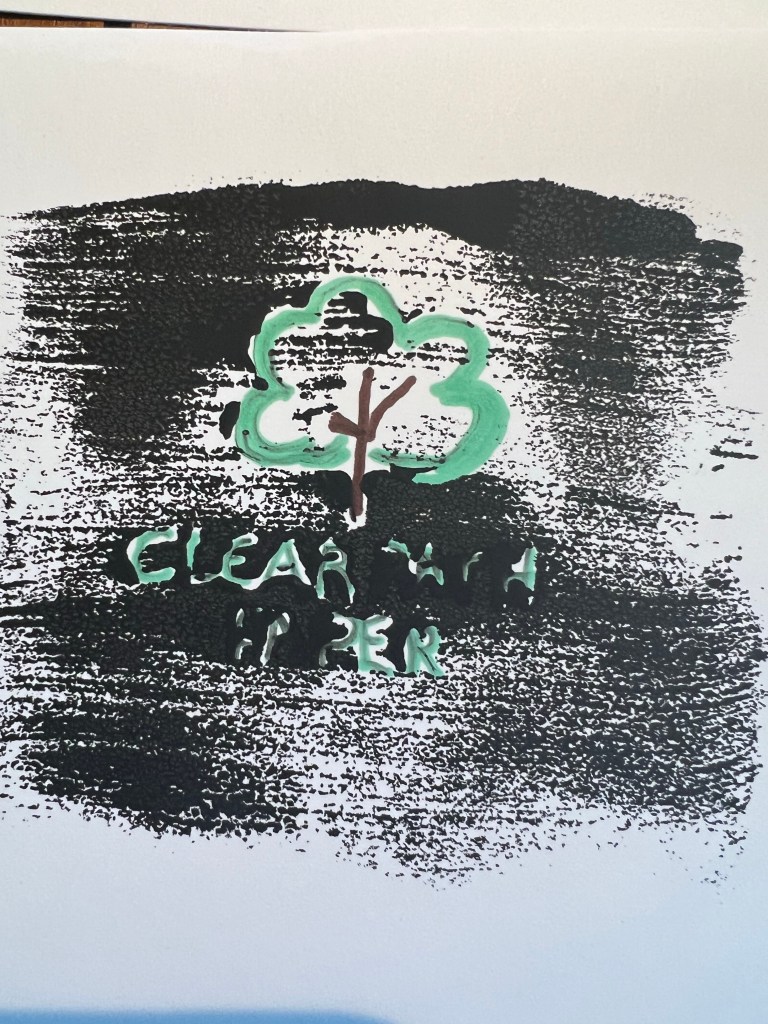
NOTE – doing letters in the trays is REALLY challenging because the ridges you make with the pencil fill in differently with paint for small spaces/details. I got fairly frustrated trying to make a fun surprise design for my Clear Path Paper partner, Andrew. But! Here’s a few tips if you DO want to brave lettering on the trays. Make sure your letters are large and any small spaces inside the letters are big enough that the paint won’t just fill in. It’s also very important that you make your letters MIRRORED so that when you stamp them on the paper they’ll be turned the right way. I used the nice thin labeling sheet from the card stock package to attempt their logo, and then used it again to make the word “Mirror” to show y’all. Any tracing paper would work, but I’m all about using my resources wisely, and then there’s no waste of the labeling sheet! Becca also used it to write “Hello” on a stamp as well. This graphic shows you the step-by-step:
Happy Summer! Make the most of it… school starts back up soon! I’m excited to share my adventures in my new job soon… I’ll be backing away from a full teaching role so I can focus on being mom! And I’m excited about running the tech lab at our school as the technology paraprofessional! 🙂
If you’re afraid of the “summer slide,” it really is a real thing. Kids DO forget what they have learned over summer break. While it’s super important to be a kid and play outside, soak up some sun, and let’s face it- spend way too much time on technology… a little practice each morning can make a huge difference!
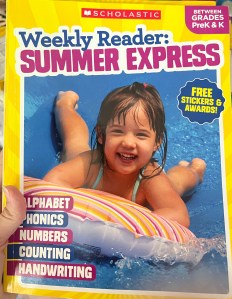
I am NOT an affiliate of Scholastic, just a mom and (now former) teacher who has used their products with great success over the years. If you have kiddos in Elementary school, they have some fabulous summer practice books for kids who have just finished Pre-K thru those who have just finished 4th grade. They are called the “Weekly Reader Summer Express.” Each book has a single sheet front and back for every week day of the summer, and includes stickers and reward certificates as long as instructions for parents who aren’t familiar with the skills their child may have been taught during the school year, which the book is reviewing. I HIGHLY recommend this series, and have purchased them previously for my kids. Here are the two we’re working in this summer- for Elle and Grayson.
I also purchased for Elle this Sight Words book, which will help her practice learning some new words. She is SOOOOO eager to learn and wants to read so badly… combine that with a love of workbooks, and she is in love with this book! It’s perfect for kids of a variety of ages depending on their skill level. Even if your child is older, if they struggle with basic sight words, this book is perfect for them. (This would also be great used as a teacher resource book to make copies from for a whole class!)
Again, I’m not an affiliate, just love their products!
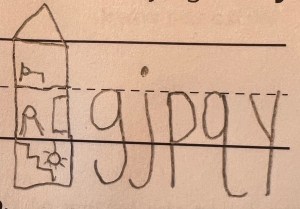
While working with her today, I was prompted by her “floating” y to tell her the story I have always loved telling my students. I first learned it years ago, when I was an aide in a first grade classroom to the most wonderful teacher, Pam Snodgrass. Pam would always tell her students about the alphabet house. All of the letters have access to the kitchen. The teenagers and adults can go upstairs to the bedroom, but only the very BRAVEST letters can go down into the basement where the spiders live! We MUST always give them credit for being brave! Most recently, one of my sweet boys would remind his classmates almost daily to “give the _ credit!”
Only these five letters are brave enough to go into the basement!! Gotta give them credit for their bravery- make sure their tails go below the line!
Hopefully these little tips are helpful to you as you begin your summer! We’ve already had Grayson’s 9th birthday, dentist appointments, trip to see grandparents, cut lip and resulting infection, lots of pool time, the kids’ first wedding to attend, VBS, a HUGE garage sale, and have played more card games than I can count! (Not all in that order!) Working on getting the house cleaned up from a crazy busy school year, and trying to wrap my brain around being “done” with teaching. Not sure what my next adventure will be, but for this month, anyway, I’m excited about being “just” a mom! 🙂
Lots of fun art will be coming your way this summer! Be sure to check back often!
Every year that I’ve taught ALE (Alternate Learning Environment… sometimes called “Life Skills”), we focus on the importance of safety in the summer time right before the end of school. This week we’re talking about sun safety and water safety. Yesterday, we tried a science experiment to illustrate the importance of sunscreen. The kids were really surprised to see just how much the sunscreen really did work!
Here’s what we did! First, we read the book “Tell Me Why I Get Sunburned” on Epic Books. (If you’re a teacher who isn’t using Epic, you need to start – they are, well, Epic!!) This non-fiction book talks a lot about sunburns and how they happen, the science behind them, and how to prevent them… all at a level that young kids can understand, and in narrative, not boring facts.
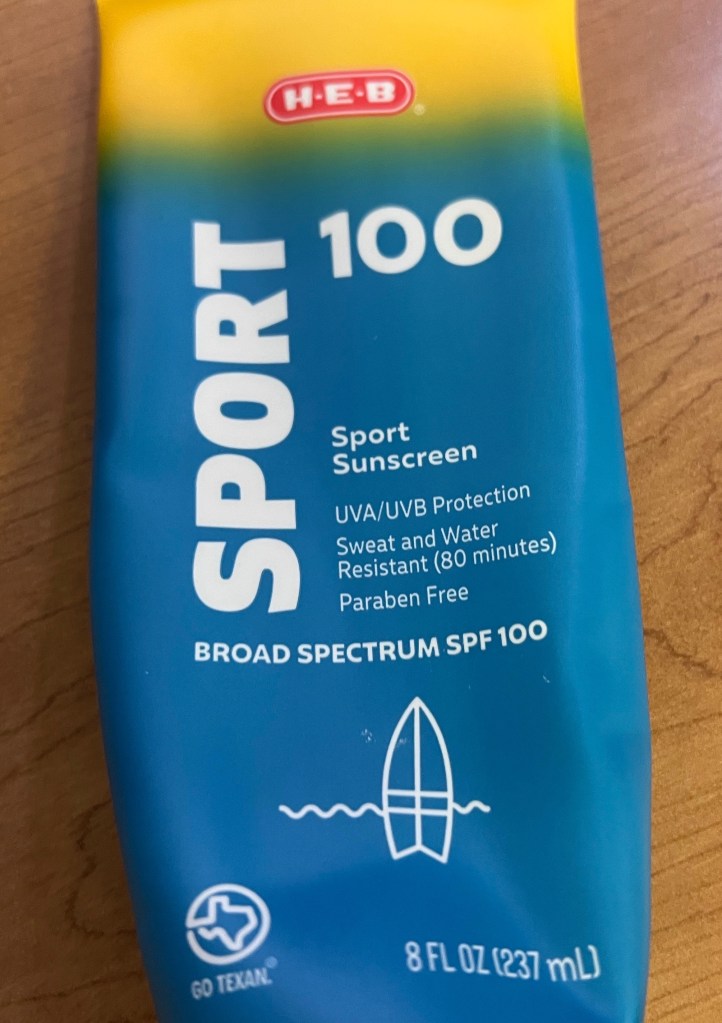
Then, we talked about the wide variety of sunscreen products that can be purchased at our local HEB grocery store. For the purpose of our experiment, I purchased 100 spf lotion.
This is the lotion I chose based on price and high spf count. You could use any lotion available.
I explained to them that in order to SEE what sunscreen does, we would be painting our sunscreen onto dark paper in a basic design. (Here is where I messed up – I should have had them all paint the same design – a basic smiley face. I would have saved on lotion, time, AND they would have all turned out really well…)
For our project, we needed just the right paper – that would stand up to painting the sunscreen onto it and then being in the sun for several hours. Enter my partners from Clear Path Paper – again to the rescue! We used two different colors of their card stock from their Mixed Essentials pack- the basic Black and Deep Sea Blue. I wanted the kids to see that ALL things are affected by UV rays, not just one color of paper, OR one shade of skin! After passing out the paper, I had the kids write their name using a white crayon or colored pencil.
Then, I squeezed the lotion out onto a paper plate and students used a q-tip to make a design on their paper. As I mentioned before the design DOES matter. Several of my kiddos just made large blobs, and covered much of the paper. This lesson is most powerful when only a few bits of the paper are covered, in a clear, distinct design. We used LOTS of sunscreen. I didn’t want to have to wash paint brushes, but I think paint brushes would have been a lot easier to use and would have made more even distribution of the lotion as well. Might be worth the time and effort to stand and attempt to wash them all out.
This picture meant something to the student, but sadly didn’t prove the experiment very effectively.
Note – if you have older kids and want to take this a step further, you could do one set with the lotion straight out of the tube, and one set with lotion you have watered down, to test it’s “waterproof”-ness! I think that would be really cool for older students to test… might even have to do that with my three at home and see what happens!
SO! I digressed. We took them outside and taped them down to the concrete, and then emailed the teachers/staff and made sure that they knew to watch their students at recess, that they didn’t get messed up. I also made sure to include a note saying I knew that I had misspelled experiment… apparently I had not yet had enough coffee. Lol. I have learned not to correct these things all the time with my students, however – it is important for my high-anxiety students to realize that I make mistakes, too, and that sometimes it’s ok to leave a mistake and just own it. I pointed out to them that I had messed up, and they all said my motto – “everybody makes mistakes!” One of my sweet girls asked, though, “are you going to LEAVE it that way?” And I said, “yes, *Sally* because it really doesn’t matter, and I don’t want to waste any more paper by making a new sign. It’s ok to make mistakes sometimes.” And she replied, “wow. I don’t know if I could handle making that big of a mistake.” Then she walked off, very contemplative. I hope that my little “woopsie” maybe made an impact on her. She often totally shuts down if she makes a tiny mistake, which is sadly somewhat common due to her specific combination of autism with an intellectual disability. Sweet *Sally* has become one of my favorite students to love on, and maybe, just maybe, my “expirament” mistake made an impact. Maybe even bigger than the actual point of the lesson. Here’s hoping! 🙂
While outside placing our papers, we were able to discuss some predictions. Here’s some of what they thought would happen: -the sunscreen might dissolve/disappear -the paper might either get darker or lighter – we were about 1/2 and 1/2 on this one since we had just learned that our melanin gets darker in the sun, but some of us knew of things like paper or curtains getting faded over time at home -the paper might blow away if we didn’t use enough tape -somebody might step on it -it would somehow change (One of my sweet boys said the cutest thing: “Well, Mrs. Hinnant, I know it’s gonna do something, or you wouldn’t have us do it!”)
We took them outside about 8:40, and made sure they were in a spot that wouldn’t get covered by shade as the sun moved (this makes for good conversation, too!). We went back out to collect them around 2:00. They were amazed to find their sunscreen still white! It hadn’t dissolved as they predicted. Some were very upset to be wrong. Again, this was a learning experience and I emphasized that scientists often make predictions that don’t end up being correct. That’s why they have to keep experimenting! Some of us were correct – a few papers flipped over because they didn’t have enough tape on the back. It appeared that our friends who were worried about stepping were wrong – teachers did a fabulous job of keeping their kids away from our work. No footprints, rips, snags, or tears!
We took our papers back inside and used paper towels to wipe all the excess sunscreen off. We were able to see a distinct line where the sunscreen had been, and they even noticed a little of the paper coloring came off WITH the sunscreen onto the paper towel. But the biggest excitement came from flipping the paper over. Those who had done a distinct design were able to clearly see where the sunscreen held the color to the paper, and the powerful UV rays faded the rest of the paper to a lighter shade of gray or blue. Again, some were frustrated by their design flaws. But I reminded them that scientists try things over and over and over before it all turns out exactly like they want. Some of them wanted to try again tomorrow, then! Lol. I told them we wouldn’t be using any more paper or sunscreen – we need to conserve our resources – but they are welcome to talk to their parents and try it at home if it’s ok with them.
This one barely used any sunscreen, which was a good lesson on making sure we have good coverage- it can’t work as well to protect us if we don’t have it covering us well like a blanket!
Overall, I’d call this “expirament” a success! A few lessons learned along the way about how I’d do it next time, but overall, quite a success! Let me know if you try it, and if you ever need quality card stock for projects such as these, be sure to give the folks over at Clear Path Paper a look!!
Well, my intent was to post this yesterday, but life happened! Again! It has a way of doing that… 🤪
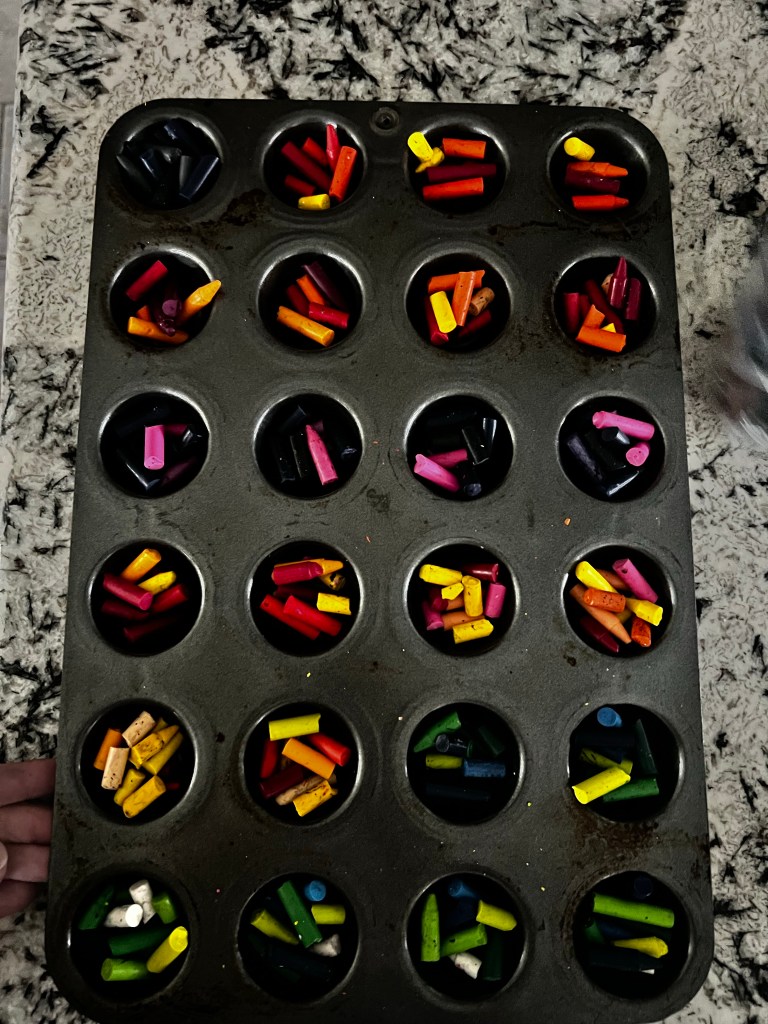
So we collected all those hundreds of crayons. And the first step is to sort them out. Over the years I have learned that Crayola brand crayons are next to impossible to peel. Something about the glue they use. So since we had a LOT of crayons to pick from, I opted to set those aside to give to our school’s art teacher. Because art teachers can ALWAYS use more crayons!!
Our art teacher will also be getting all the paper peelings from this project- because they are PERFECT for using to make new paper. They water down and mash into pulp really well because they are super thin and already torn into small pieces. So if you’re interested in recycling the wrappers as well, definitely look into how you can make your own paper! Last year we made some really awesome seed paper in her art class that would be amazing to make with your crayon peelings! This website has great directions on how to make your own seed paper!
Check out all these beautiful wrappers!
After you’ve peeled all your crayons, you’ll get out your pans. I HIGHLY recommend silicone molds over metal, unless you want to spend a good bit of time banging the pan to get the finished crayons to unmold. Any silicone molds you get will work- whether they’re fancy ones intended for chocolates that you get from the craft store, or they might be cheap ice cube molds from your local dollar store. Silicone just makes it easier to unmold them. The more basic the design, the better, as small points and details may break off when you remove the crayon from the mold.
Peeled unwanted crayons… just waiting to be made into something new and amazing!!
Pre-heat your oven to 250F and begin breaking your crayons into small pieces. Kids love lots of colors melted together, so feel free to melt brights like yellow and darks like black together. The colors will NOT melt into each other and all become one. They will maintain their own color integrity, making some really cool color swirls. I like to use warm colors together and cool colors together. Last year, I even used green, blue, and white together to make crayons that looked like Planet Earth. As you can see further down, this year I put yellows and oranges together with greens to make pineapples, which the kids thought were super fun. I also made some wacky pineapples mixing some weird neon crayons we were given alongside blacks and grays. The boys especially LOVED them!
I love doing mixed colors! Warms together and cools together is always a safe bet if you’re nervous about mixing them on your first go-round.
Once you feel like your colors are together like you want, and the bottom of each mold is covered, then stick them in the oven. Silicone molds need to go on top of a metal cookie sheet so that when you get them out, you’ll be steady and won’t accidentally spill the hot wax and burn yourself.
A metal sheet pan is your friend! And don’t try candy molds with spots for sticks. That just makes a mess. 🤦🏻♀️
The time really varies on how long to bake them, depending on how deep you’ve layered your wax. Just check on them every ten minutes or so. The little round ones I made in my metal pan (never again on the metal, I swear!) are nice and smooth and thin for doing leaf rubbings, and they only took about 12 minutes to be all liquid. In contrast, the pineapples were deeper molds that I filled a lot more, and they took almost thirty minutes to be all liquid. This process will make your house or school smell like a crayon factory! Ha!
The colors maintain their integrity even as a liquid, they won’t mix together. Here, you can see green below yellow, which is beside orange.
I miss being able to use the oven at school to make these, where the kids could actually watch their crayons melt. If you have the opportunity to do that, it’s so so awesome for your students to experience. Either way, this is a fabulous video to share so they can see the similarities and differences of how crayons are originally made, vs how they are recycled in your own oven!
These were semi-cooled. See how some parts were still dark? They’ll be completely solid on top when they are cooled. Note- I really DO NOT recommend using a metal pan. Removal is h-e-double-hockey-sticks!
Once the wax is completely liquid, pull them out of the oven and let them cool COMPLETELY. (This could be another 30-45 mins.) Once cooled, you can remove them from their molds and start coloring! These are super fun for kids to experiment with and see how many different colored marks they can make from their one crayon! Mine loved how the tops of the pineapples can make multiple lines on the paper at once, and if you have a smooth bottom on the crayon, leaf or embossing sleeve rubbings are super simple and fun!
I am just in love with how these pineapples turned out!
This activity is great for kids of all ages, and even my 6th grader still gets excited every year about recycling crayons. It’s just a super fun project that any child can participate in. (And the peeling of the papers step is fabulous for working on fine motor skills as well as building stamina for a project that takes time and has multiple steps!)
Let me know if you try this with your own kids/students! Happy recycling! -Christy