Where has the summer gone? Today was the last day for me to spend with all three kids before camps and going back to work invade… and school starts just around the corner! So, I wanted to share our favorite art project from the summer!
Back in May, I read this post by one of my favorite bloggers, Sarah, from Little Bins for Little Hands. Right around the same time, my partners over at Clear Path Paper came out with their Mixed Packs of bond paper! Their bond weight paper is PERFECT for kiddos cutting to create art- because sometimes cardstock is just labor intensive for little hands.
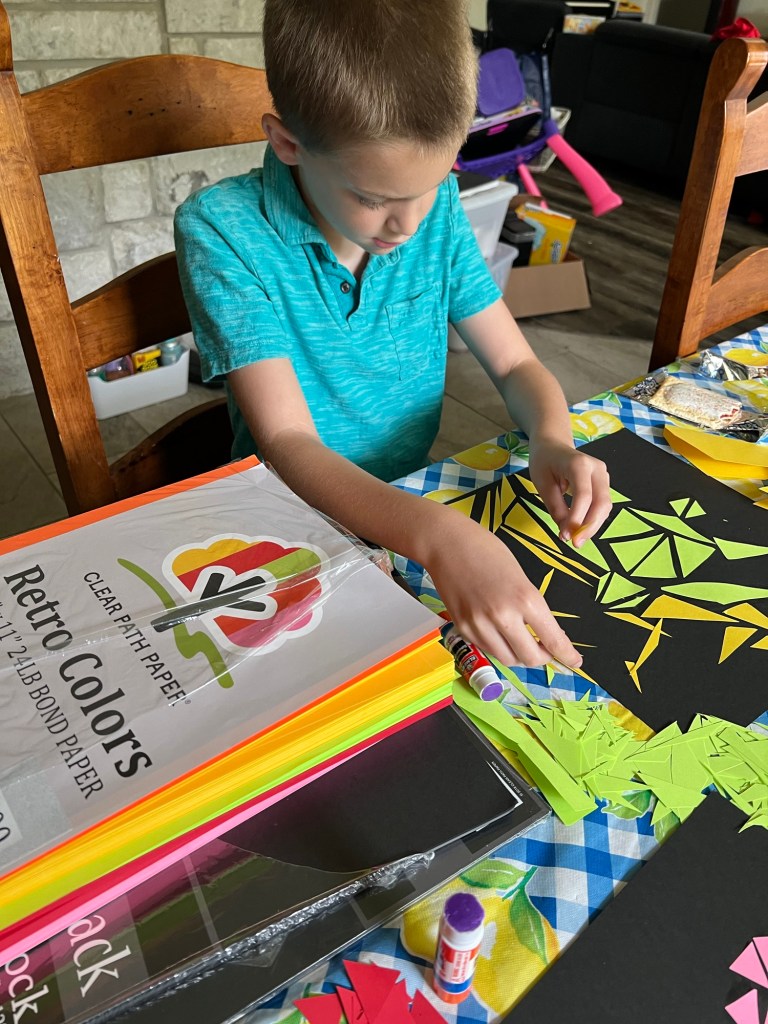
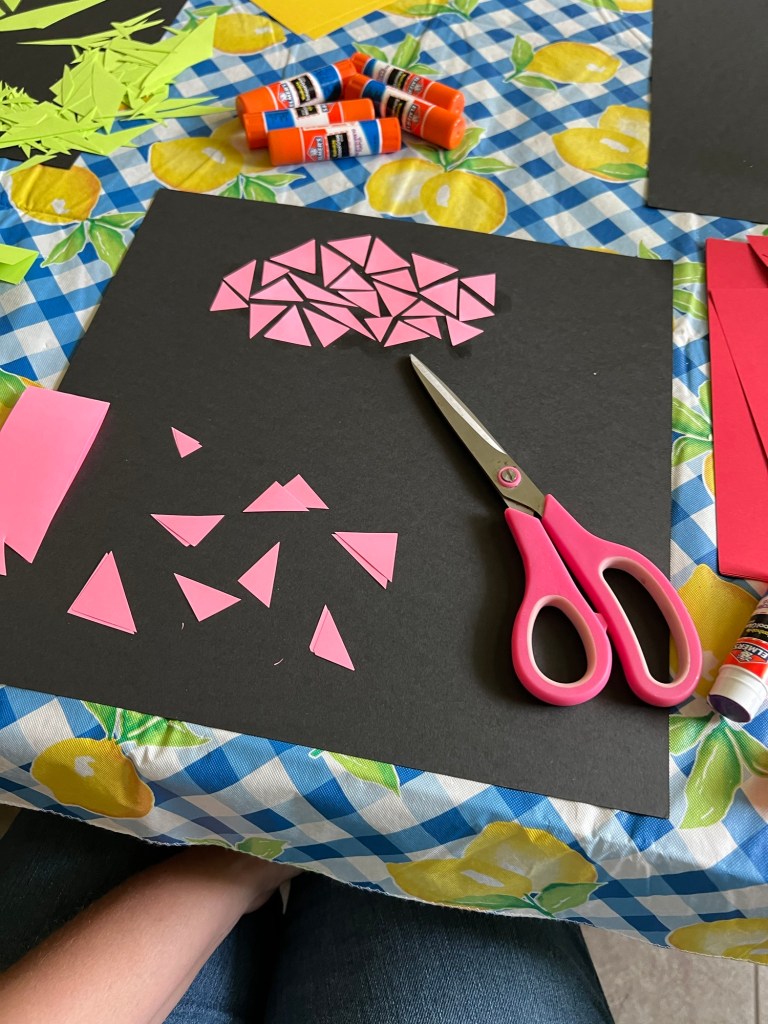
So, I got with Andrew and told him my idea… and once again, Clear Path came thru and made it happen! Their black cardstock is perfect to attach to, and the Retro Colors Mixed Pack just screams summer! My kiddos loved researching Yayoi Kusama, and had never encountered her particular style of art. We just kept enjoying more and more images from our Google search! I set the Retro Colors pack in front of the kids and told them to “think summer and triangles with polka dots.”
We first grabbed paper and started cutting triangles of all sizes. Both the older kids immediately had a picture in their head that they wanted to make. Elle didn’t really understand the concept, but she had fun cutting and gluing paper. (So I recommed this project for 4th grade and up!) The older two really took the idea and ran with their own concepts, but we didn’t tell each other what we were trying to make… and the three of us enjoyed guessing where the others were going with our art!
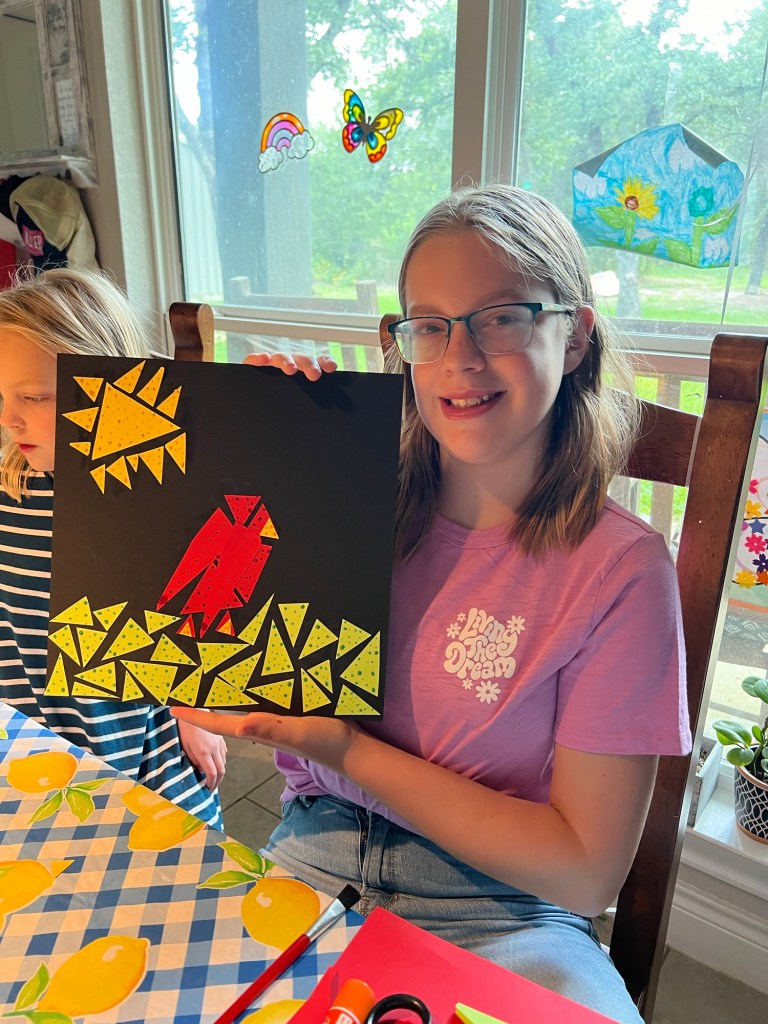
After our glue had fully dried, we went back and painted the polka dots by using the back side of paint brushes of various sizes, and a wide variety of paints we had in the art closet. They then enjoyed hanging them on our ever-changing art wall in their bedroom hallway, so they can enjoy seeing them for a few months til we hang up new art!
Becca loves the Cardinals that live in our backyard each summerThe pink in the retro pack made me think of cotton candy at a summer festivalGrayson’s sea turtle mama is going onto the beach to lay her eggs! The kids’ hallway is the perfect place to display their art!
We had so much fun with it, that we want to use the same pack of paper to make FALL inspired scenes over Labor Day weekend! Becca already has ideas for a basket full of apples, and hay bales!
Want to make your own art with your kids or students? Be sure to shop Clear Path Paper for all of your paper projects!!! And if you need help finding a specific paper for a project, let me know and I can help you find the perfect Clear Path Paper for your project!
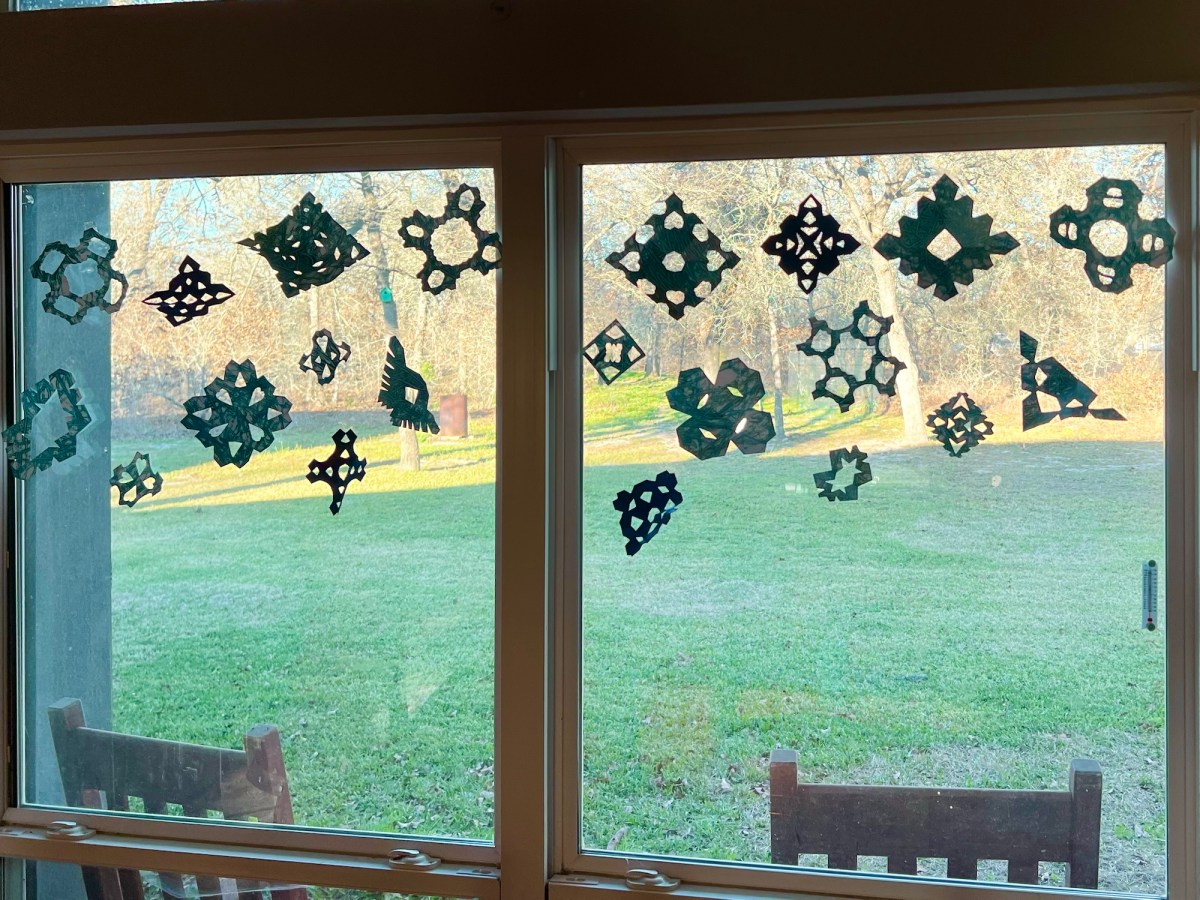
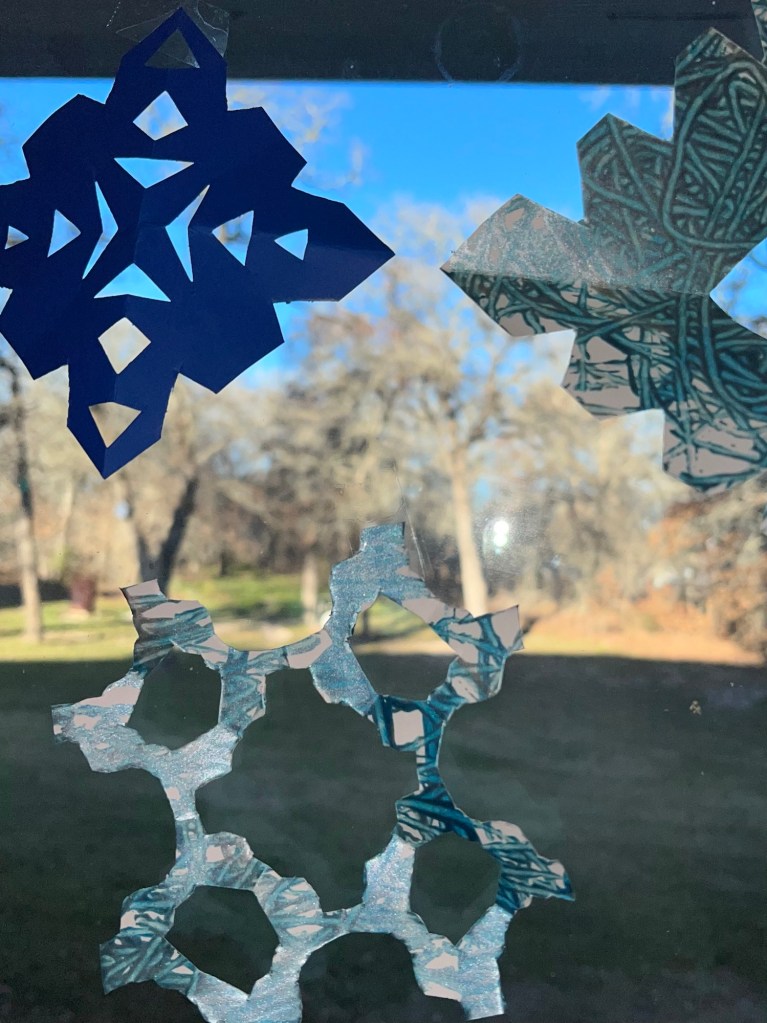
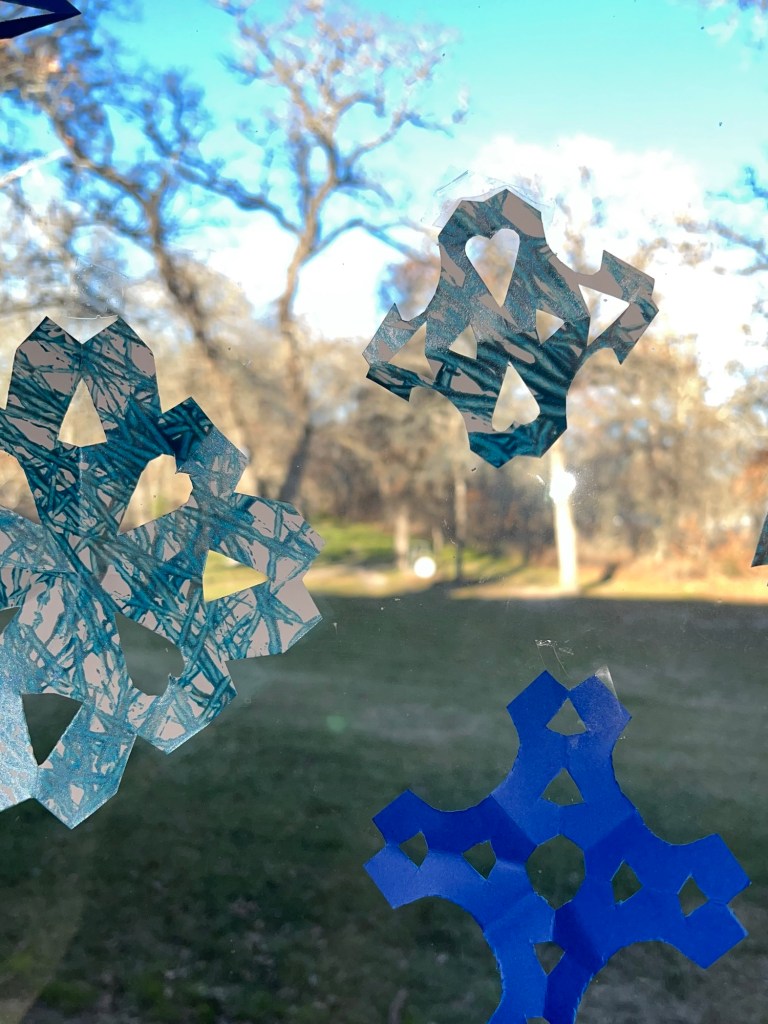
Living in the middle of an almost perpetual summer, we have to get a little creative sometimes to make January actually feel like winter! So while the weather was nice and cool one day (in the low 70s), we got outside to do some marble painting, enjoyed cutting snowflakes from them once it was dry, and now our dining room windows give the appearance of winter… as long as you don’t look out and see all the green grass behind them! HA!
So here’s how we did it…
First off, you know how much I love sharing with you about my partners over at Clear Path Paper. They have so many fabulous products that are perfect for projects of all types. Their 100lb white cover stock is PERFECT for painting – heavy enough to stand up to a LOT of liquid. (It does make cutting for super small hands a bit challenging when folded over several times, though, so I DID cut the snowflakes shapes for my youngest, who is almost 6, where my 9 year old had no problems on his own.)
You’ll need: Clear Path White 100lb Cover, cut in half Aluminum cake or casserole pan Marbles Gray/Blue Paint (we used a washable metallic tempra paint, which has a nice shimmer to it)
Just put a dot of paint on the side of the pan in each color, drop the marbles in, and roll away! Both of my two younger kiddos loved this project, which kept them busy for quite some time while big sis was off at a school extracurricular. My boy loved making this slow-mo video for y’all to see how you can even make curved lines in the paint! Just gotta go slow and steady, and all kinds of fun patterns are possible.
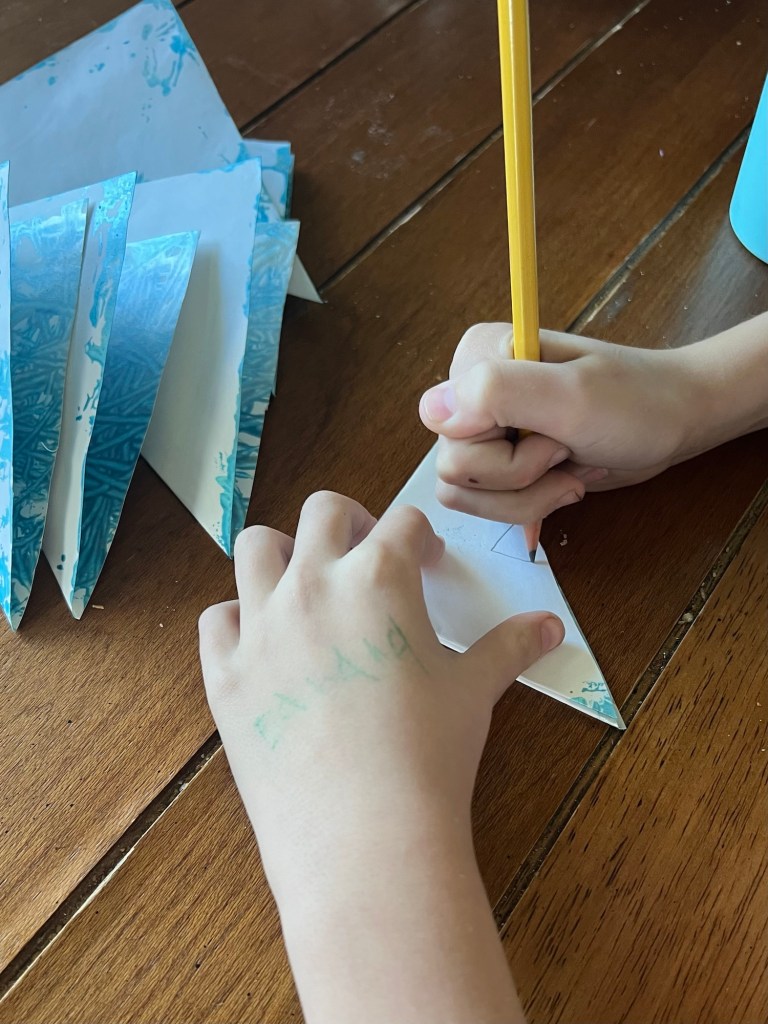
Once the paper is dry, the most basic way to do a snowflake is to fold the paper into a square, cut off the extra, and fold it into quarters. For my little one, she drew where she wanted me to cut, where my middle drew his designs and cut his own snowflake shapes easily. He even cut some squares in half to just play with what he could cut. They don’t look like snowflakes, but they were still fun and we hung them up as “abstract snowflakes” to add a little fun to the window.
Clear Path Paper is now also offering 4×4 (and 4×6) 65lb card stock, which is really cool for smaller projects! I used their royal blue 4×4 65lb to cut some solid blue snowflakes to mix in with their painted ones, and loved how easy it is to fold and cut… it’ll be perfect for my middle man to use for origami, to, because he gets frustrated with thin paper that rips if he gets rough with it, and he loves making TINY things, vs the sizes that regular origami paper usually makes.
Here’s how the windows look… getting us ready mentally to finally have some cold weather coming up early this next week! It actually got down to 30 last night! Whats up with THAT? We don’t know what this thing called cold is! It’s been a couple years since it actually snowed at all here… the kids are hopeful that maybe since we made snowflakes to hang up, maybe just maybe it will actually snow! Time will tell, ha!
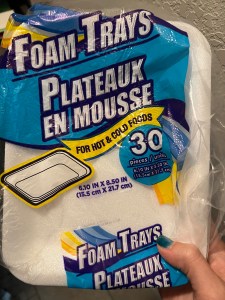
Are you melting this summer like we are and looking for more FUN you can do in the A/C? A Dollar Tree find turned into a super fun summer activity that the kids and I really enjoyed! While walking around the store last week, we came across this big pack of foam trays, which are perfect for turning into large stamps!
What you’ll need: -Foam trays -A dull pencil -Black acrylic paint -A large paint brush OR small roller -100lb weight White Card stock (available here from my partners at Clear Path Paper) -Markers, colored pencils, or crayons (Also at Dollar Tree, we got an 8 count pack of Crayola brand crayons for coloring on dark paper that worked GREAT with the black paint!)
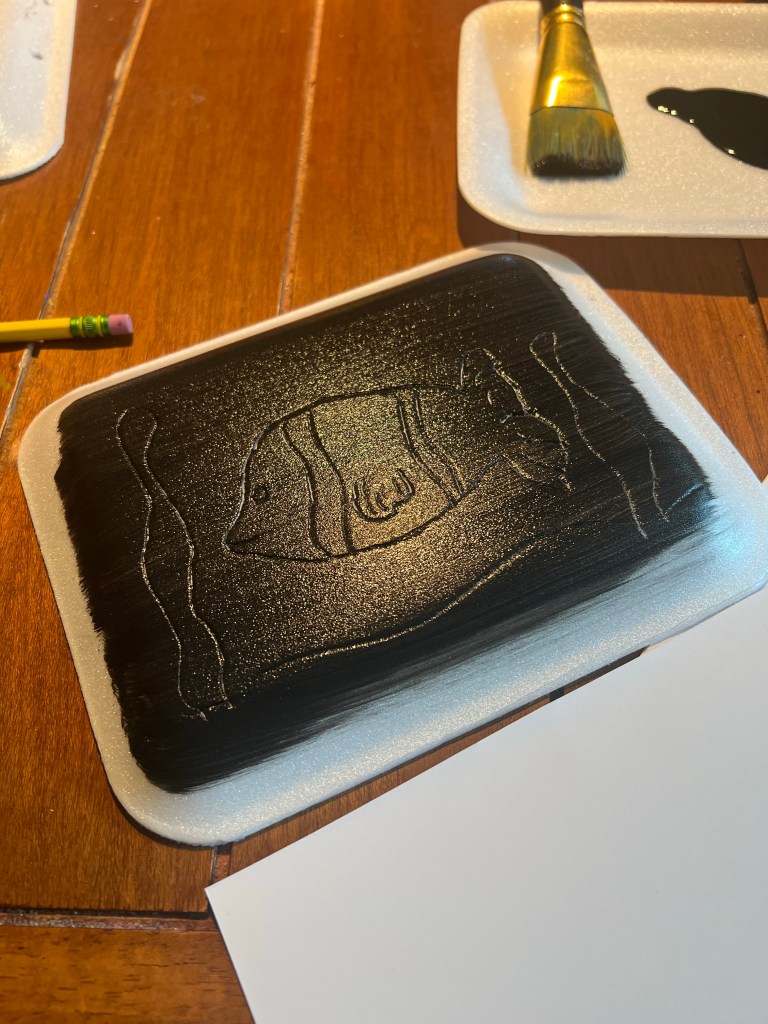
On the back of the foam tray, make your design with your dull pencil. Just be careful to not push too hard and poke a hole in your tray! Your goal is to make a nice thick ridge, but no holes!
My original design
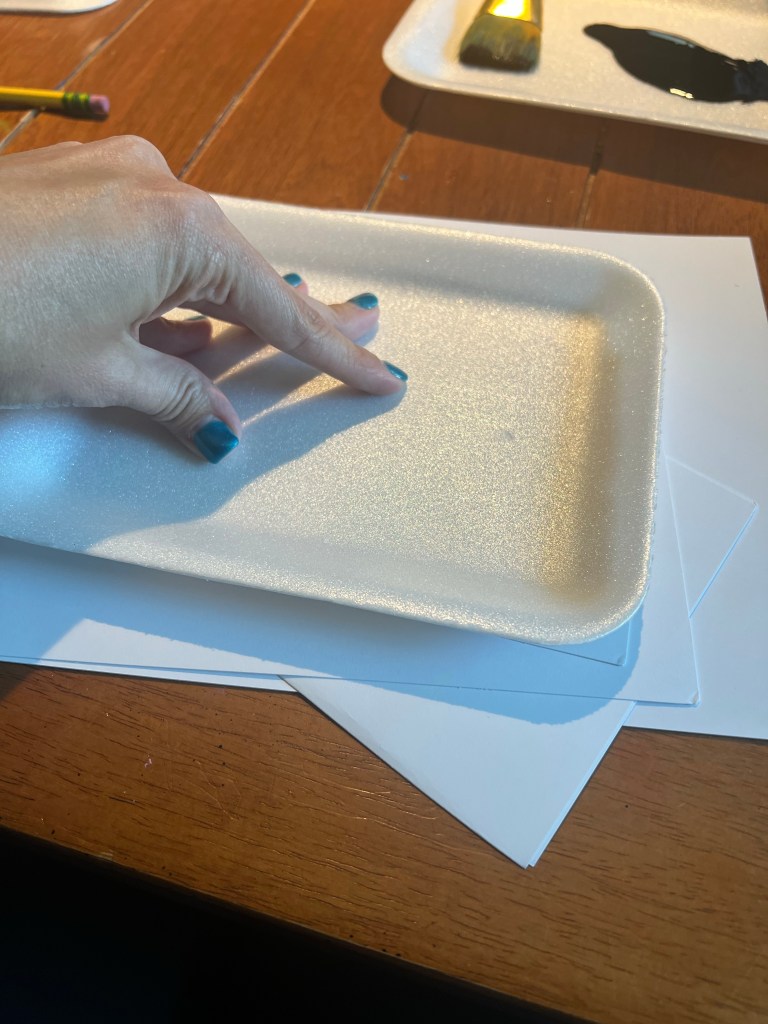
Once your design is done, paint your black paint in a thin, even layer over the whole tray (or the whole design if it’s smaller than the size of the tray). While the paint is still very wet, turn your tray over and press evenly onto your 100lb white card stock. (I cut the sheets in half so that we were using it most efficiently and not wasting any paper.) Then pull off the tray and wave your paper in the air to dry. Acrylic paint will dry really quickly if you’ve done a thin layer, and then in the white space of your design, you can use your markers, colored pencils, or crayons to color – if you so choose. They can look really cool just black and white, too!
These “Bold and Bright” crayons worked awesome over the black paint and sharpie!
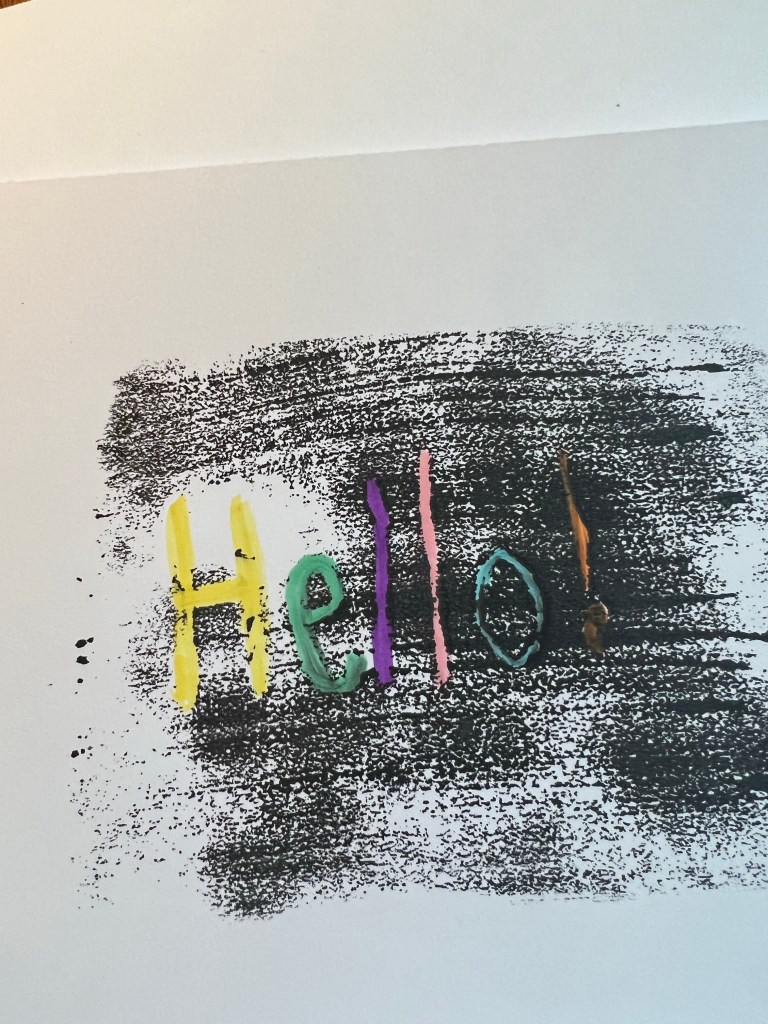
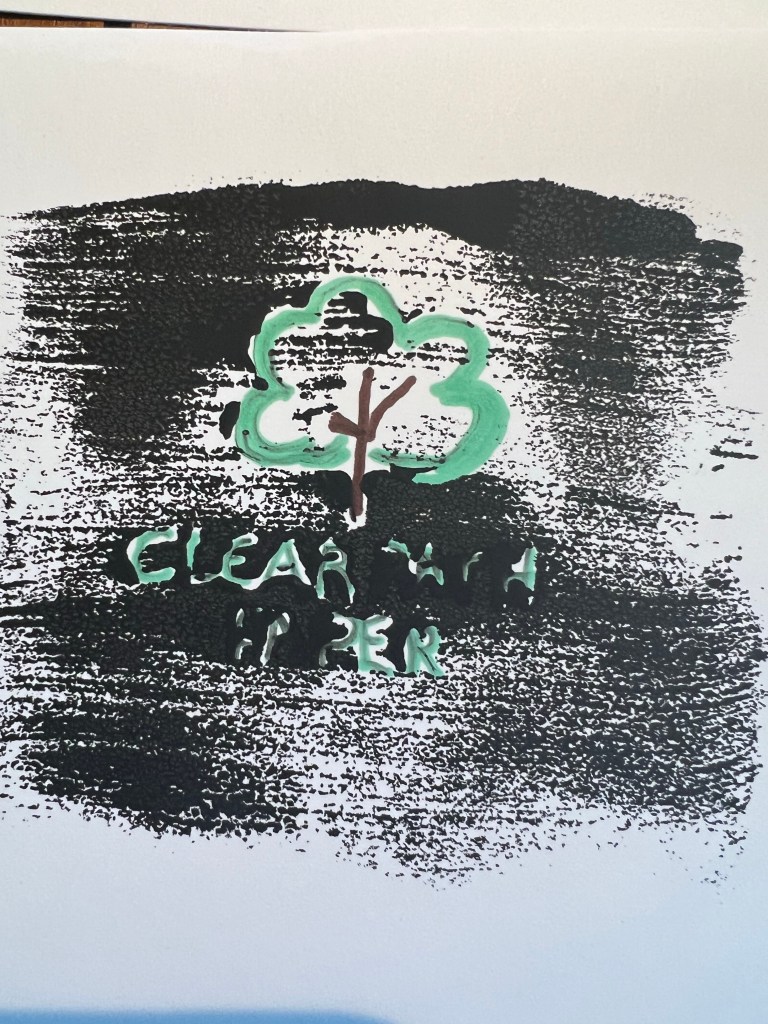
NOTE – doing letters in the trays is REALLY challenging because the ridges you make with the pencil fill in differently with paint for small spaces/details. I got fairly frustrated trying to make a fun surprise design for my Clear Path Paper partner, Andrew. But! Here’s a few tips if you DO want to brave lettering on the trays. Make sure your letters are large and any small spaces inside the letters are big enough that the paint won’t just fill in. It’s also very important that you make your letters MIRRORED so that when you stamp them on the paper they’ll be turned the right way. I used the nice thin labeling sheet from the card stock package to attempt their logo, and then used it again to make the word “Mirror” to show y’all. Any tracing paper would work, but I’m all about using my resources wisely, and then there’s no waste of the labeling sheet! Becca also used it to write “Hello” on a stamp as well. This graphic shows you the step-by-step:
Happy Summer! Make the most of it… school starts back up soon! I’m excited to share my adventures in my new job soon… I’ll be backing away from a full teaching role so I can focus on being mom! And I’m excited about running the tech lab at our school as the technology paraprofessional! 🙂
Every year that I’ve taught ALE (Alternate Learning Environment… sometimes called “Life Skills”), we focus on the importance of safety in the summer time right before the end of school. This week we’re talking about sun safety and water safety. Yesterday, we tried a science experiment to illustrate the importance of sunscreen. The kids were really surprised to see just how much the sunscreen really did work!
Here’s what we did! First, we read the book “Tell Me Why I Get Sunburned” on Epic Books. (If you’re a teacher who isn’t using Epic, you need to start – they are, well, Epic!!) This non-fiction book talks a lot about sunburns and how they happen, the science behind them, and how to prevent them… all at a level that young kids can understand, and in narrative, not boring facts.
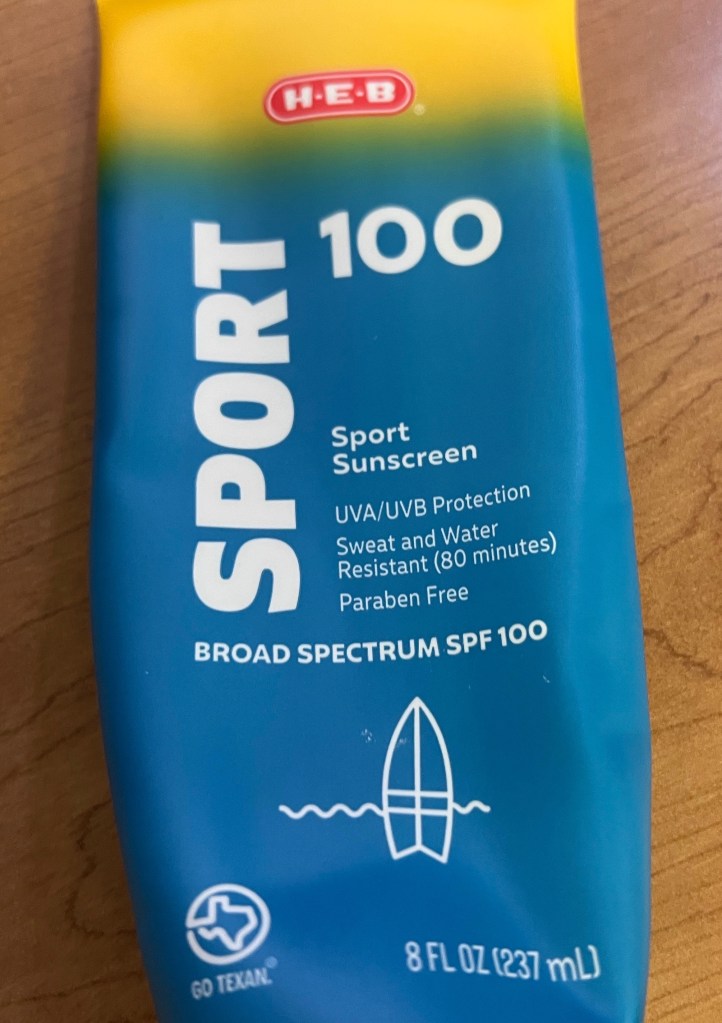
Then, we talked about the wide variety of sunscreen products that can be purchased at our local HEB grocery store. For the purpose of our experiment, I purchased 100 spf lotion.
This is the lotion I chose based on price and high spf count. You could use any lotion available.
I explained to them that in order to SEE what sunscreen does, we would be painting our sunscreen onto dark paper in a basic design. (Here is where I messed up – I should have had them all paint the same design – a basic smiley face. I would have saved on lotion, time, AND they would have all turned out really well…)
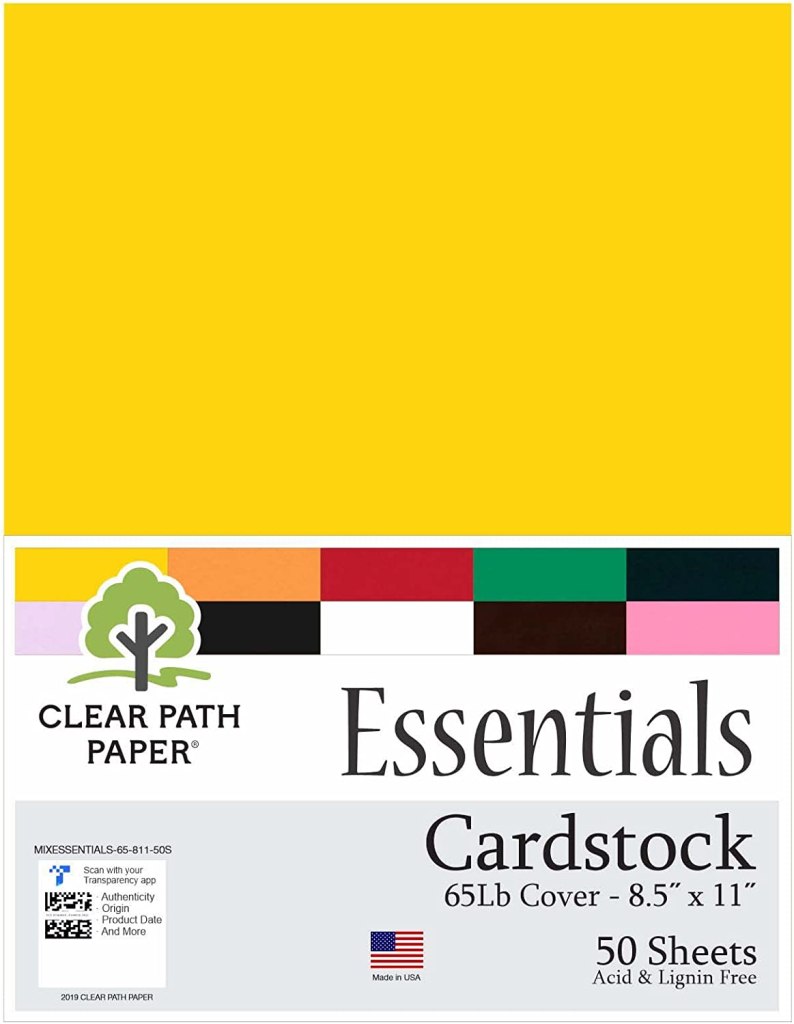
For our project, we needed just the right paper – that would stand up to painting the sunscreen onto it and then being in the sun for several hours. Enter my partners from Clear Path Paper – again to the rescue! We used two different colors of their card stock from their Mixed Essentials pack- the basic Black and Deep Sea Blue. I wanted the kids to see that ALL things are affected by UV rays, not just one color of paper, OR one shade of skin! After passing out the paper, I had the kids write their name using a white crayon or colored pencil.
Then, I squeezed the lotion out onto a paper plate and students used a q-tip to make a design on their paper. As I mentioned before the design DOES matter. Several of my kiddos just made large blobs, and covered much of the paper. This lesson is most powerful when only a few bits of the paper are covered, in a clear, distinct design. We used LOTS of sunscreen. I didn’t want to have to wash paint brushes, but I think paint brushes would have been a lot easier to use and would have made more even distribution of the lotion as well. Might be worth the time and effort to stand and attempt to wash them all out.
This picture meant something to the student, but sadly didn’t prove the experiment very effectively.
Note – if you have older kids and want to take this a step further, you could do one set with the lotion straight out of the tube, and one set with lotion you have watered down, to test it’s “waterproof”-ness! I think that would be really cool for older students to test… might even have to do that with my three at home and see what happens!
SO! I digressed. We took them outside and taped them down to the concrete, and then emailed the teachers/staff and made sure that they knew to watch their students at recess, that they didn’t get messed up. I also made sure to include a note saying I knew that I had misspelled experiment… apparently I had not yet had enough coffee. Lol. I have learned not to correct these things all the time with my students, however – it is important for my high-anxiety students to realize that I make mistakes, too, and that sometimes it’s ok to leave a mistake and just own it. I pointed out to them that I had messed up, and they all said my motto – “everybody makes mistakes!” One of my sweet girls asked, though, “are you going to LEAVE it that way?” And I said, “yes, *Sally* because it really doesn’t matter, and I don’t want to waste any more paper by making a new sign. It’s ok to make mistakes sometimes.” And she replied, “wow. I don’t know if I could handle making that big of a mistake.” Then she walked off, very contemplative. I hope that my little “woopsie” maybe made an impact on her. She often totally shuts down if she makes a tiny mistake, which is sadly somewhat common due to her specific combination of autism with an intellectual disability. Sweet *Sally* has become one of my favorite students to love on, and maybe, just maybe, my “expirament” mistake made an impact. Maybe even bigger than the actual point of the lesson. Here’s hoping! 🙂
While outside placing our papers, we were able to discuss some predictions. Here’s some of what they thought would happen: -the sunscreen might dissolve/disappear -the paper might either get darker or lighter – we were about 1/2 and 1/2 on this one since we had just learned that our melanin gets darker in the sun, but some of us knew of things like paper or curtains getting faded over time at home -the paper might blow away if we didn’t use enough tape -somebody might step on it -it would somehow change (One of my sweet boys said the cutest thing: “Well, Mrs. Hinnant, I know it’s gonna do something, or you wouldn’t have us do it!”)
We took them outside about 8:40, and made sure they were in a spot that wouldn’t get covered by shade as the sun moved (this makes for good conversation, too!). We went back out to collect them around 2:00. They were amazed to find their sunscreen still white! It hadn’t dissolved as they predicted. Some were very upset to be wrong. Again, this was a learning experience and I emphasized that scientists often make predictions that don’t end up being correct. That’s why they have to keep experimenting! Some of us were correct – a few papers flipped over because they didn’t have enough tape on the back. It appeared that our friends who were worried about stepping were wrong – teachers did a fabulous job of keeping their kids away from our work. No footprints, rips, snags, or tears!
We took our papers back inside and used paper towels to wipe all the excess sunscreen off. We were able to see a distinct line where the sunscreen had been, and they even noticed a little of the paper coloring came off WITH the sunscreen onto the paper towel. But the biggest excitement came from flipping the paper over. Those who had done a distinct design were able to clearly see where the sunscreen held the color to the paper, and the powerful UV rays faded the rest of the paper to a lighter shade of gray or blue. Again, some were frustrated by their design flaws. But I reminded them that scientists try things over and over and over before it all turns out exactly like they want. Some of them wanted to try again tomorrow, then! Lol. I told them we wouldn’t be using any more paper or sunscreen – we need to conserve our resources – but they are welcome to talk to their parents and try it at home if it’s ok with them.
This one barely used any sunscreen, which was a good lesson on making sure we have good coverage- it can’t work as well to protect us if we don’t have it covering us well like a blanket!
Overall, I’d call this “expirament” a success! A few lessons learned along the way about how I’d do it next time, but overall, quite a success! Let me know if you try it, and if you ever need quality card stock for projects such as these, be sure to give the folks over at Clear Path Paper a look!!
If you’re anything like me, you have gone through a wide array of emotions this week as you struggle to figure out how to handle all of this stuff. It’s just a crazy mess. But the bright side is, all of the teachers out there are working hard to come up with great ideas and find resources to help you with your kiddos at home!! I’ve stolen some ideas from others, and come up with a few things on my own that are hopefully super helpful to yall as you’re stuck at home!!!
So first up is Stained Glass Window Painting! A friend of Gray’s from school and church enjoyed doing this at home and his mama posted on Facebook… so we tried it!! It was SO MUCH FUN that now we’re contemplating doing the bottom half of the kid’s bedroom windows, too! Here’s how I did it:
Get some Crayola Washable Paint (you can get the little pots on Amazon if you’re not venturing to Walmart these days, but even with Prime shipping they are about a week out on delivering… just fyi!). You’re going to mix the paint with dish soap and water. The proportions I used were kinda just by feel, but I mixed approx half of the little paint pot with two (small) pumps of dish soap and probably about 2-3 Tbsp of water, and mixed thoroughly.
To prepare, I used painter’s tape and some construction paper pieces of colors we don’t use much to mask off the window sill and sides. Even though the paint is very washable, I didn’t want to have to stress. I also talked to the kids a lot about wiping their brush on the side of the pot before painting so that it wouldn’t drip on other shapes below. (But they still dripped, and it’s thankfully super easy to wipe off and fix!)
Lesson learned… we did one window one day, and the other one the next day. So I discovered that if you kinda let the first coat dry and then add another coat, they look much brighter! You can also try fun brush strokes – try doing some straight, some swirly, some zigzag, etc – because the brush strokes WILL show when it dries. Then, because you’re using water in the paint, be sure you LEAVE the tape and paper up for several HOURS to insure it dries and you don’t have runs into your blank spaces. It is a super fun and easy project, and DOES wash easily off of skin AND out of clothes.
(ALSO! A couple different friends have shared similar ideas using painters tape and sidewalk chalk on a fence – that looks super fun, too!)
Another super fun activity that we borrowed from a coworker friend of mine was playing with Magnatiles on the Garage Door! This was a super fun activity (and also a good lesson on gravity vs the strength of a magnet for the big kids) that we tried out yesterday morning, and this morning the littles are having fun doing the Magnatiles on the freezer drawer inside! Elle got super excited about this activity, too, and created Arendelle (“Adondell!”) and Elsa’s castle (“Elsa’s cast-tell!”) all on her own!
Trying to figure out what to do with the papers that your kids are doing for school at home? Try making this easy Recycled Cereal Box Paper Holder! Simply take a large cereal box (we get the family size boxes), completely unfold it, and let your child decorate the blank sides! I wrote on them first and had them use stickers (because we have MILLIONS of stickers!) to decorate where I didn’t write. But you could have your child paint, draw, doodle, or even make a collage on the box. Then, tape it back together! I have a roll of clear contact paper, so since we used stickers that I didn’t want to fall off over time, I covered the boxes in clear contact paper. I’m keeping the kids’ work in folders, but they are rapidly filling. So after I take pictures of their work for the week to send to their teachers, I’ll be sticking that finished work into their boxes, which easily fit on the shelf in the closet!
And now for a couple other ideas that you can purchase relatively inexpensively on Amazon! (Reminder – I am no longer an affiliate, these links are just to help you out… please remember to always shop on Smile.Amazon so that you are helping out your favorite charity with every purchase!!!)
This Water Doodle Mat is super fun for all three of my kids (3rd grade, kinder, and 2 yrs), and was only $24. WELL worth it! They have used it multiple times a day since it arrived, and I love that the water pens are interchangeable with our Melissa and Doug Water WOW! Books that we have gotten from my friend Casey over at Munchkin Land Kids! (Yall please go and check out all of her awesome stuff… now is the time to support small businesses!!!!)
We also seriously LOVE Paint By Sticker Kids books, which you can get off of Amazon. We have done SEVERAL of their books, but the ones I got for the kids for right now are Unicorns & Magic (full of LOTS of sparkly fun stickers!) and Beautiful Bugs. They are $10 a piece and worth every penny! Great for number matching/recognition practice, and fabulous fine motor / hand eye coordination practice! They also make fabulous story starters for your kiddos who need some inspiration to get WRITING!!!
I also shared in that last graphic a photo from Natalie Grant and Charlotte Gambill… remember through all of this, mama… the struggle is real. Make sure to let your faith rule over your fear.