Vinegar Science

steam activities header

What better way to start off our STEAM Thursday series than with some good ole vinegar science?  Vinegar science posts are a dime a dozen, but hopefully some of what we did will inspire new ideas of how you can take your basic activity to extend it further.

A couple of basic supplies that we’ll be using in many of our STEAM activities are a set of plastic beakers, and plastic pipettes.  I ordered them off of Amazon – here are your affiliate links to help you set up your science supply shelf!

Plastic Beaker Set – 5 Sizes – 50, 100, 250, 500 and 1000ml

Plastic Transfer Pipettes 3ml, Gradulated, Pack of 100

Some other items I recommend you picking up are some plastic trays (they are fabulous for any craft activities) – I got these cute heart shaped ones we’re using for this activity over at Dollar Tree.  We also have some fabulous activity trays that I got from Lakeshore, and I’ve heard that some Walmart stores carry similar trays.  If you’re looking for a quick order off of Amazon, here’s a great set.

ECR4Kids Flat Activity Trays Set of 5 (Non-Slip)

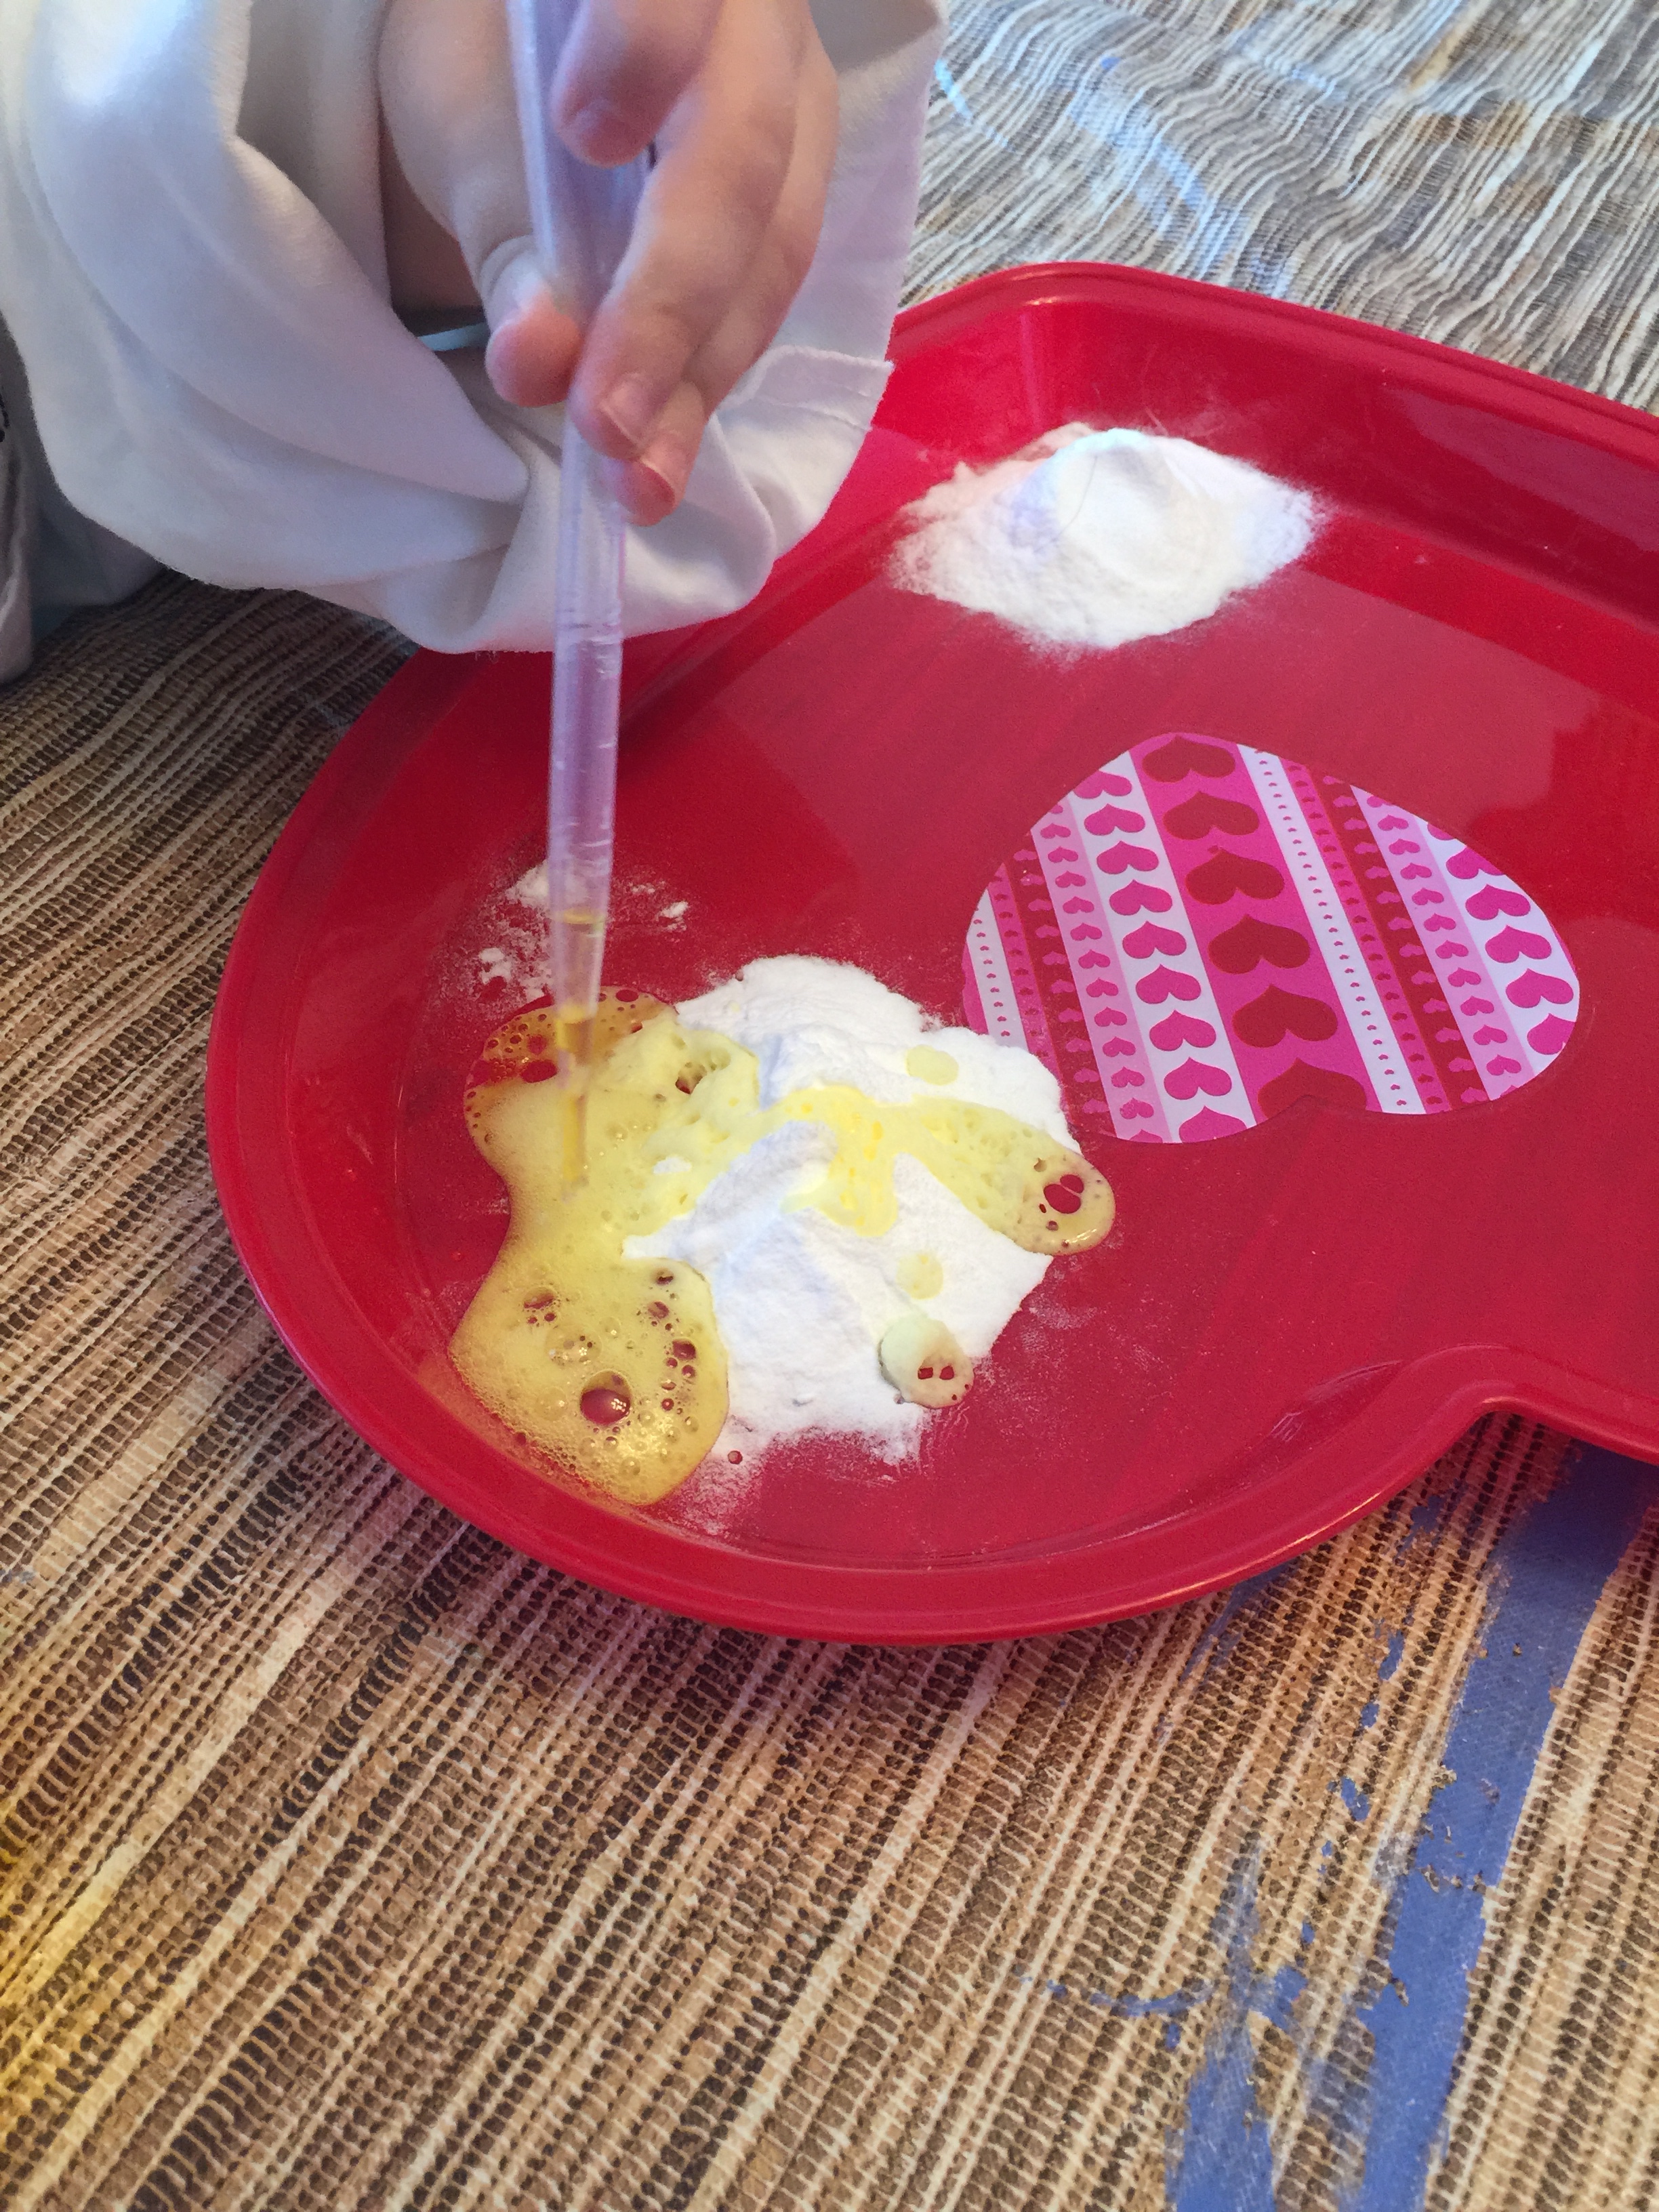
For this activity, you’ll also need vinegar, baking soda, and food coloring.  We also used paper towels.  The lab coat is of course optional – I used to sell Pampered Chef cooking products, so my chef’s coat is now her lab coat / painter’s smock. 🙂

IMG_2279 IMG_2281

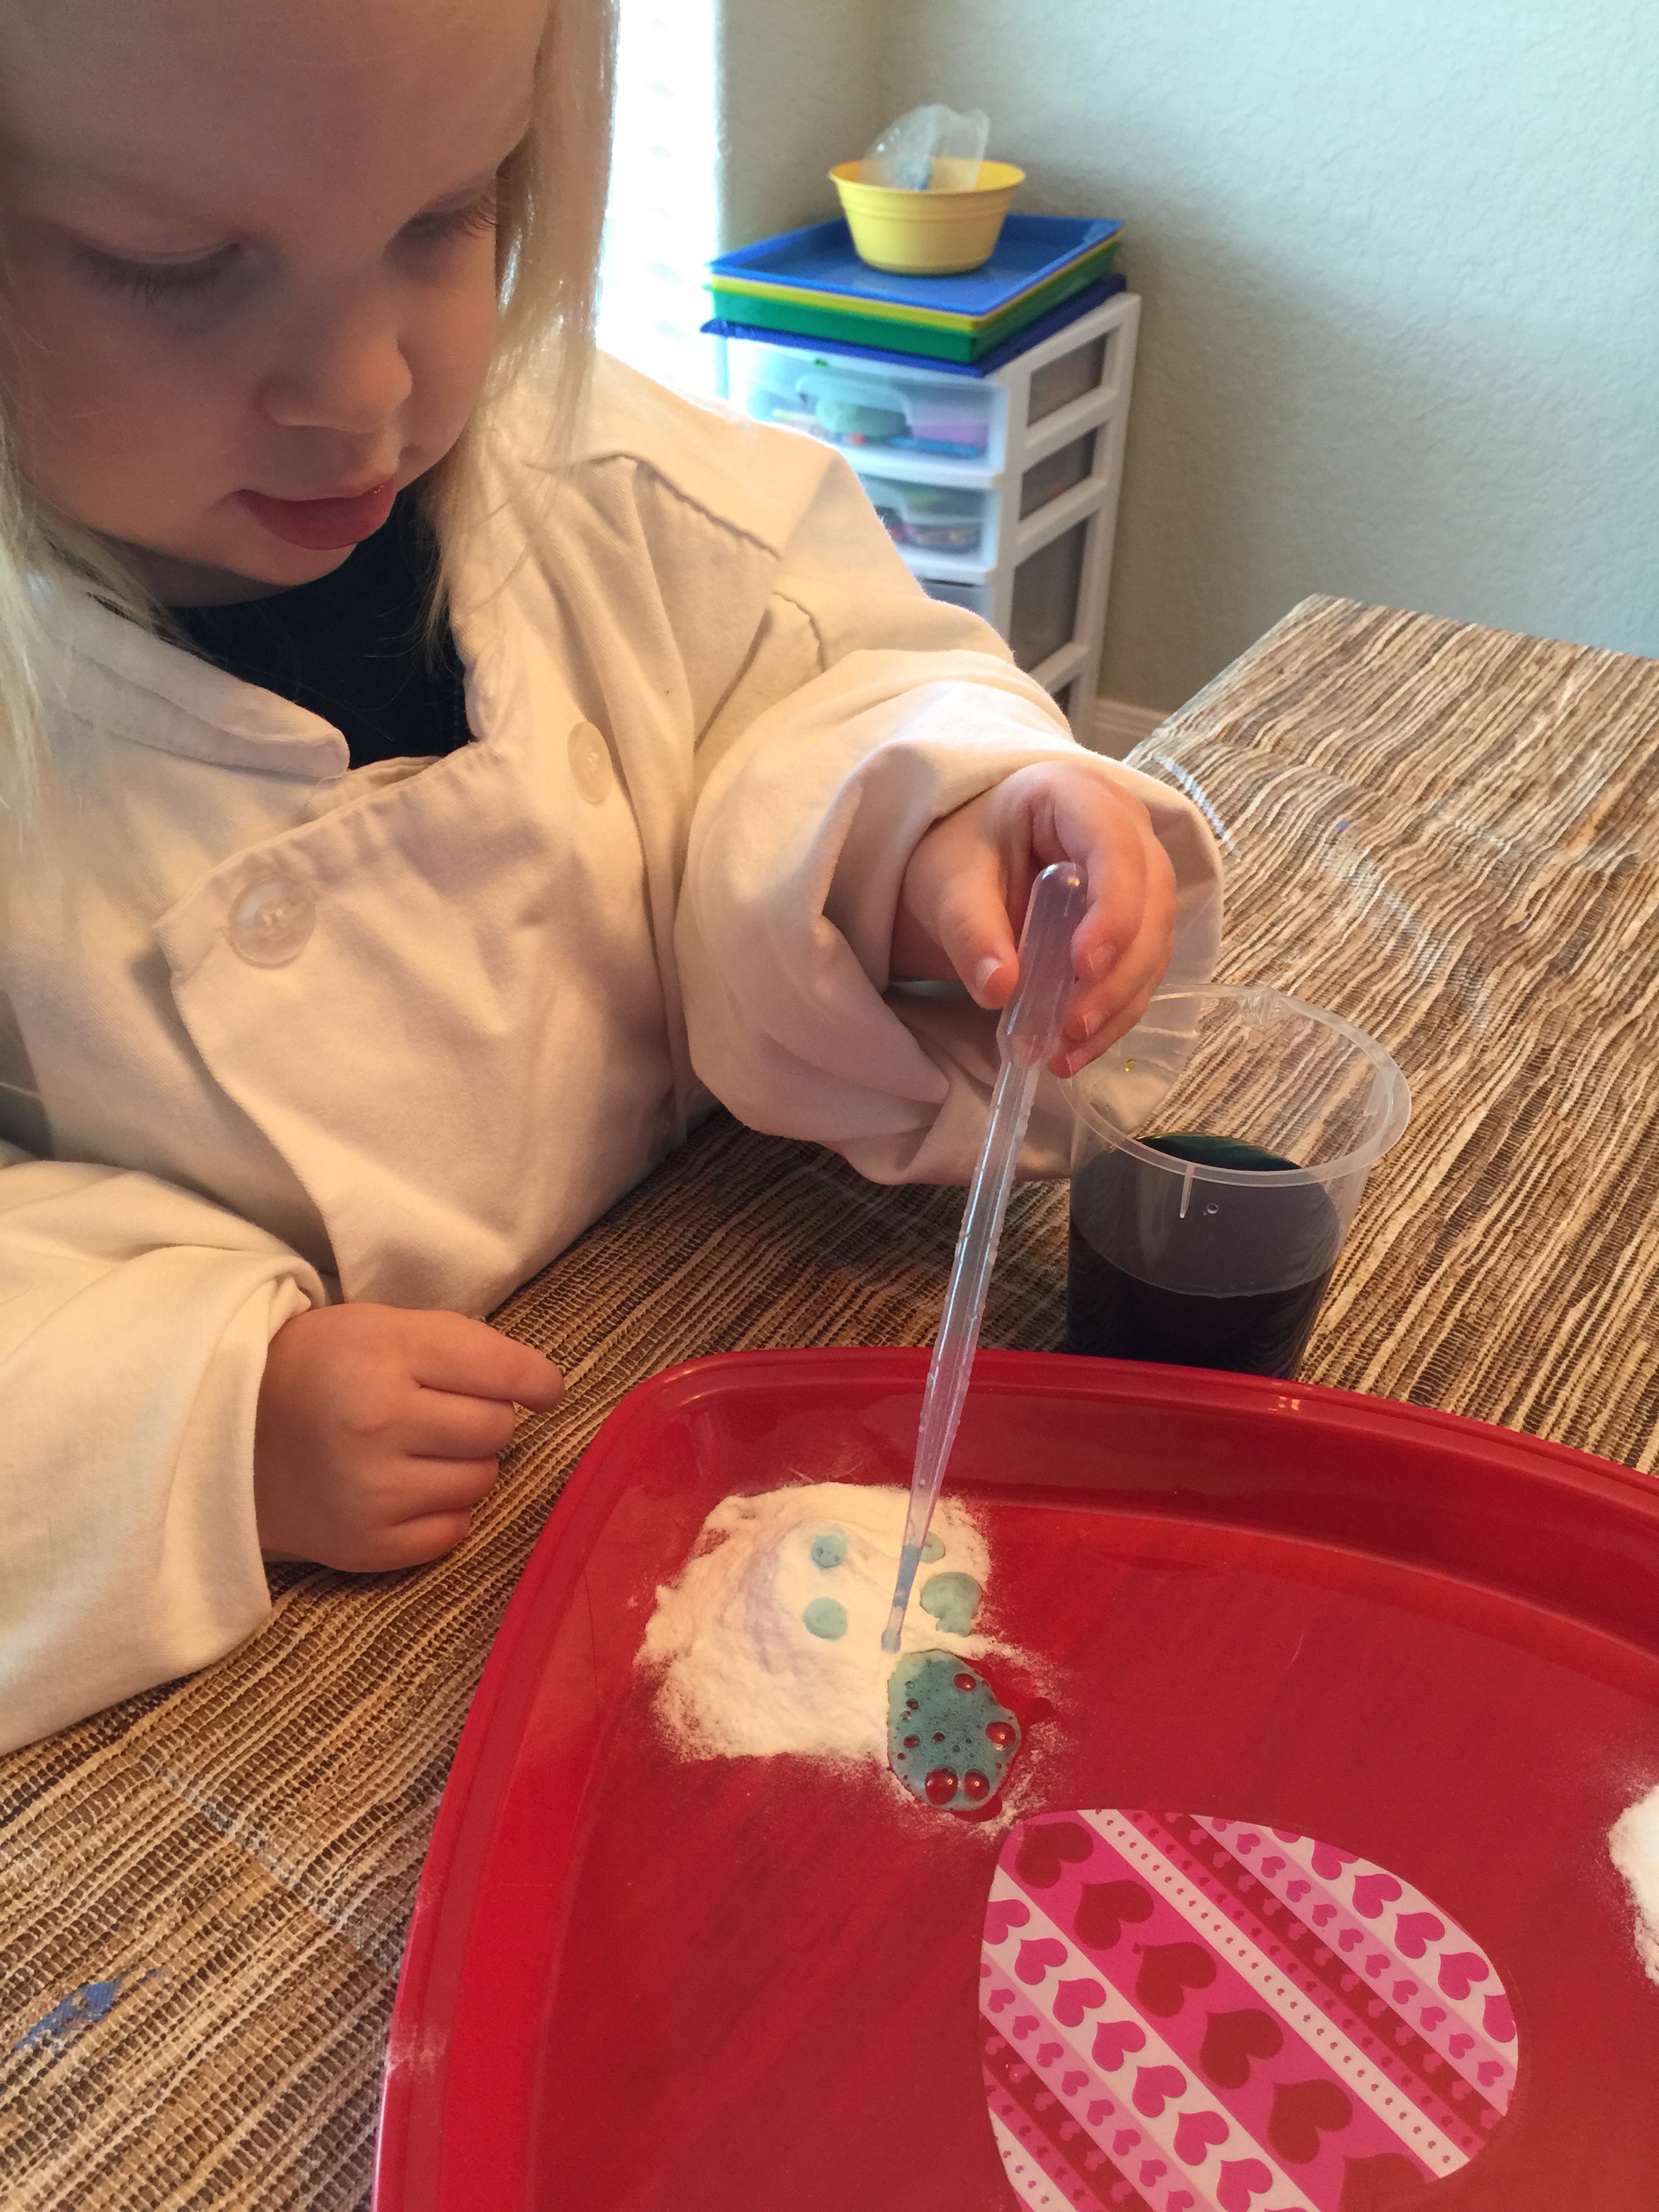
You can make this as basic or as complex as you want.  Here she’s doing the first steps – I put vinegar in two beakers, and she decided she wanted to make green, so we did blue and yellow.  She stirred the coloring in with her pipette, and then squeezed some of each color over into the smaller one to make green.  Talk about good hand-eye coordination and fine motor skill work!  It took a bit of practice to get the colored vinegar to move, but she go the hang of it fairly quickly!

IMG_2282

Then we took our tray, and made three baking soda mountains.  She enjoyed squeezing the colored vinegar onto the baking soda and seeing the colored bubbles!

IMG_2284 IMG_2285

So that was where my intentions for the project ended.  The rest is all Becca.  And that’s the beautiful thing about having an open science experiment time with your kiddos.  LET THEM LEAD.  They’ll take you amazing places.

IMG_2292

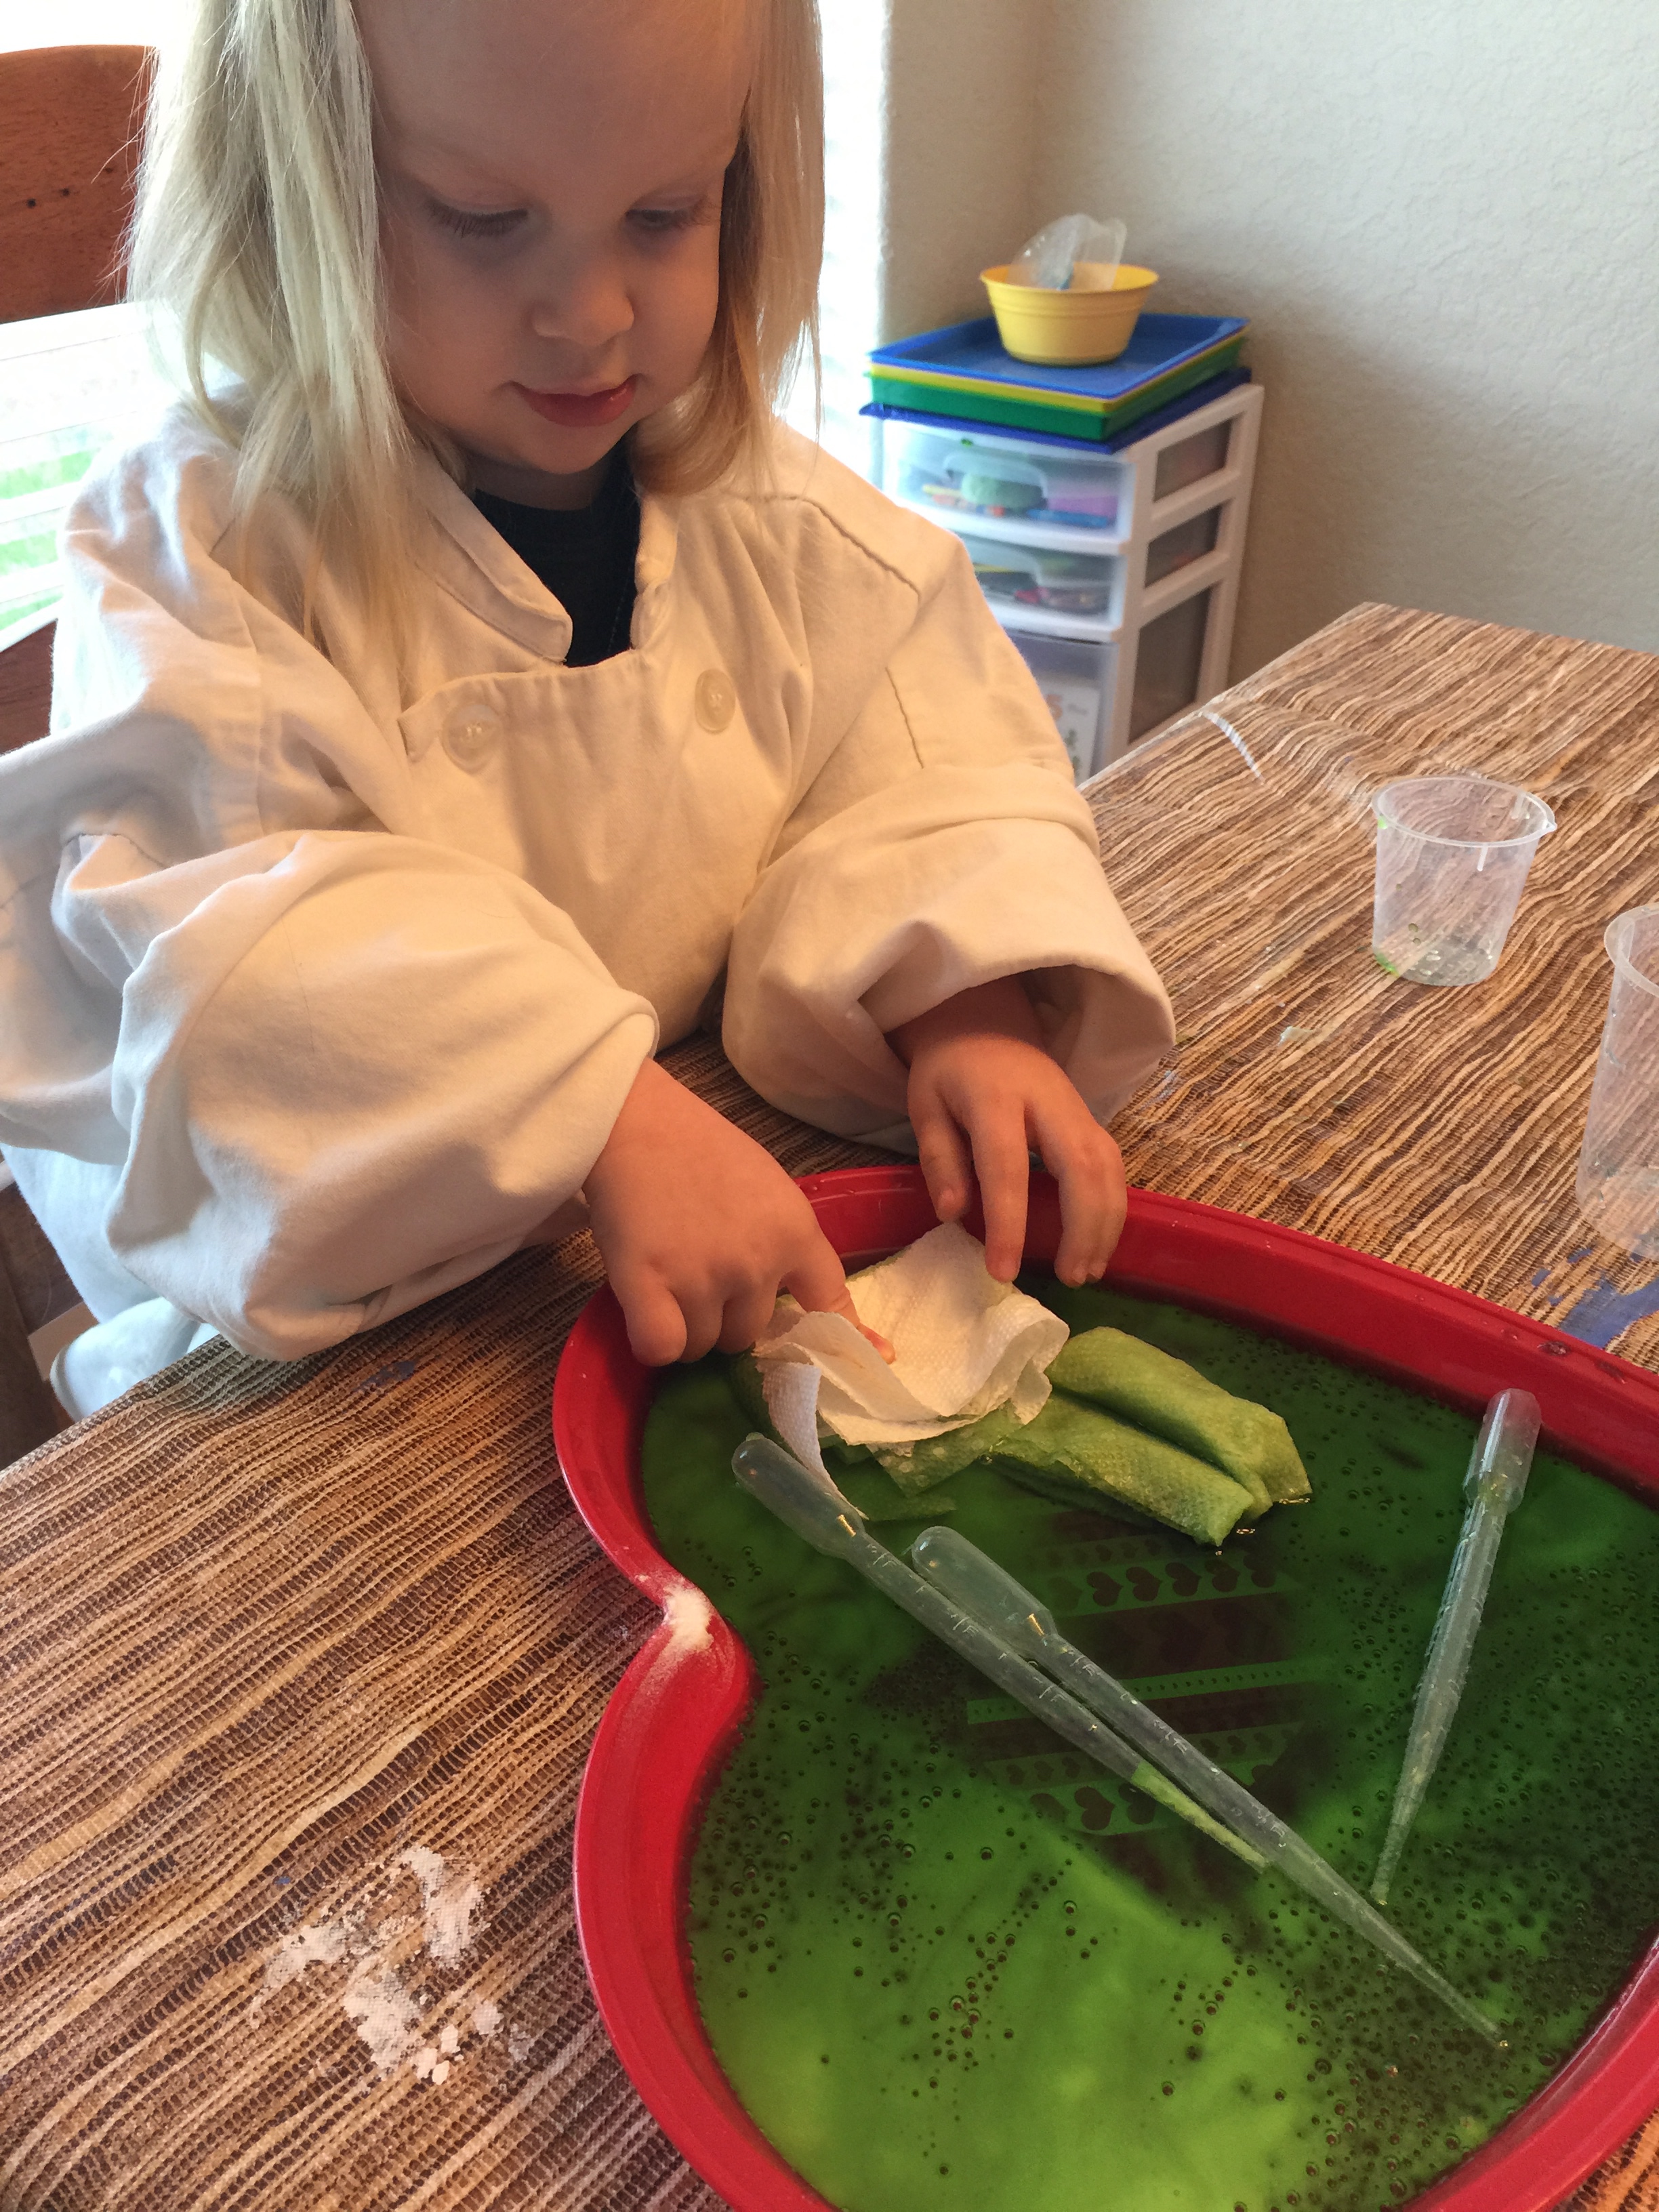
First, she decided that she wanted to dump ALL the vinegar into the tray.  Talk about big bubbles and lots of giggles!!!  The whole heart turned green, and she was super excited.  Then, she drew in the remaining baking soda with a pipette.  So suddenly we were doing art in our science experiment.

IMG_2294

Then, she discovered that the pipettes float!  But, if you fill them up and then put them in, they sink.  And, when I used a paper towel to clean up a spill, she thought it was awesome that part of the paper towel was yellow, part was blue, and then where they touched, they were green.  And then, the paper towel fell into the tray.  And thus began the TRUE experiment portion of our science time.  She loved watching the water soak into the towel, so we folded paper towels with different amounts of folds to see which would take the longest to soak up the water.  And then we stood up a paper towel in the water and she learned the words “capillary action” in regards to how trees take water in through their roots and the water spreads upward through the tree like the water spread upward through the paper towel.  I never expected my 2 1/2 year old to be able to repeat “capillary action” to her Daddy and explain it’s “like the trees getting water from the ground”… but ya know, I never expected lots of things when it comes to Becca.  She’s definitely my little science expert.  I’m so curious to see what career path she will choose some day.  Whatever she does, she’s gonna be amazing.

IMG_2297 IMG_2302

I hope that this, the first of many STEAM activities for the year, will inspire you to get into the kitchen (or dining room as the case may be) and start experimenting with your kiddos.  And don’t be afraid to let them lead you to a place you didn’t plan to go.  Because they might just be ready to learn about capillary action, too.  Or not.  Let them lead… and be prepared to follow.  (But don’t worry, if they lead you to a place where you don’t know all the answers… that’s what the internet is for!)  🙂

Farm Habitat

In our continuing series on various habitat sensory boxes (visit the Arctic/Antarctic here / visit my dino habitat here), this week I’m sharing our Farm Habitat with you!

We love the Safari Ltd Toob animals – and have a great little set called the “Petting Zoo” which includes two kids dressed in overalls (one holding a bottle) and several animals – most of which are farm animals.  So, I pulled out the farm animals and I’m using them for this habitat.  Then, I dumped the stuffing mix (from my sensory cooking post last year) into the box as their farm yard and added the animals and kids!  Easy peasy, and super fun!!  She loves making the animals “eat” the “hay” as she calls it. 🙂

IMG_2440

Looking for additional farm fun for your kids?  We love this little set of Melissa & Doug puzzles, as well as our farm train set that Santa brought to our two this Christmas!
Melissa & Doug Deluxe Farm in a Box Jigsaw Puzzles
KidKraft Farm Train Set

Dinosaur Habitat

The next few Tuesdays, I’ll be sharing some fun habitat sensory boxes with you.  Becca absolutely loved her Arctic and Antarctic boxes that I made back in December, so I decided to make her some more small boxes!

Due to a lack of good storage/organization/planning on my part, we have a TON of wild bird seed.  So it made a perfect base for her Dinosaur habitat!  Add in a dinosaur Toob (Safari Ltd Dinos TOOB aff link here), a couple of palm trees from Party City, and you’re good to go!

dinosaur habitat

 IMG_2168 IMG_2169

“ROAR!”

Wonderful Wednesday

Normally on Wednesdays, I post the funny or cute little things Becca has said. This week, I wanted to share a conversation we had this past weekend that warmed my heart. The perfect conversation to share the day before we celebrate our Savior’s birth.

When headed back to our car at the Farmer’s Market Saturday morning, we encountered several nice folks who commented to Becca on how cute she looked. She’d grin and say “Merry Christmas” to each of them. She did look especially adorable in her bouncy ponytail and her big puffy burgundy pink coat and brightly flashing pink and white Minnie Mouse tennis shoes.

But as we turned a corner, I saw someone we couldn’t just walk by. He was an older gentleman, with a long scruffy white beard. His belly had the rounded sagginess of hunger, not of too many Christmas cookies consumed. He was far from Santa Claus, but had his life gone differently, he could have been Santa for the company Christmas party, or for his grandkids. No, instead this old guy was sitting on the metal chair on the outskirts of the band in his floppy dirty shorts and a long sleeved tshirt with holes. His shoes had seen many long hours of walking, and his prosthetic leg was well worn and beaten. He looked desperately cold, as the wind whipped between the buildings and the leaves swirled around him.

We couldn’t just walk right by him. My heart immediately ached for him. He wasn’t begging, just sitting in the chair listening to the music. I looked in our bag, surveying the goods we’d just received, and I stopped Becca. I told her- “You see that man sitting over there? We’re gonna give him some of our cherry tomatoes.” She perked up and said, “Can I give them to him?” I told her, “No, I’ll hand them to him. You hold my hand still, ok? He’s a stranger, so let Mommy talk to him.” She said, “ok.” And we walked up.

I said, “Sir, we’d like to give you a couple of these fresh juicy tomatoes we just bought, if you’d like to have them.” He replied, “oh thank you very much, ma’am!” And took off his partially intact glove to reveal a horribly unmanicured hand. I placed the three largest cherry tomatoes in his hand and said, “Merry Christmas!” He smiled, his teeth telling another sad story of a life gone terribly wrong, and he said, “Thank you, ma’am! Merry Christmas.”

As we walked toward our car, Becca was silent for a couple of long minutes. I said, “That man probably hadn’t had fresh healthy vegetables like that in a long time. I’m glad we could share some of our tomatoes with him.” She was quiet. Then she spoke. “Mommy, that man doesn’t have a coat. I think he’s probly very cold.” “Yes baby, he probably is.” “We don’t have a coat we can give him, do we?” “No, baby, we don’t.” We got into the car, and she was very quiet.

She has recently started understanding something of the concept that God keeps us in his hands, because she frequently will say things like what she said as we drove away: “God will hold him and keep him warm, right, Mommy?” “Yes, sweetheart, I’m sure He will.”

Long minutes and several Christmas songs on the stereo passed before she spoke again. “I hope he likes tomatoes. They are too squirty for me.”

There’s my girl. Always thinking. Sometimes hours or even days later still reflecting on the same topic. I feel sure we haven’t heard the last of her thoughts about the would-be Santa and those three squirty tomatoes.

God bless her sweet little heart for caring so much. As a mom, it makes my heart so warm and fuzzy inside. May we as parents never hesitate to take those moments to teach our children by our actions how to care for God’s creatures- big and small. This Christmas, I’ll be thinking about that man, and praying that God brings someone his way who can give him some better clothes, and that as Becca said, God will hold him close and keep him warm.

/home/wpcom/public_html/wp-content/blogs.dir/33b/48337332/files/2014/12/img_1488.jpg
My girl with her sweet kitty cat, Toodles.

Candy Cane Science Experiment

When I was teaching, I remember one of my coworkers who taught 3rd grade doing this super fun experiment with her kids the day before Christmas break each year, and I thought I’d pull it out for Becca.  We had a blast together.


Here’s what you’ll need:
IMG_1575

4 clear plastic cups
Sharpee marker
3 cups HOT water (I microwaved for 2 mins)
1 tsp salt
1 tsp baking soda
1 cup vinegar
4 small candy canes
Paper to record your findings

As you can see, I labeled our cups, and drew a line where I had figured out 1 cup would be – so they’d all be equal.  We poured our hot water into the three water cups, and stirred to dissolve the salt and the baking soda.  Added our vinegar to the vinegar cup, then Becca did a quick taste of each candy cane to ensure authenticity and uniformity in our experiment.  She said they were all real. 😉  Then, we dropped one in each cup and began to observe.

IMG_1576IMG_1577

Here’s what we found… see what you find!  This would be really fun to do with red and white candy canes, and then do another set with candy canes of different colors to see how different colors react.

Initial observations:
Water had the most bubbles instantly.
Baking Soda Water turned the pink the fastest and left no red on the candy cane within one minute.
The vinegar had a definite divide between the pink liquid and clear liquid – the pink didn’t float up past the top of the candy cane.
The salt water seemed to have the most pink dispersed throughout the cup.IMG_1579

Ten minutes later:
The candy cane in the water was totally gone.
The candy cane in the baking soda was totally gone.
The candy cane in the salt water was mostly gone – Becca predicted it’d be all gone in 4 minutes (she was right!)
The candy cane in the vinegar was just a thin white piece – she predicted it’d be all gone in 6 minutes (she was right!)

IMG_1588

Two hours later:
All cups have a higher concentration of pink at the bottom than at the top, but the baking soda and plain water have some pink throughout.  The salt water has pink settled only at the bottom, and the vinegar has pink only at the bottom.