A Positive Focus for 2024

You may have heard of selecting a single word to focus your year, and it’s often a great practice either for the beginning of the calendar year, the beginning of the school year, or even on your birthday, to set the focus. Kids need this positivity now more than ever. Especially as they get into upper elementary school- when grades start mattering, tests get more complicated, chores pile on at home, and friendships can get complex. The drama builds with every step closer to puberty. So I sat down last December with one of our school counselors to talk about what we could do to shift their focus from the up coming STAAR testing season (our Texas State achievement tests) to something POSITIVE, and in the form of some digital art work that we could do in my technology classroom.

ALL of the completed mittens!

It’s important for kids to learn Google Slides (similar to PowerPoint) skills in a FUN way, and with lots of trial and error… so I wanted to do a digital artwork project that would allow them to play with WordArt, fonts, colors, inserting images, rotation, resizing, and so many more skills. Our counselor loved the idea of a positive word focus, and we decided on a mitten shape, and a set of 8 words they could chose from.

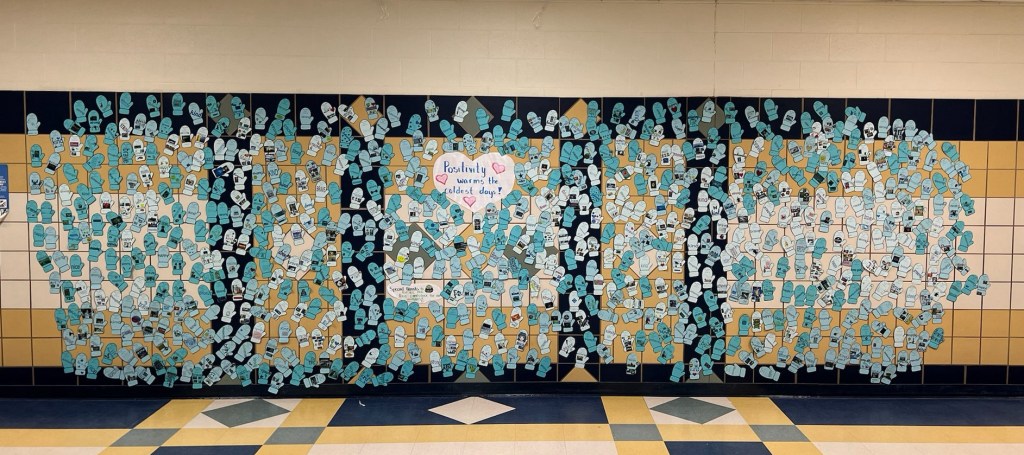
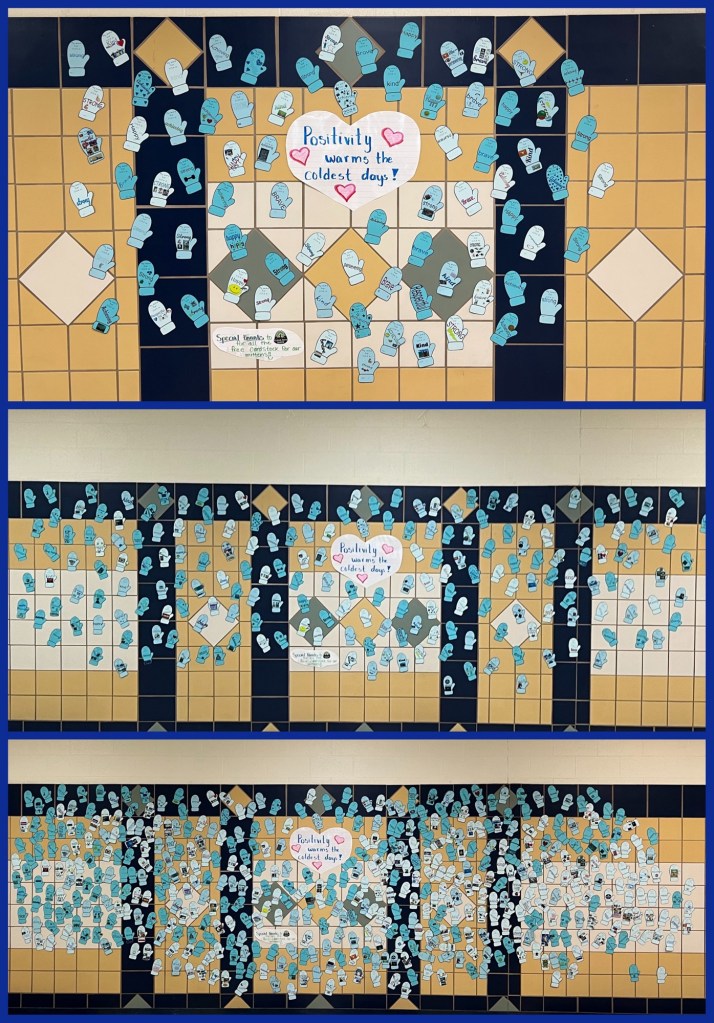
Then I contacted Andrew, my partner over at Clear Path Paper. There was only one way we’d be able to do the project up right, where we could display the mittens in the main hallway. They’d have to be on high quality cardstock, so that kids brushing up against them wouldn’t just rip them. And Andrew not only loved the project, he DONATED all of the paper we needed. Once again, Clear Path Paper showed how they care about teachers and their projects! We decided to do similar shades of light blues, but with a different shade for each of the three grade levels at our school. So he sent over enough 100lb Baby Blue, Light Cadet Blue, and Teal Blue to print two mittens per sheet for 700+ students!!!

Not only were the students intruiged by the project, MANY of them mentioned being surprised that a company would care enough about them and their art work to simply GIVE them paper. So it worked not only to get them in a positive mindset, but also to help them feel like they AND their art/artistic expressions really ARE important. ❤️ Talk about a blessing in so many ways!!

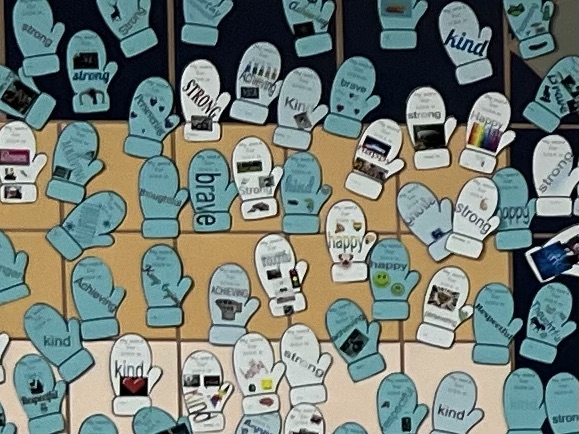
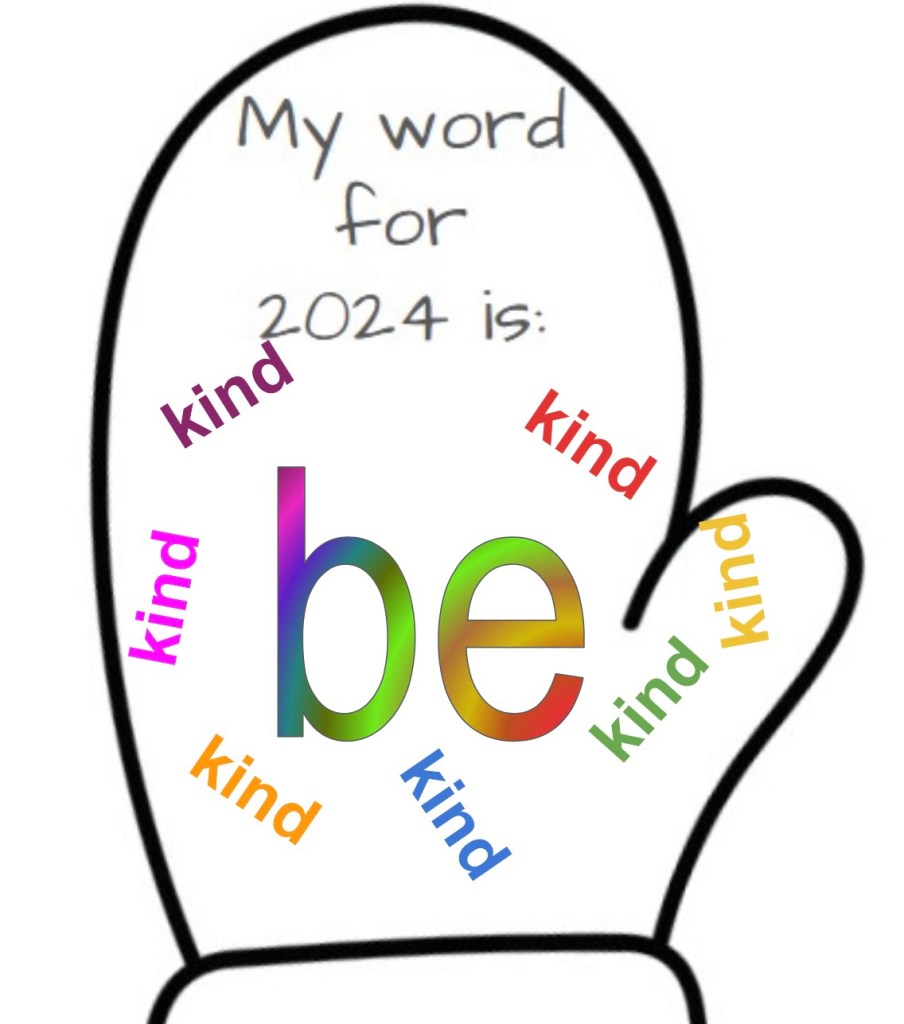
I set up the project in Google Slides, and assigned thru Google Classroom. Because many of my third graders are new to editing in Slides, I set the mitten pattern (with the words “My word for 2024 is:”) as the background of the slide, so it wouldn’t be easy to accidentally delete it. The kids loved learning how to create WordArt colorful fills, and some decided to add clipart or photos that went along with their word, while others just did a theme they like- like dinosaurs, cats, race cars, or their favorite college sports teams. The beauty in each mitten is the individuality, and seeing that while they each selected from a list of the same eight words, there are individual creative touches making each mitten unique, just like it’s designer.

The project took longer than I anticipated on the administrative end, and if you decide to do a project like this for your entire school, I have a few tips to suggest:

1) Create a separate Google Classroom for each day of your electives rotation, making it easier to locate with classes and students’ work you’ve printed.

2) Due to privacy laws, we can’t have student work posted in the main hallway with last names or major identifying features. SO! I assigned each classroom teacher a number, and had students put that number next to their first name on their mitten, so that when they come down off the wall in a few weeks, I can get them back to them to take home. With over 700 students, we have LOTS of repeat names… and I’m not going to hunt down the 5 Grayson’s and see whose is whose! (Using that example, b/c that’s my son’s name.)

3) As you print the mittens when they are turned in on Google Classroom, mark off a classlist for each class so that it’s easy to go back and see who you’re missing, who needs to be printed, etc.

4) Make sure you have really good sharp scissors! 100lb cardstock is fabulous for this project, but if you’re cutting a shape, you need to make use of your time and cut at least two at a time, so make sure those scissors are sharp! Better yet, cut into rectangles on your paper cutter to save your handwork!!!

Pre-cutting, when I had only sliced the sheets in 1/2

5) Get a club or class of kids to help you hang them up! It’s very time consuming to put them all on the wall… but it’s so worth it, and getting kids to help hang them adds even more ownership of the project! This might be a fabulous project for your Student Council or other service group!

Seeing the wall get fuller and fuller of mittens over the course of a few weeks was so fun!

6) Differentiation is possibly the most difficult task that teachers face today. We have a select group of students with more extensive need than can be met in the General Education classrooms – both medical and intellectual disabilities – but I wanted them to still be able to participate!! I set up a Google Slide set where I already had each child’s name on their mitten, and had four of the eight words typed into WordArt off to the side, just ready for color to be added. I also selected 20 random cute cliparts that I put on the other side of the slide for them to pick from. I called them to my computer while they were in the lab, and let each of them pick their favorite word, tell me 3-5 colors they like, select a linear or radial color pattern, and then pick all the clipart they liked. Each one really enjoyed not only getting to design their mitten, but find them in the hallway once they were hung up! It’s not always super easy to find ways to include everyone, but it’s always worth it to make them feel just as important as everyone else. ❤️

A few of the mittens our ALE students designed with my help

Teacher Tech Tip Tuesday

So I decided that every couple of weeks, I’ll share a tech tip to help (hopefully) make your teaching life easier!

I’m going to start with my FAVORITE classroom tool, which is a totally FREE resource, tho it does offer even more features for a paid membership. I just use the free version.

Classroomscreen.com is epic, yall.

A view of my screen for this elective rotation

Easily customize your screen with lots of background options, clock, count down timer, and more! You can add images, and can even totally customize a traffic light. (Mine says “No talking” for red, “Quiet Table Talk” for yellow, and “Inside voices” for green).

If you’re running it off of a device with a microphone, you can even set a volume detector alarm in case your class has a tendency to lose track of their volume when working on projects. (Note- some classes respond well with this, while others will simply try to make the alarm go off to hear it make a noise… so, know your audience! Ha!)

There is also a recently added feature for smart boards which allows you to write on top of your classroom screen instead of having to open a new window or switch over to your whiteboard feature. This is PHENOMINAL! I love being able to write a quick note. It also erases super cool- by taking away the whole line or letter you wrote all at once, not having to swipe over the entire thing. Swipe one line thru the center of your word, and the whole word disappears! Super cool.

Here I’ve shown the write/highlight/paint/draw shapes feature. LOTS of options I haven’t even used yet.

You can also type on the screen, attach youtube videos (as long as they don’t have a live chat- I haven’t ever been able to get it to show a video that had live chat attached), and do so much more!

I attach photos of my tasks for each class, as well as my inspirational quote for each rotation, and it’s easy to switch out the photos for each grade level in just two clicks after the intial morning set up.

Once you get used to the format, I can go from a completely blank Classroomscreen to ready to use in literally two minutes. I highly recommend this program for ALL teachers- it WILL revitalize your classroom instruction.

I am NOT a paid affiliate for this program, just a teacher who has used it over a year now and absolutely love it so much, that I had to share!!

Let me know if you try it- I’m sure you’ll love it, too! I have shared with so many teachers who have started using it and love it! Enjoy!

A Fresh Start

This school year, I have started over.

After deciding that I needed to spend more time with my kids as mom, I took a step toward resigning my teaching career for a while. My principal and other administrators understood. I needed a clock-in, clock-out job where I could go home and be a mom, not working 24-7 on paperwork and planning for meetings.

Then, this summer God opened a whole new doorway. The paraprofessional who had been the technology instructor decided to work elsewhere, and a friend let me know the position had been posted. I started praying about it, and decided to apply. I prayed that God would make the decision for me – and the door would either be so wide open there was no doubt, or it would be slammed in my face. That of course, made me super nervous in the interview. Because I knew that God’s answer might be no… and I might not get the job despite having worked with the people on the committee for the past three years.

However, that wasn’t His plan. Before the interview was over, I was told the position was mine, and they were so excited to have me in this role. Such a huge blessing it has been. Four weeks in, and I’m loving my new job, and the stress level is SO much lower! I still get to see some of my former special needs students, while also instructing everyone else on technology, as well. I have my own classroom to decorate. PLUS, I get to work with the electives team, which consists of some fabulous ladies who were already my friends, but now are my TEAM. I am beyond blessed!

Look for a new post coming soon about how I have my computer lab organized and decorated… and a super fun paper project that my mom and my partners over at Clear Path Paper are helping me with! 🙂

Until then, be blessed!

Teaching Graphs

I’m not going to begin to put an age level on this lesson because I’ve sort of lost all realistic memory of when is the “right time” to do this type of activity.  SO, I’ll say that if you think it might be time for your child, you might be right!

Graphing is so much fun.  And it’s even more fun when you add in a technology element and work with your child to set them up in Excel or Numbers!  I have a Mac, so our work was done in Numbers.  The first step before creating any graphs, however, is to collect data.

I came across this insect survey free on TPT and thought, somehow I have to make this work for Becca even though there isn’t a class full of kids to survey!  Enter social media.  I polled Facebook through my page (thanks to several friends and family members who shared my post!) and we received over 30 responses!

tally sheet

As I scrolled through the responses, I would read them out to Becca, and she learned about making tally marks.  She would mark the sheet, and then once we had recorded all of the answers, we counted the marks and I wrote how many of each insect had been “favorited” by our participants.  Making tally marks was a new experience for her, and she wanted to circle the groups of four instead of making a line through them for five to group them together.  Cody and I were both there for this lesson, and we had to explain to her that this isn’t something you can do however which way you want – to make tally marks, this IS the way to do it.  No other options.  She wasn’t real sure about that, which I dealt with again with her when we did our second grouping of data, which I’ll talk about later in this same post.

So, once we had the numbers for our insects, I pulled up Numbers and immediately set up a little data table.  She read off the insect names to me and how many of each one.  Then she decided what title we should put on our table.  I knew that I wanted to teach her about pie graphs AND bar graphs (she has seen some bar graphs before, but it’s been a while), so I first put the information into a pie graph, and she was immediately intrigued – she helped me select the colors that she wanted, and was very pleased.  She started asking questions about what % means… and I skirted around it by simply saying, it’s what part of the whole group it is – sort of like fractions.  She said “oh” and was actually content with that.  No doubt  percentages will be entering our math time very soon.  Then I let her select whether she wanted a vertical or horizontal bar graph, and she selected the color.  She decided that she needed some pictures of her top favorite insect to make it look a little “happier,” so I pulled up Google images, and had her type in “butterfly.”  She selected the image and I showed her how to save it.  Then she also saved a dragonfly and a ladybug.  I showed her how to import her photos into the document, and once I got them the right size, she dragged them to where she wanted them.  I had her tell me about her graphs and typed her words onto the “poster” as well.  We printed it out on card stock, and she was so proud to show her daddy!

becca w graph
Left: she typed in the words to save it to my computer, and was quite frustrated wanting to know what crazy person put the letters in the wrong order on the keyboard! HA!

Then, a couple days later, we colored Easter eggs with some dear friends.  And we had ALL. THESE. DANG. EGGS!  What to do with them all?  So after she had spent a good amount of time sticking butterfly stickers all over them, we sat down and made a tally of how many eggs we had of each color, and I had her draw a bar graph on paper so she would have the physical concept of what the bars show.  We talked about how “this is what three orange eggs look like in real life, and this is what they look like in tally marks, and this is what they look like on a bar graph!”  She said “that’s cool let’s put them on your computer.”  Hey, what can I say?  It’s really fun to make “graph posters” on Numbers!  So, for ease (and because it was almost bedtime) I pulled up her previous file, renamed and saved it as a new file, and then had her tell me the new data to type in.  She was quick to notice that I needed to change my titles on the data table, and told me what names I needed.  Instead of types of insects, I needed colors of eggs!  She decided this poster needed different graph colors, and of course it needed Easter egg images.  We also edited our text, and in about 7 minutes, we had a whole new graph poster about our Easter eggs!  We printed it and she was so excited again to show it off to her Daddy!

eggs

This is a super simple way to get your child talking about Science and Math AND to incorporate the Technology aspect of STEM as well.  Don’t have a computer or experience with Excel/Numbers?  No problem!  Drawing on paper can be awesome as well – you could draw on copy paper, cut them out, and post them onto a large sheet of construction paper!  Clip photos from magazines, or illustrate yourself with paints and markers!

I’ve noticed since doing these graphs, Becca is much more interested in Math again – not shying away from addition and subtraction story problems, and excited to count and sit to learn new math concepts as well.  Remember – Math HAS to be FUN!!!  Make it that way!

insect survey

egg graphs