Creating a “Quiet Place”

If you’ve been reading my blog or following me on Facebook for any amount of time, you have probably gathered that (if not directly read) Becca has some sensory processing issues.  In all of my research about Sensory Processing Disorder (SPD), I have learned that this disorder is so vast and so extremely different from one child to another that it’s super hard to quantify.  I would say on a scale of 1-10, with 1 being barely having SPD or 10 being having severe SPD that totally makes the child unable to function, Becca is probably (on most days) about a 3.  On most days, she does really well.  Especially now that we have identified her needs, and identified her triggers that cause problems.  We can usually head things off at the pass before they become a real issue.

Another thing that has helped her immensely has been having places in our house to call her own.  She is a very independent child who likes to be left alone.  Obviously, not all kids with SPD have this character trait.  But, for those who do, I HIGHLY recommend setting up a very small, cozy spot in the main area of your home as a “Quiet Place.”  The Quiet Place idea was born actually in Cody’s mind, as we struggled with her through mealtimes.  The thought was that if she felt she needed to quiet down, she could go there.  So, our Quiet Place is in our dining room, right next to the table.
quiet place

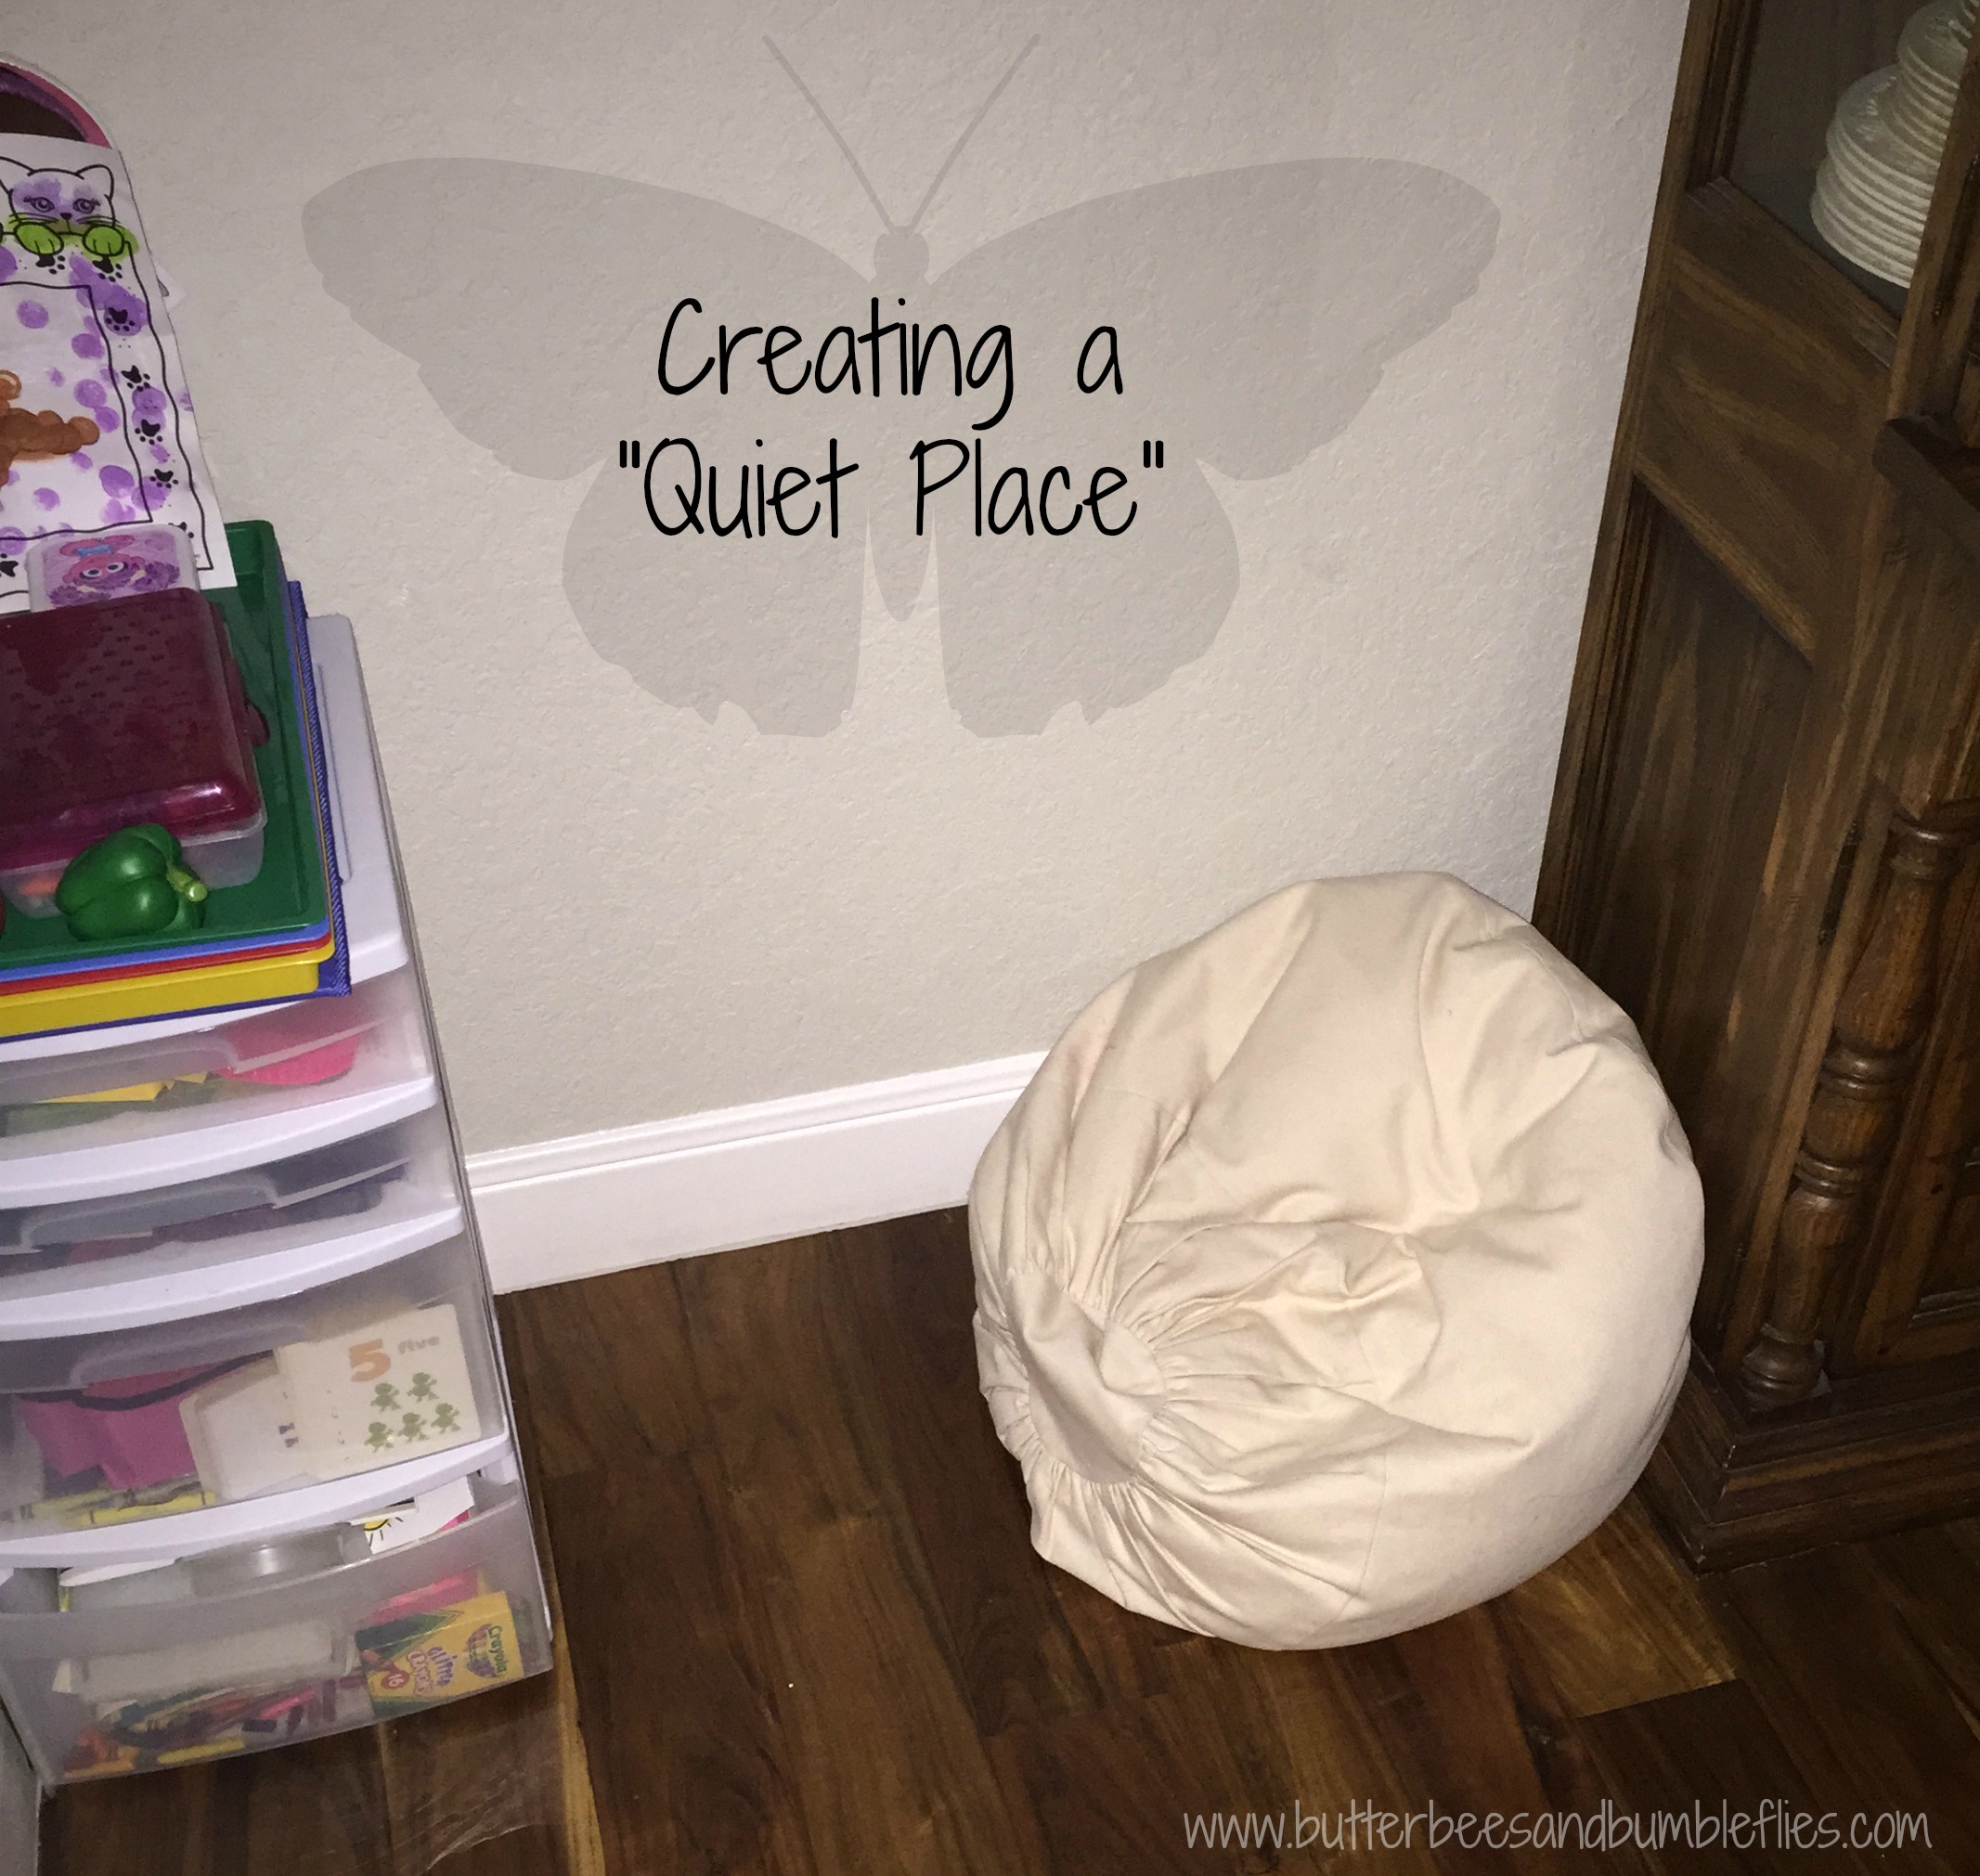
Wedged between our China hutch, and her little art station, it’s just what the picture shows – a bean bag. SUPER SIMPLE.  We introduced it to her and told her it’s her special “Quiet Place” – a place where she can take a rest anytime she needs to get away.  I truly had no idea if she would really put herself in time out when she needed it.  It was a leap of faith, and honestly, Cody really really gets her in a way that I often don’t… so when he has an idea, I run with it!

This has been a fabulous thing for her.  When we first introduced it, I went to the “Quiet Place” with her and we’d pull a foam puzzle out of her art station and work it together, practicing whispering.  The first few weeks, I had to really encourage her to go over there – “Why don’t you take this book to your Quiet Place?”  Or “Why don’t you take this animal habitat to your Quiet Place?”  Now, if I can’t find her, that’s where she is.  Every. Single. Time.  She has learned that if she just needs to escape whatever situation is bothering her, she can go there.  I love that she finds comfort and shelter when she needs it.

For her, when she has a sensory trigger go off, it doesn’t always instigate a total crying meltdown.  It can start up really hateful behavior, or it can just cause her to completely shutdown.  More than once, I have seen her almost zombie-walk to her Quiet Place, and fall onto the beanbag.  At that point, I turn off ANYTHING that is making noise, and if Grayson is awake, I take him into his room to play, and tell her she can come in when she’s ready before I shut the door.  Usually within 5 minutes, she’s back to normal and joining us again.

Finding what works for your child is a great challenge for ANY parent of ANY child.  But if that child has any sort of special need whatsoever – be it mental, emotional, physical, or dietary, the challenge is so much greater.  It is my hope that as we find things that are consistently successful for her, I can share them with you so that maybe, just maybe our tried-and-true ideas will help someone else.  The bonus about this specific idea is that it’s not a bad idea for any child to have their own “Quiet Place.”  Call it whatever you will, no matter the level of “normal” or “need,” every single child loves to have things to call their own – and their own special place is just the icing on the cake.

Have multiple kids?  Share the idea with them, and have them select what spot (of your pre-selected ideal areas) would be their own.  Over time, you could teach them that they could go there when they are frustrated with a sibling, take time to breathe, and then go back to play.  I could see that seriously cutting down on fights if they were able to pull themselves away in the heat of the moment.  (And with a little training, Becca’s total shutdown zombie-walks tell me that IS possible!)

I hope this idea is helpful – let me know your thoughts!!

Painting – With Cars

art

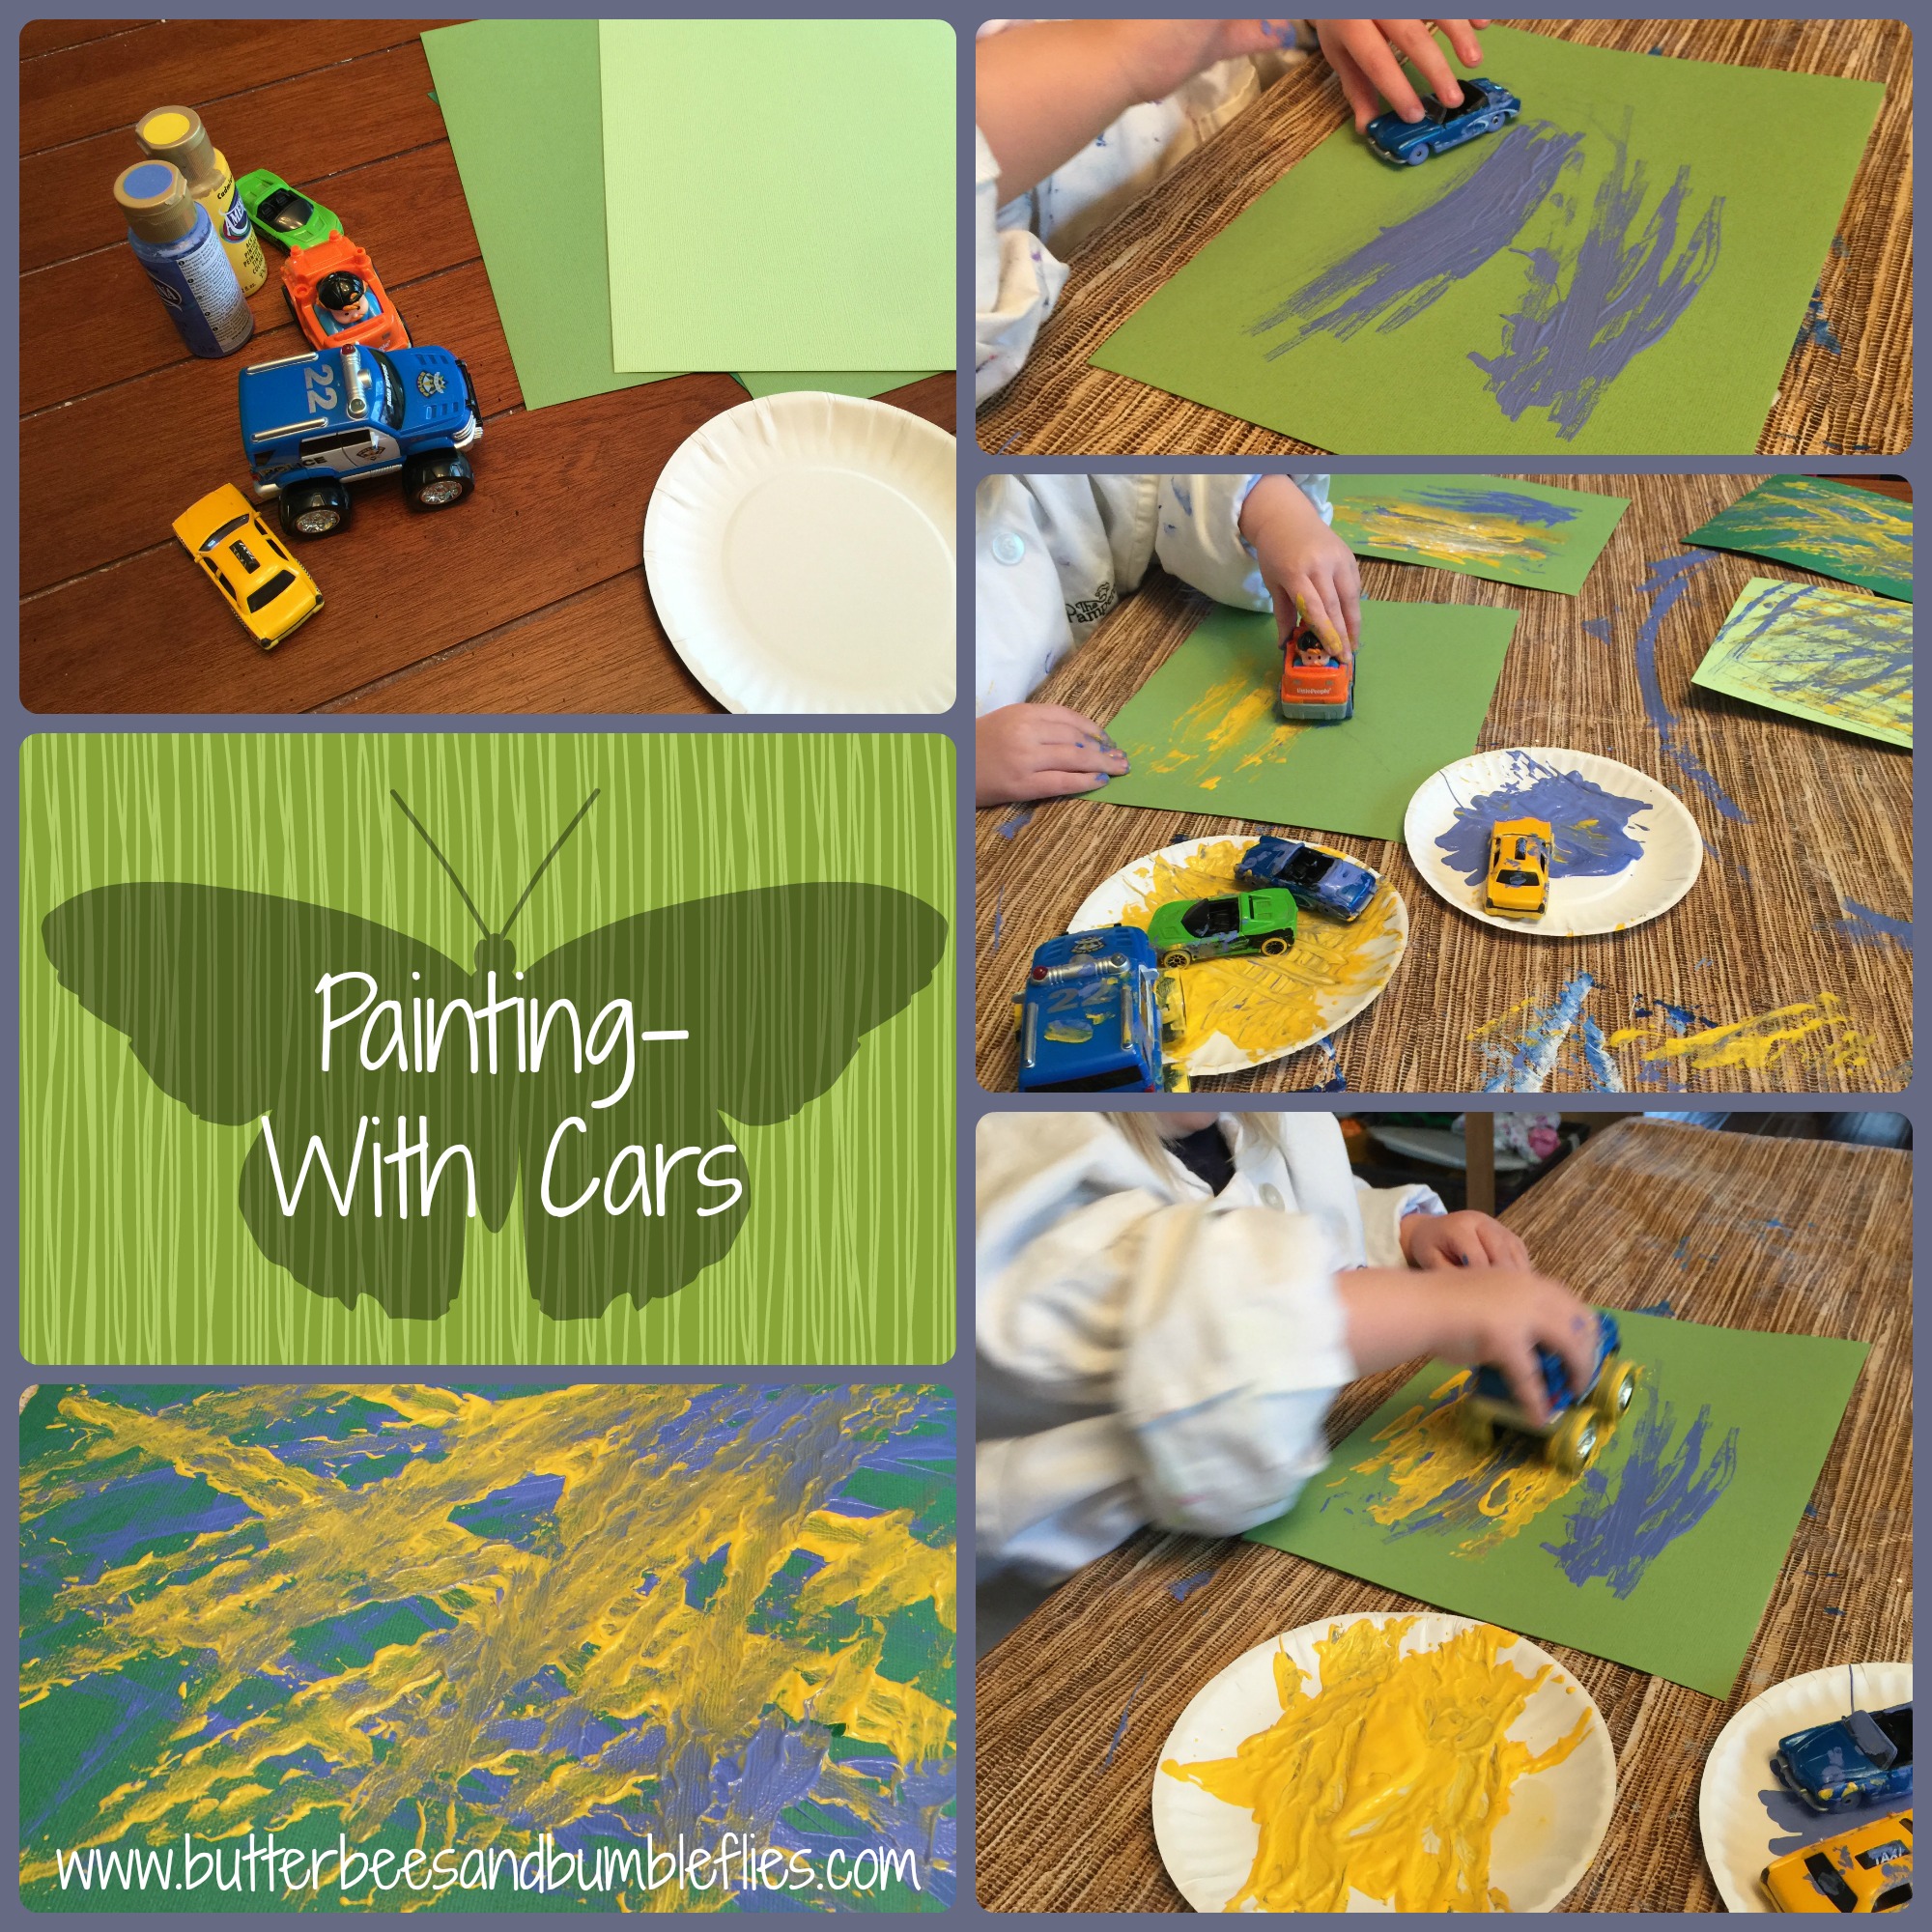
On my own, I never would have thought of taking Becca’s cars and running them around on paper… after running them through paint.  But there is a really neat place here in town called Artworks Studio that has a great “open art” play time.  Our MOPS group went to it and one of the activities was painting with a car.  Becca LOVED it.  So, I decided to recreate that activity at home with some of her cars – and her monster truck.  Note that yes, we did use acrylic paint, and yes, some little bits of it stuck permanently to the cars. That wasn’t a problem for us.  If you want to maintain your cars, be sure to use something washable like a fingerpaint.  We had a really great time with this, and then were able to take one of our sheets and immediately turn it into something super useful – I punched flowers and butterflies out of one of the pages and ran them through my Xyron Create-a-Sticker Sticker Maker (aff link – thank you!) and Becca was able to use the stickers on a birthday card to send to my grandma.  So it was really neat to mail out some of her art the next day afterward.  Usually we keep it around to use for our 2016 calendar.  Here are a few pictures of our fun… and yes, Becca painted her hands.  I just didn’t fit those pics into the collage.  This silly girl… can’t paint anything without totally painting her hands!
painting with cars

I’d love to have you follow my Facebook page, where I share fun ideas from lots of bloggers, as well as run a special series each day at noon where I share favorite books to help build your home or classroom library.  Please note that the way Facebook selects pages to view on your timeline is based on your interaction with that page.  Be sure to click on over to my page frequently to see what Facebook might not be showing you, and click “like”, “comment”, and “share” on my posts to ensure that Facebook will show you what’s going on on the page!  The more you interact, the more that should show up on your news feed!  www.facebook.com/butterbeesandbumbleflies 

Whew.

Whew.  I’m really not sure where the past couple of weeks have gone.  I am NOT a night owl, but I’m writing this at currently 10:37pm CST on Sunday night.  I have one post done for this week – Friday’s Fun with Art segment was super super fun and it’s ready to post.  The rest of this coming week?  Well, this past week was super busy in our house, and it’s been one of those weeks where I have met myself coming back.  My sweetheart helped me conquer the literal mountain of laundry this weekend, and somehow between the two of us, the 8 (or was it 9?) loads got washed, dried, folded/hung, and put away.  There are clean dishes all over one counter, a dishwasher full of more clean dishes, and a sink overflowing with dirty dishes.  This is what I get for cooking all weekend long.  I have great aspirations for the upcoming week because it seems to be a tad slower than last week and hopefully will give me some time to catch my breath.  I love living a busy life, because I am an extrovert, after all… and it’s good for me to be out and about and involved in lots of things.  But, down time is wonderful too, and I’m looking forward to time to get my kitchen back in order (before hopefully baking a bunch of cookies tomorrow afternoon), and to do some more fabulous projects with Becca to share with you.  Because honestly, last week was  a whole bunch of playing with trains, playing outside, and watching tv.  Which is good.  Because if I had had to do much in the way of projects last week I probably would have pulled all my hair out.  Grayson is crawling EVERYWHERE and is into EVERYTHING now!!  So yeah, ya know… Whew.  Love my babies.  Love my job.  Love being a work at home mom.  Love my hubby and our home.  But whew.  Looking forward to loving being home and getting it clean this week.  Like really clean.  I might even wipe down the blinds in our bedroom.  Because I’m pretty sure the dust has been there oh, since the day we moved in… and might be contributing to my allergy issues… yeah.  Whew.

This post has been the true definition of a rambling.  But I take the time every now and then to post these because I want you to know I’m real.  My house regularly chews me up and spits me out.  And that’s just the house.  The kids regularly chew and spit – all over me.  (Well, one of them does anyway.  Thank the Lord the other one is past that phase.  Altho as soon as I type this I know she’ll end up sick and throwing up all over me and I’ll live to regret that comment… ha!)

Whew.  So.  Enjoy your week.  Enjoy my Fun with Art post on Friday.  And please please please, wonder on over to my Facebook page and check out my daily book share at noon each day, and do follow my posts because seriously, Facebook’s selection of who sees what on their timeline really sucks.

Have a great week!  I’ll be back next week with some fun stuff you’re sure to love.  Or my name isn’t “Mommy, I’m hungry!”  “Mommy, can I have a snack?”  “Ma – ma – ba – ba – mih – mih”  “WAAAAAA”

Everybody eats.  Seriously folks, everybody eats in this house.

Super Simple Playdough

Happy Valentine’s Day!!  If you’re like me, this day has snuck up quickly – quicker than usual, it seems.  And somehow I recently realized that I haven’t made any play dough since Christmas.  Yeah.  We go in phases of play around here, and we’ve been out of a play dough mode for a while.  But, Becca’s been asking for some, so I thought I’d make her a wonderful surprise and make glitter play dough!  So, I looked online at a million different recipes and decided that I guess I’m just lazy.  Or maybe I’m stuck in a rut.  But whatever it is, I’m just not willing to try a new play dough recipe.  I like mine, and I’m stickin’ to it!

Maybe you’ve been looking for an EASY recipe, too.  So many of them require the stove or an electric skillet.  And honestly, this was the first time I made my recipe without the electric skillet, and I felt so silly that I had ever used it in the first place!!  Here’s what you need to do to make my Super Simple Playdough.

super simple play dough

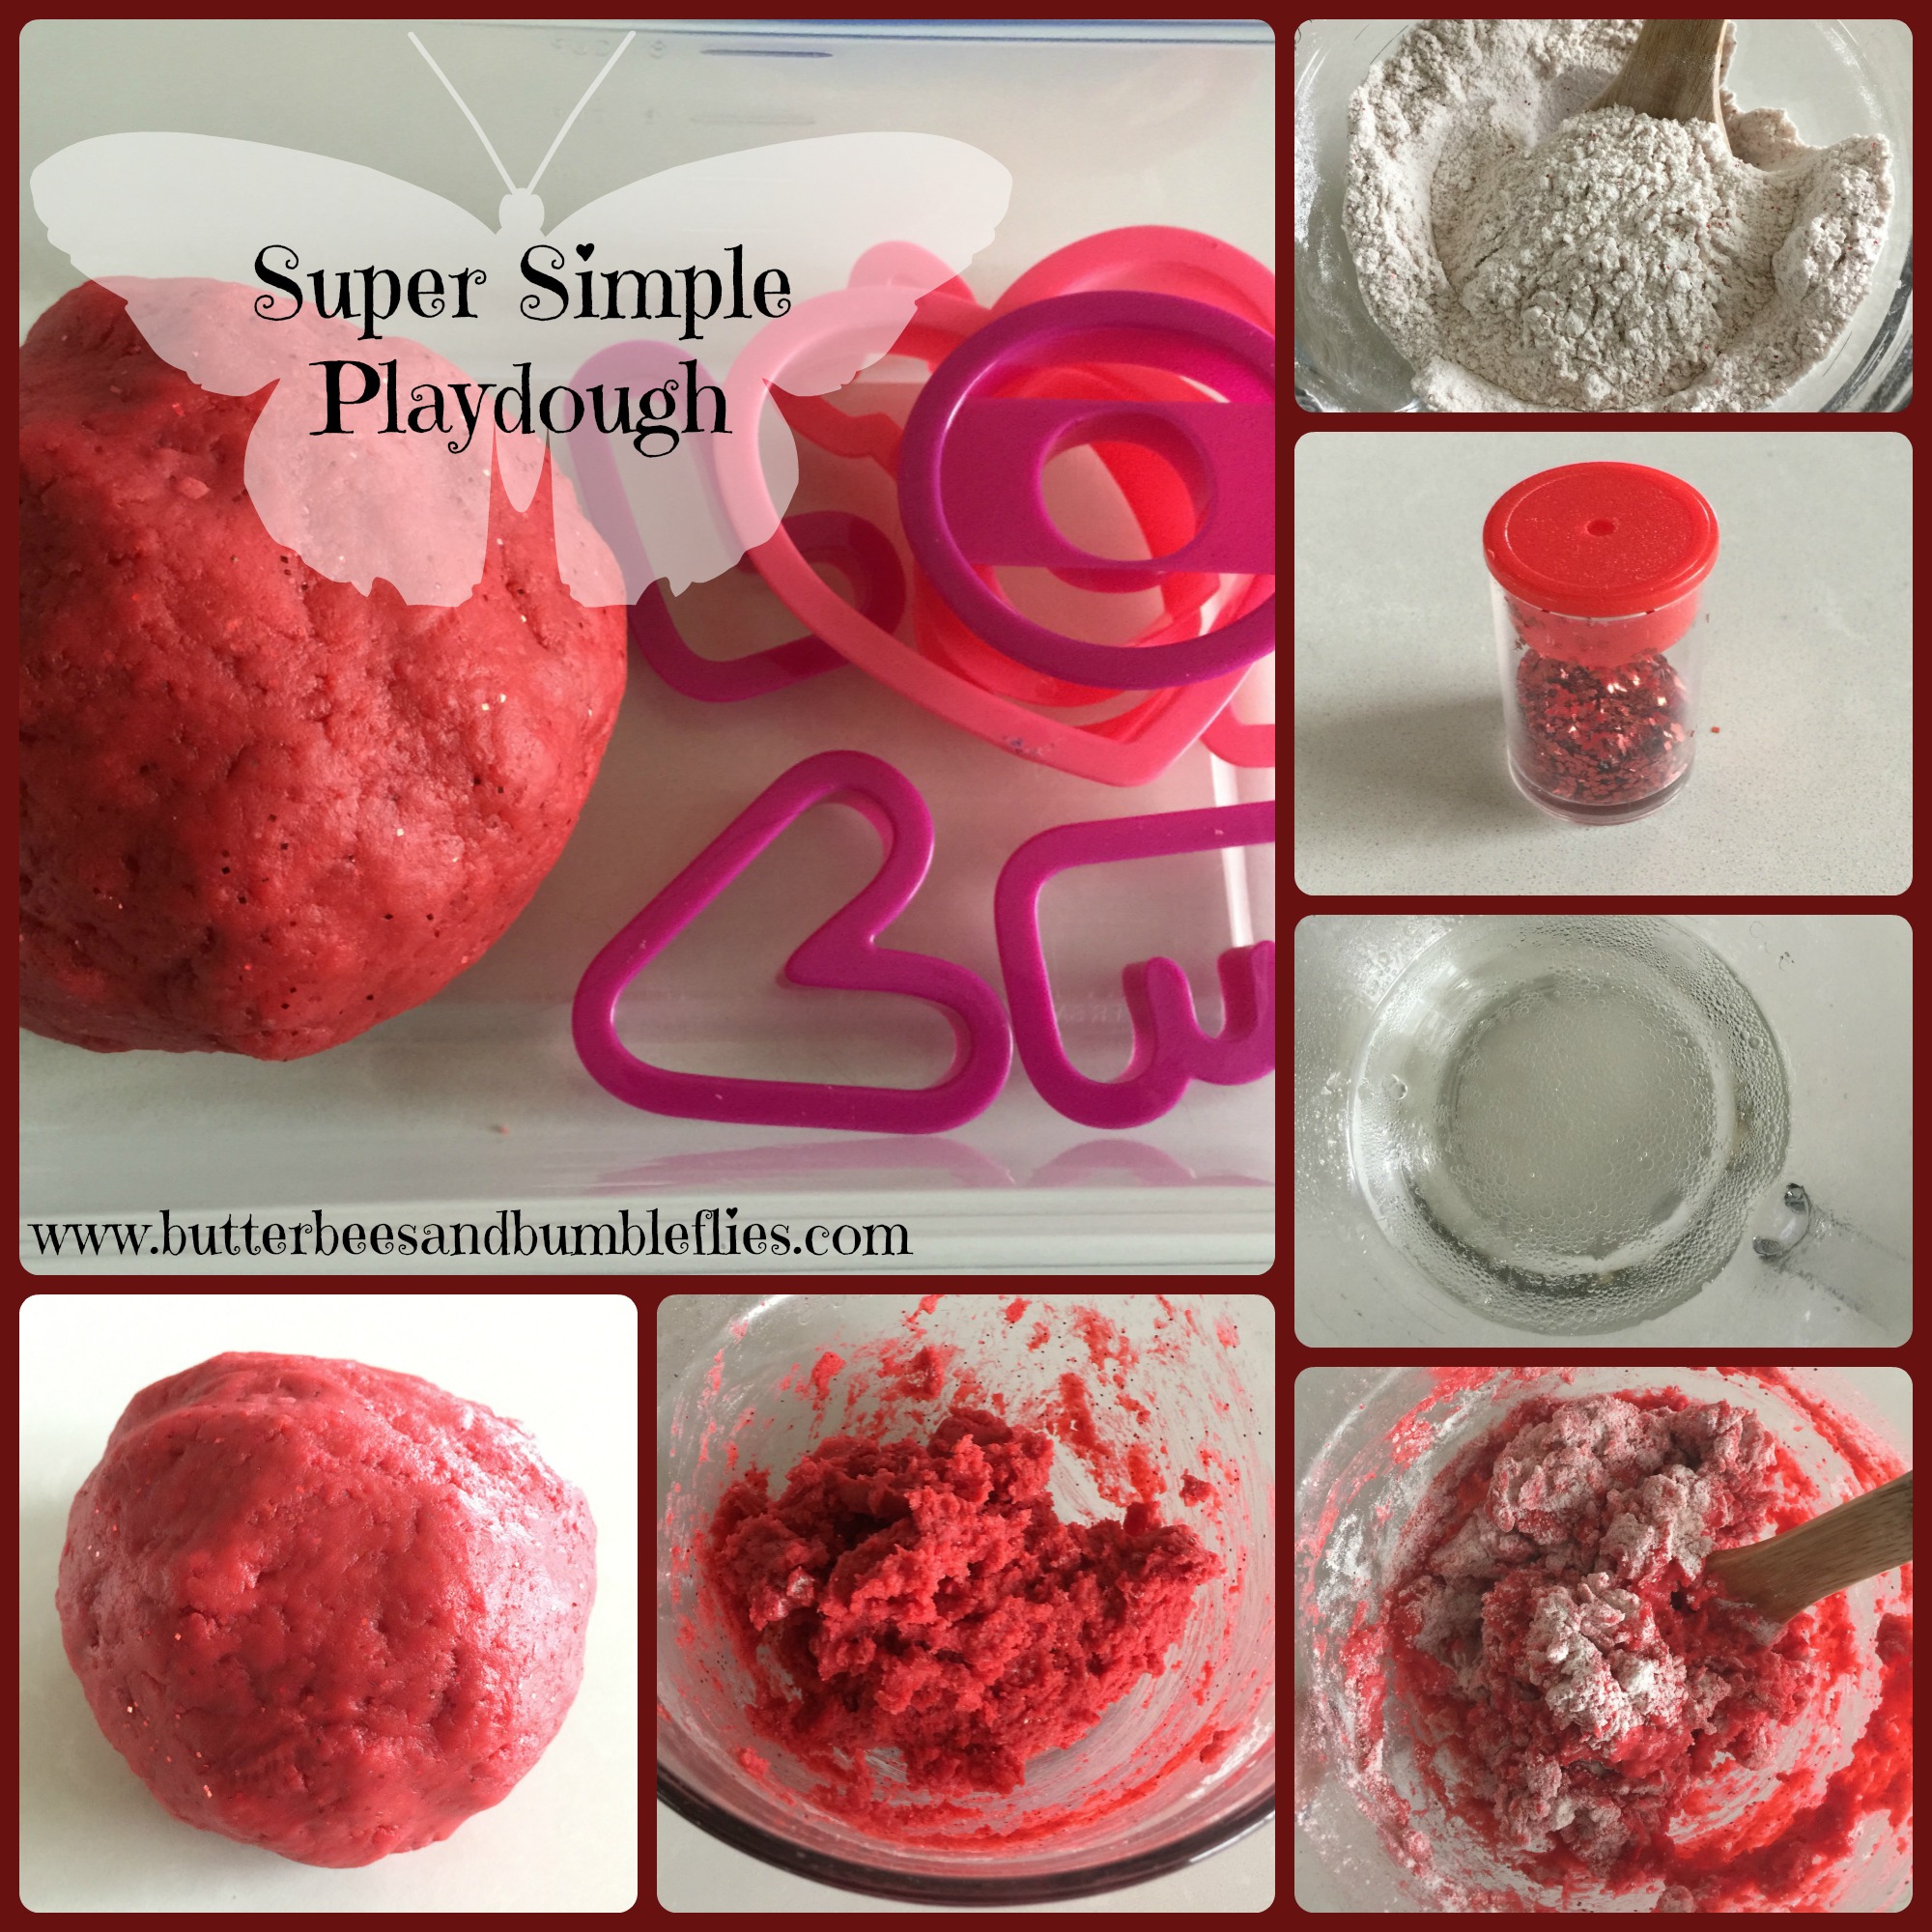
In a bowl, mix together 1 cup of flour, a little less than 1/2 cup table salt, 2 tsp cream of tartar, three packages of your favorite Koolaid for vibrant color (I used cherry for this to make it red.  Fyi though, if you do grape wanting to make purple, only use one pack b/c three comes out almost black), and then if you want, stir in some glitter, too.

In a larger mixing bowl, heat 1 1/4 cups water and 1 overflowing Tbsp of vegetable oil.  Make sure it’s boiling when you pull it out – I heated mine for 3 minutes.  Dump in your dry ingredients and stir well.  You’ll have a sticky mass in your bowl.  Let it cool for about an hour.  Then it’s ready to be played with!  No adding extra flour or any stovetop mess!  Super simple.

Store it in an airtight container, and it’ll be great for play for a couple of weeks.  After that point, you’ll need to add flour if you want it to not be sticky… or just throw it away and make a new color/scent!

So if this Valentine’s Day you need something fun to occupy the troops… pull out a few packs of cherry Koolaid and make some play dough! 🙂

NOTE: If you don’t have any Koolaid on hand, food coloring works just as well – add it to the boiling water.  You can add a drop of essential oil to the water for a scent if you’d like.  If you have a child who is eager to dive in and doesn’t mind the CAUTION – HOT! dough, you can throw a little flour on the counter and let them go ahead and dive in to kneading the dough as soon as it is mixed!

Bubble Painting

art

Well, once again, the link that I had to credit this idea to has disappeared from my Safari tabs, and Googling has not produced the blog post that I originally saw.  So, as with most things, please know that I’m not the original genius who thought this up… I’m just the Mommy who made it happen in our home and is now sharing with you so you can try it too!!

bubble painting

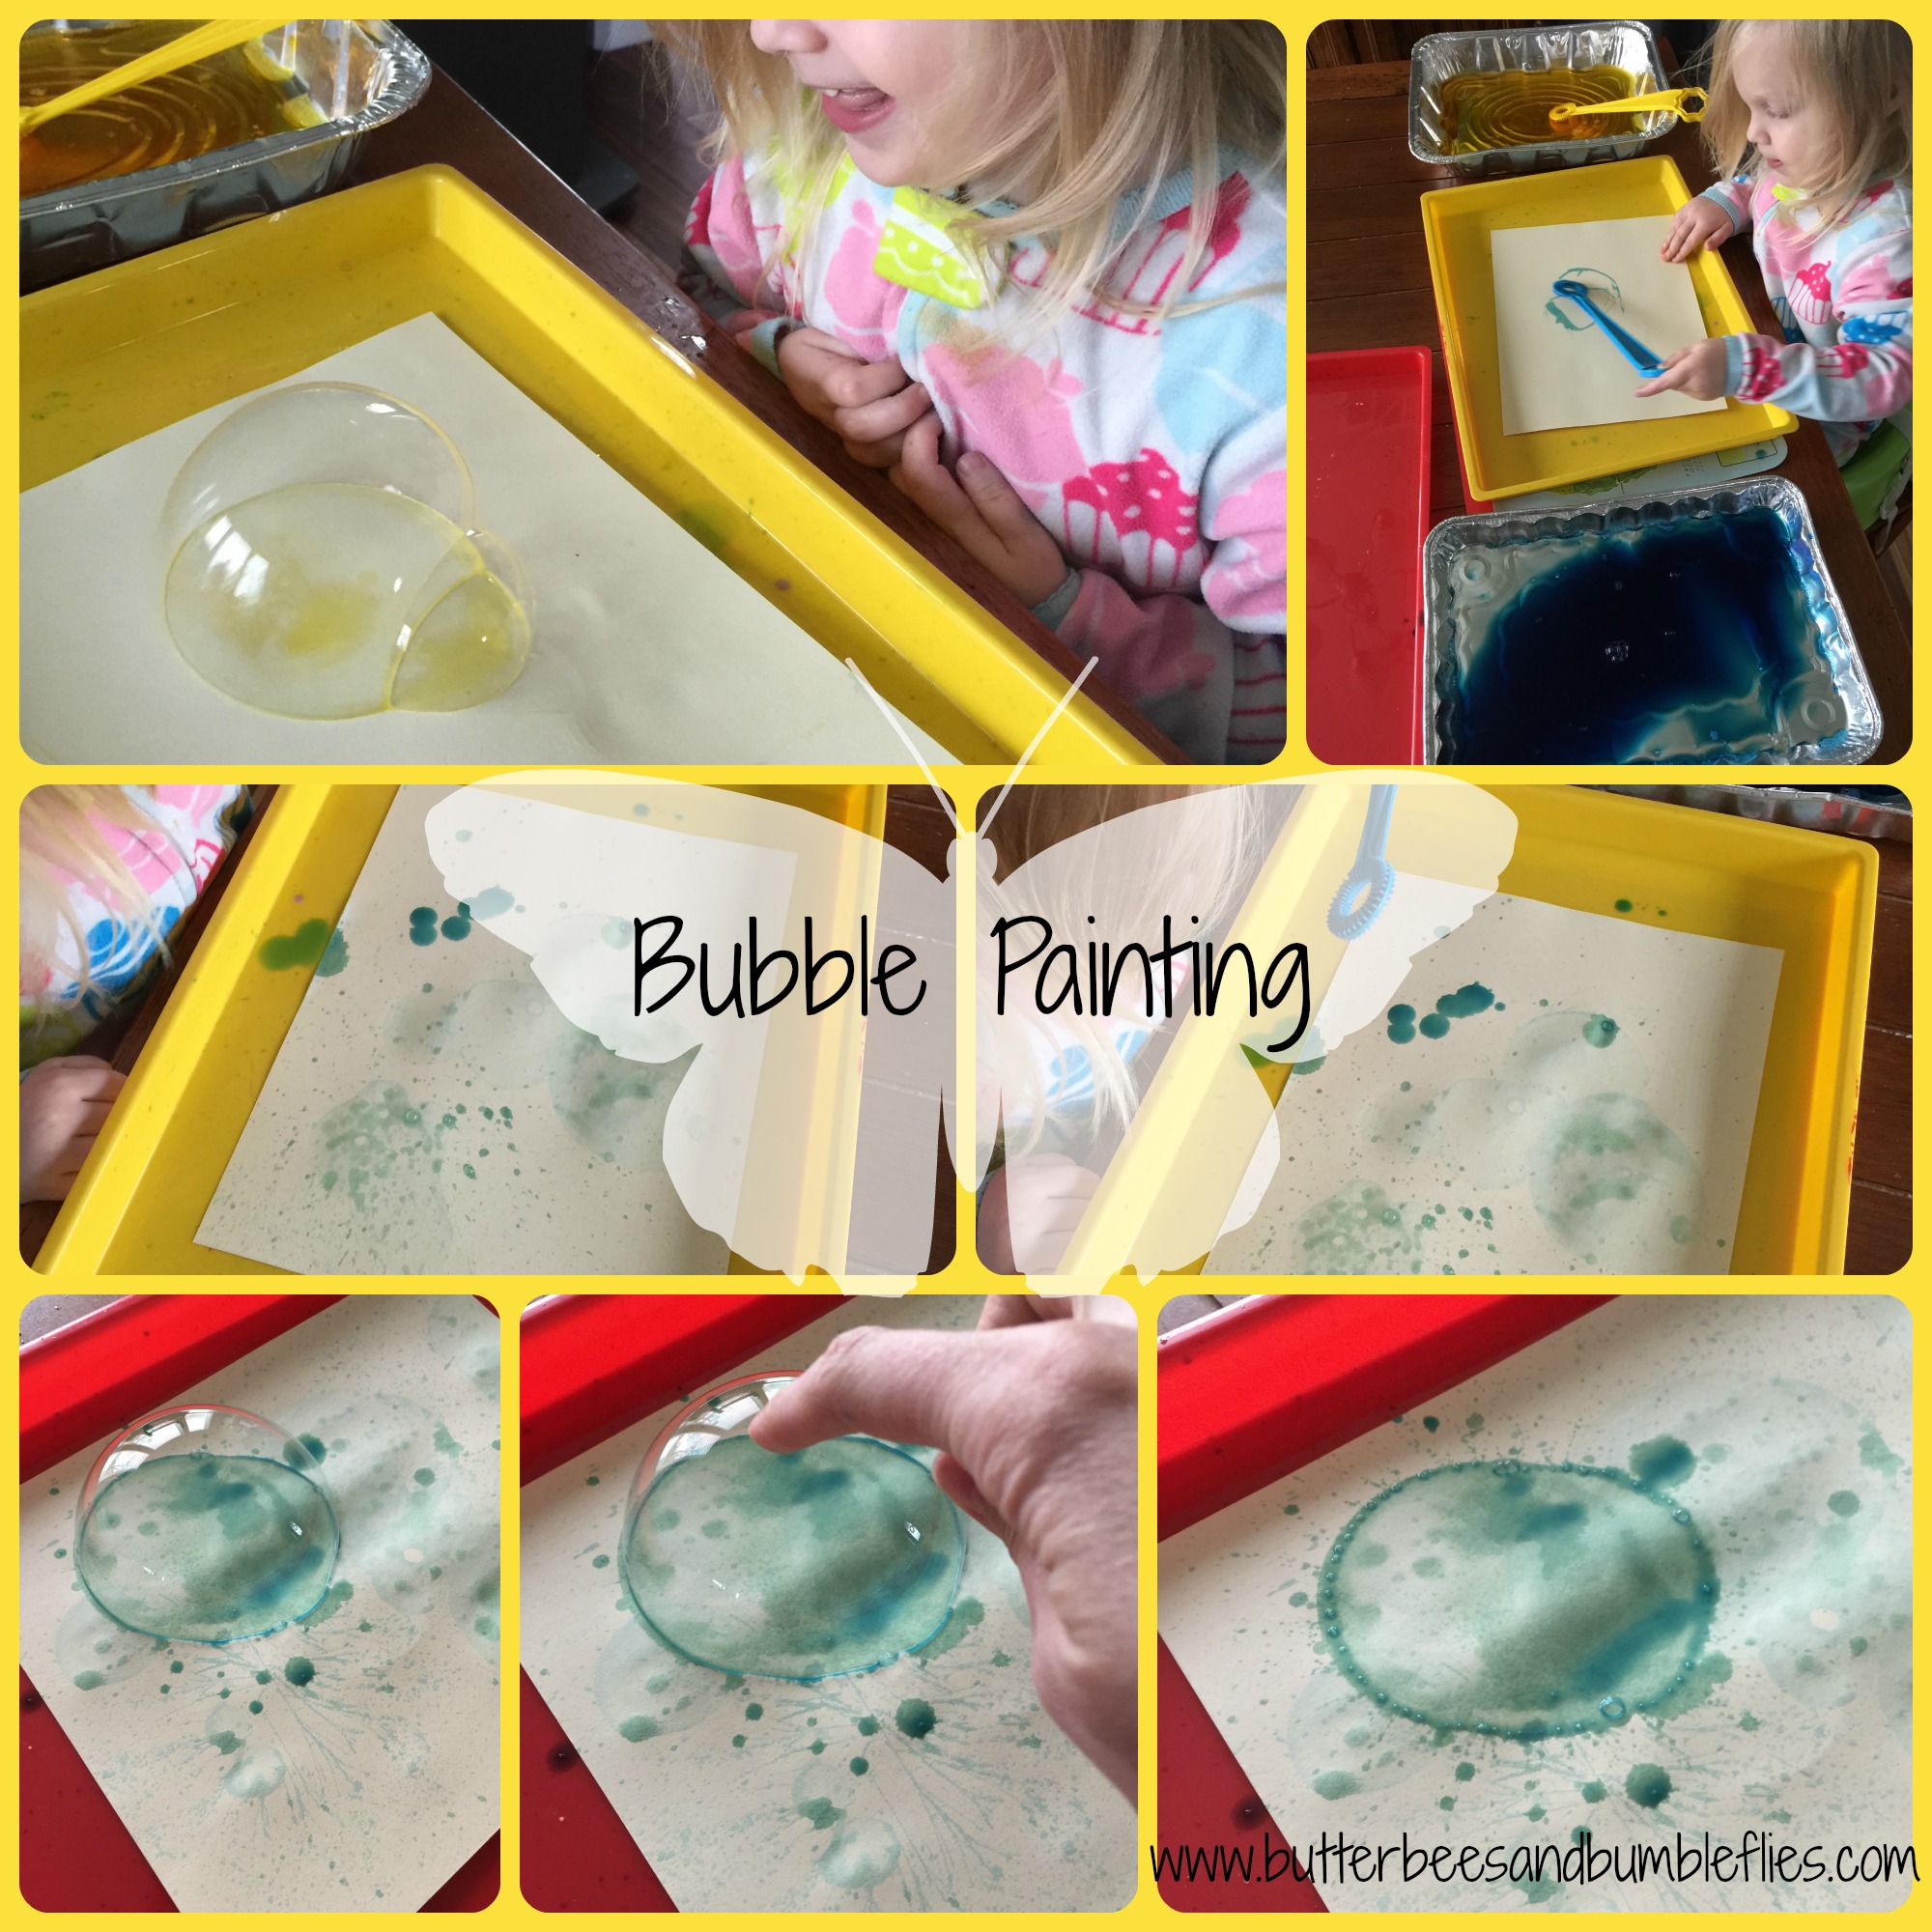
Bubble painting is super simple and fun – just add food coloring to bubble solution, and blow bubbles onto your paper!  The bigger the bubble, and the longer it sits before it pops, the better the marks will be.  Also, we learned that the yellow dries pretty lightly, but the blue turned out good.  So, definitely use white or creme cardstock, and when you add your food coloring in, you might want to make darker colors like purple or green.  Becca had great fun just spreading the soap solution with the bubble wands, too – there’s just no limit to the fun that can be had with this!  You could even try one of those bubble blowers that makes lots of bubbles in one cluster, and see how those painted.  There’s just a never ending list of fun things to try when painting with bubbles!  I’d love to have you try this with your kids at home, and then share your photos with me!  We’ll definitely be doing this activity again and again.

Can easily be done indoors with activity trays, or outside if it’s a nice sunny day!

Just think how awesome these are going to look added to your collages for your 2016 calendar!

I’d love to have you follow my Facebook page, where I share fun ideas from lots of bloggers, as well as run a special series each day at noon where I share favorite books to help build your home or classroom library.  Please note that the way Facebook selects pages to view on your timeline is based on your interaction with that page.  Be sure to click on over to my page frequently to see what Facebook might not be showing you, and click “like”, “comment”, and “share” on my posts to ensure that Facebook will show you what’s going on on the page!  The more you interact, the more that should show up on your news feed!  www.facebook.com/butterbeesandbumbleflies