
Welp. They’ve done it again. ABC pulled off another super dramatic, over-the-top season of their highly sucessful, highly controversial Bachelor series. Some things never change.
Chris Harrison will always tell us this season has the most “unexpected” ending. He’ll always tell us it’s been a “controversial” season. He’ll always play up the drama. Because some things never change.
As long time viewers of the series, we also know that the likelihood of any of the relationships lasting longer than a few months is slim. And yet, there are success stories. Because through it all, it is truly a way to meet a potential mate… And God has our stories figured out better than we can even fathom! He is in control. Some things never change.
Every season we watch with anticipation and pick our favorites. Sometimes we are right, sometimes we are wrong, but the final episode is always our favorite. Mainly because some things never change.
The last episode reminds us of how relatively simple our journey was to find each other, and how much we truly love each other and always will. Because THAT will never change.
Tv romances may come and go, but this? This won’t be changing. I love him more today than yesterday. More tomorrow than today. The only way my love can change is to grow- stronger and fiercer day by day. That will never change.
So if we find that Sean and Kaitlyn are done tomorrow or next week or two months from now, will I be sad? Yes. Will I be surprised? No. Will I love Cody more then than I do now? You bet. Because some things never change.
He’s got my final rose, my ring, my promise, and my heart. Always. That will never change.
Author: Mrs. H
I am a former SPED Teacher turned Technology Paraprofessional who is mom to three beautiful children, a wife to a fabulous man, and blessed beyond compare!
Custom Penpal Art Cards
Yeah, this post totally isn’t a normal Wednesday “From the Heart” post, but since I intended to have it post yesterday and didn’t get it finished, I decided to just do it today! Enjoy!
A few years back, I came across an Etsy shop that looked neat. What has happened since then is nothing short of a love affair with cards. I’ve always been fond of custom cards, and I enjoy scrapbooking and styling my own cards occasionally. But printed cards have never been within my realm of expertise. Enter Jessica Bates, from Jack and Ella Paper Press.

Over the past several years, she has designed custom Christmas cards for our family, has created an entire custom line of “thank you” stationery for my travel clients to meet a variety of needs, and now this- all to my design specs. She’s talented, sure… a mind reader? Most definitely!!! I can send her my ideas and somehow it’s like we’re on the same brain wave length. It always turns out perfect.
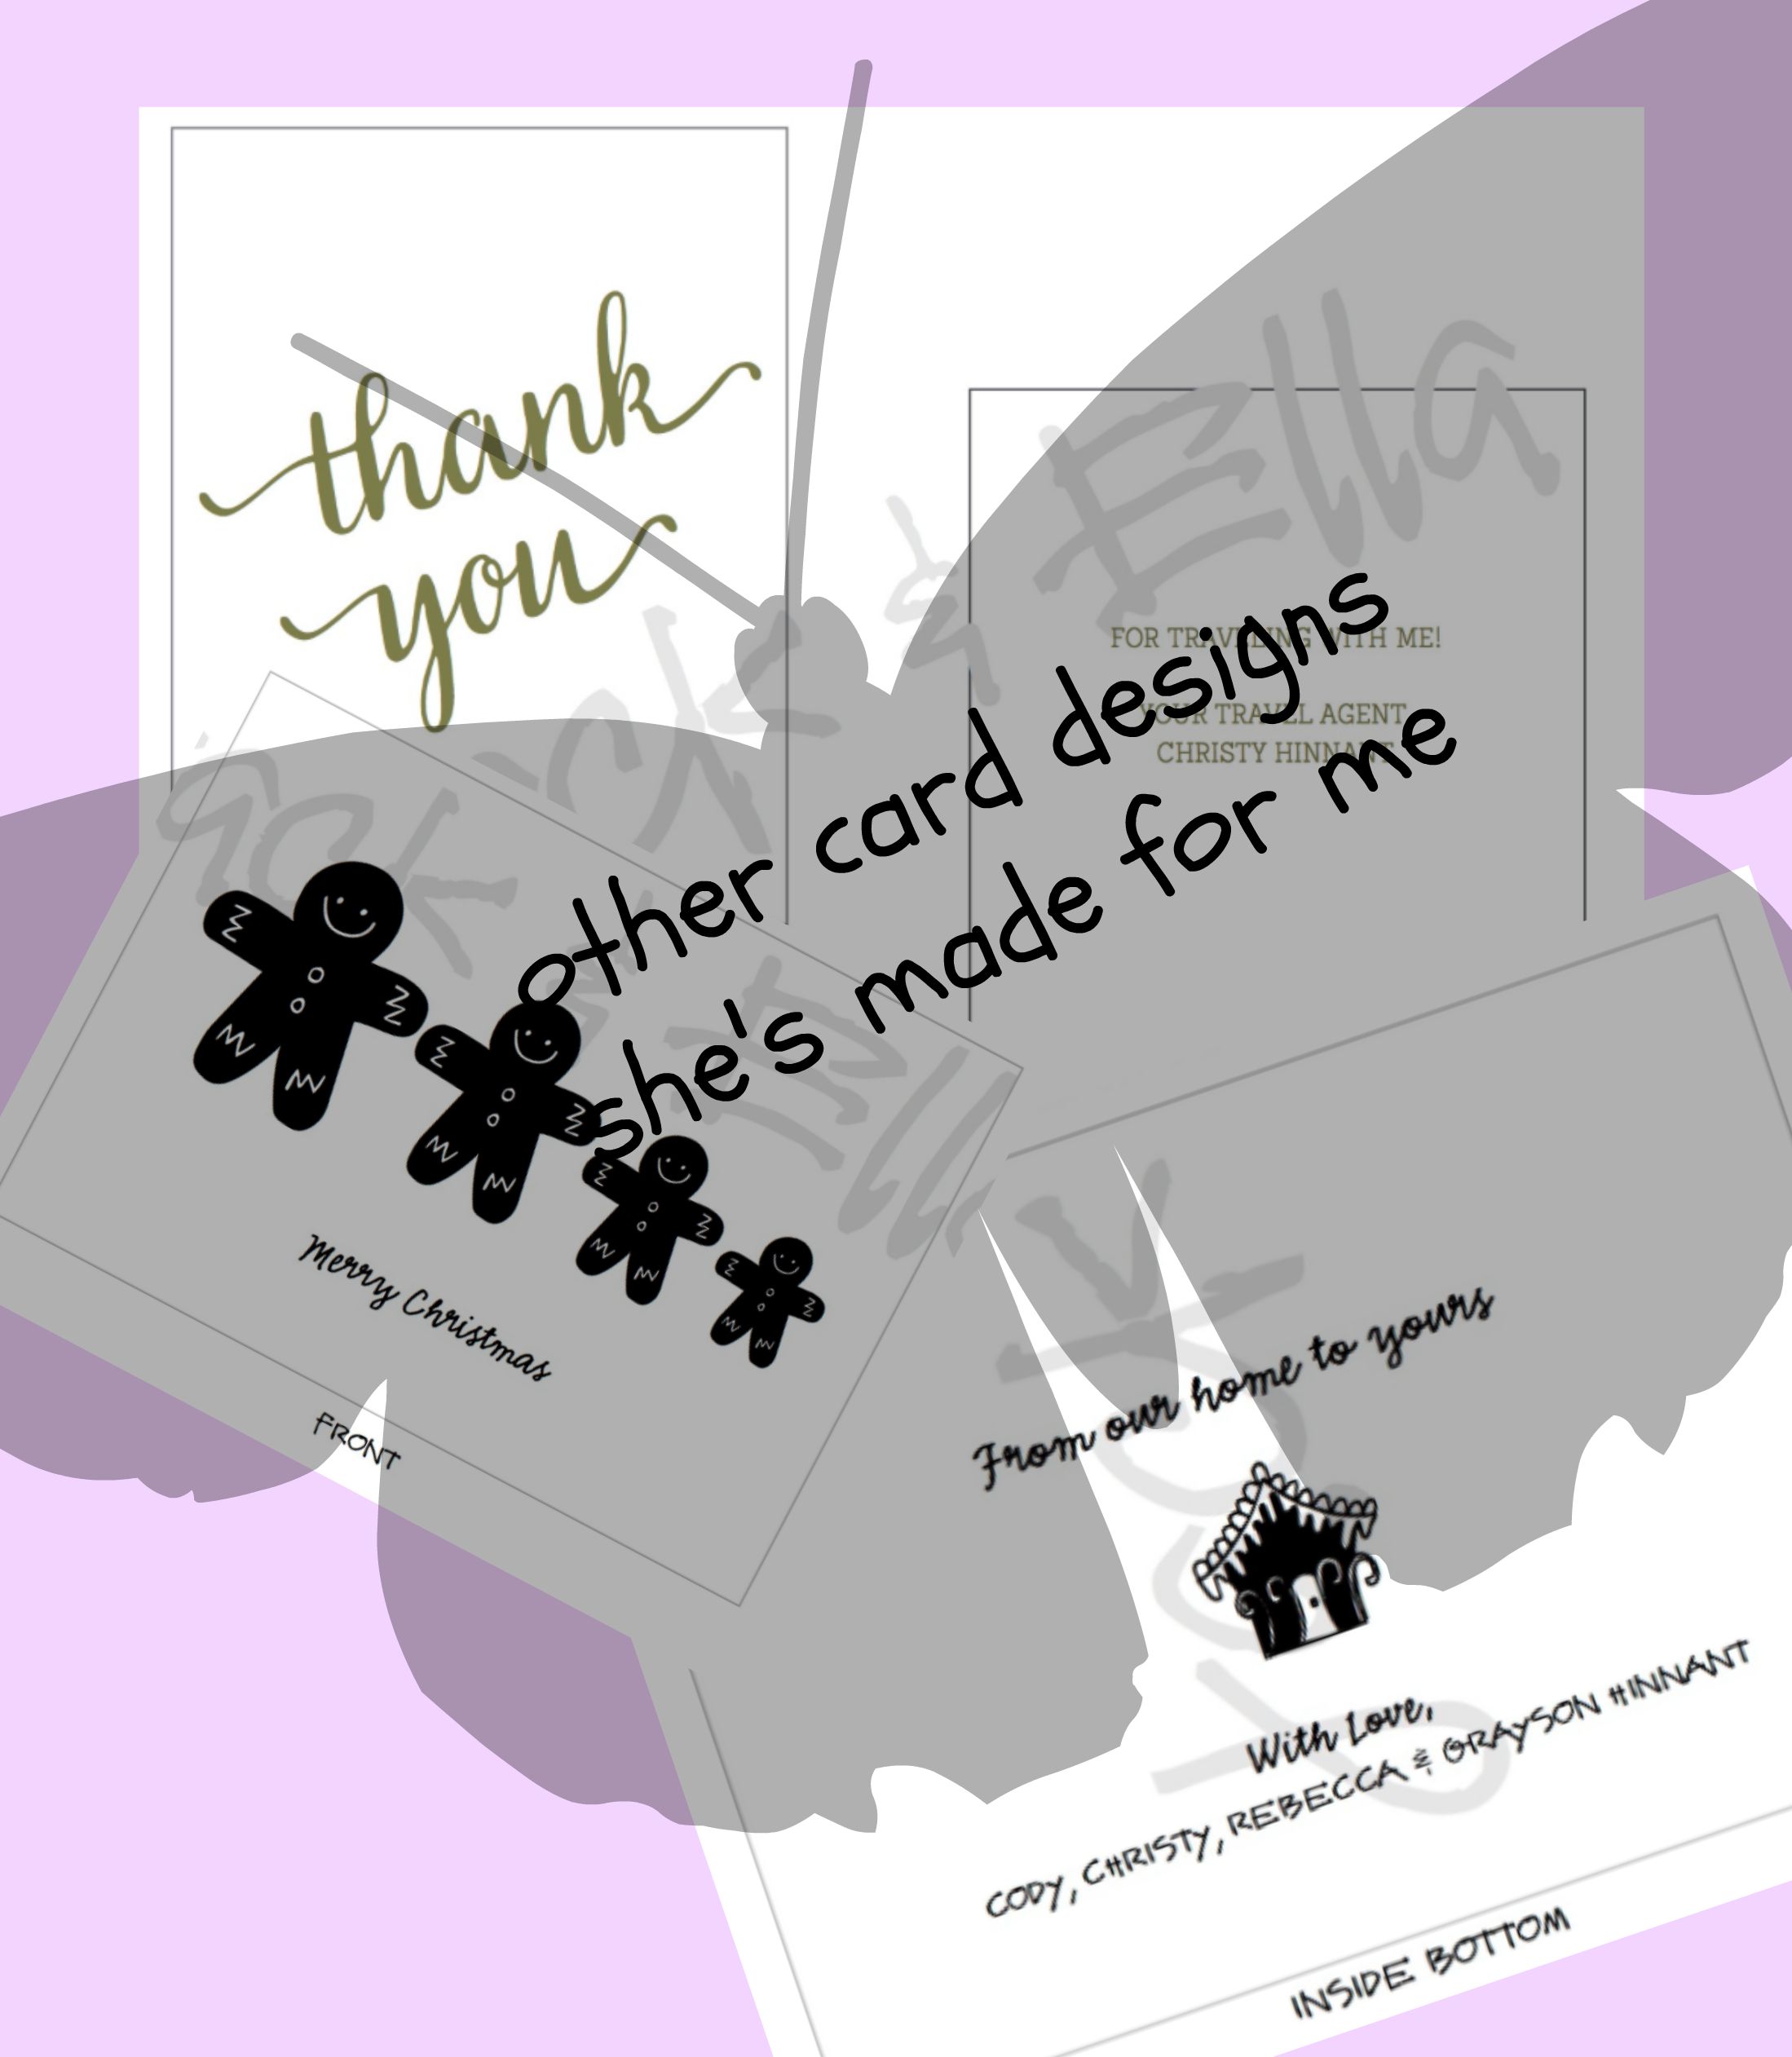
This project was no different. I wanted Becca to be able to start writing to friends and family – via mail. Granted, she could have done so on construction paper, but I thought Jessica would be perfect for this project, and she was! (We’re already discussing modifications for additional cards!)
So I wanted a big circle on the front. Becca normally creates her art on a blank paper. I wanted to see how many different places she could go with a circle. (We’re contemplating triangles and squares coming soon!) I also knew that to begin, I’d be writing. But soon, she’ll be writing more on her own and she’d need plenty of space, and some guidelines for her words. I drew up my design idea and sent it over to Jessica, who of course made it better than I could have imagined! I love that they are of heavy paper so she can do any type of art she likes- acryllic, glue, watercolor, anything.

For her first two cards, Becca chose to paint with acryllics. She made a sprinkle donut and a butterfly. She wanted me to help make zigzags on the butterfly wings and make the sun, so I held her hand. She did the movements herself- she has much more talent for hand movements than she realizes. We let them dry, and the next day we sat down to write our messages.
We talked about our two penpal families, where they live, how many kids they have, etc. She decided which design of card needed to go to which family, and told me what to write to them. We talked about letter structure- how if we want them to write back, we need to not only tell them something, but ask questions to learn more about them and show that we care. She was very good at coming up with questions! Then she had me help her draw a heart for her salutation, and she wrote her name on each card.
I showed her the parts of the envelope, and we discussed where the recipient address goes, where our address goes, etc. She stuck the stamps on, and then added some stickers for a little added Becca flair. She was super excited to mail her cards and she’s anxiously awaiting her penpal notes back. She already has ideas for more cards she wants to make and send to more people. So I don’t think we’re anywhere near the end of Project Penpal!
Have you done penpal projects with your kids? If you’re interested in having some custom penpal cards like these for your kiddos, be sure to contact Jessica and I know she’ll be glad to hook you up!! (Fyi, she’s not paying for this “ad” in any way… I’m just writing this simply because I love her work and know you will too!!)
Be sure to let her know you heard about her from Christy, and that you are interested in some penpal cards!
Sauce Painting for Baby Bees
 Remembering that every child is super different has been hard for me. I’m sure every mom struggles with it. I’ve heard myself say “Why aren’t you like your sister?” And then the guilt comes washing in like waves beating up the seashore. I don’t WANT my Baby Bee to be like his sister. But certain similarities sure would be nice. Like if he would get over this need to put EVERYTHING in his mouth!!!! By this point with my Big Butterfly I was doing arts and crafts and sensory bins and more… Because she didn’t put things in her mouth!!
But I realized (finally) this last week that I need to get over that. He isn’t his sister. And I don’t want him to ever be… So, one of the main ways he explores his world is with his mouth. He’s still majorly teething, and he needs to feel textures with his mouth to help combat his pain. That’s why he licks touch-and-feel books. That’s why he gnaws on everything. Because his mouth isn’t finished doing a lot of really painful work, and he’s very aware of how it feels.
So, all of that is ok because it’s who he is. However, it does make my life quite difficult. I want him to be able to do fun things like I do with his sister… And he will in time. Until then, I had to find a way to let him do things his way- that were safe for him. Enter food.
I know there is a lot of controversy about using food as a manipulative for anything other than eating, but when you get desperate to provide experiences for your oral child, food is a FABULOUS way to safely allow participation – and exploration!

Sauce Painting is probably the easiest activity I’ve ever had to prep… Don’t buy anything! Just set up your child’s highchair tray with a variety of sauces you already have, put them in the chair in just a diaper, and be prepared for a bath afterward! It’s so fun to watch as your child experiments with the different textures, colors, color mixing, and of course, tasting!!
I will add here, however, that for once Gray never put his hands in his mouth! Had I used paint, I’m sure he would have had it head to toe – including internally… but since I used yummy sauces, he of course decided not to indulge. He truly keeps me guessing!!
For the painting aspect, I just grabbed a piece of scrap paper (this isn’t going to be the Van Gough you hang on the wall, mom – it’s going in the trash after you take a picture of this fabulous work of finger paint art… so don’t waste good paper on it!!) and let him paint! He also got “paint” all over the place mat and the table, so a plastic table cloth taped down ahead of time might be worth the prep time if you are really picky about messy activities.
Sauces I used: Tarter Sauce (he LOVED the chunks!), Ketchup, BBQ sauce, Spicy Brown Mustard, and Honey Mustard. You could use anything you’ve got that is paint consistency. Mayo, regular Mustard, anything like that would work. Remember that if you’ve got an oral kid, there ARE ways around it, and you can totally still provide them with art experiences… you might just have to experiment and step outside your “normal” box of crayons, markers, and water colors.
Cardboard Boxes
When Becca and I had our recent discussion about what things she’d like to learn, she mentioned wanting to know how boxes are made. And since then, she’s mentioned it several times. So I thought I’d share what we did in case some of your kiddos have the same questions!
First, I set up a new “How it’s Made” Playlist on my YouTube channel, so you can click over there to check out several fabulous “How it’s Made” video clips that you and your kids will enjoy learning from! We watched the cardboard box video probably a total of 5 times – she kept not remembering certain parts or wanting to re-watch because she had questions still.
 Then, we took a regular cardboard box from our recycling pile, and took it apart. We found where the seam was, and “unglued” (her word) it. Then, she enjoyed decorating the inside with some custom artwork, and she helped me re-glue the box back together – inside out. We used a little tape to help the glued flap stay closed.

With Daddy’s encouragement, we took it a step further, and made our own cardboard!! She was most fascinated with the process of making the cardboard itself, so he suggested getting three sheets of paper and making our own! She wasn’t able to make the “fluting” by herself, so I did that part, and then she enjoyed adding the glue and sticking each sheet on. We set a book on top of it for it to dry, and she was AMAZED when it was dry at how strong those three once-flimsy pieces of paper were!! It was a great experiment, and I’m glad he encouraged us to take it a step further.
She really learned a lot from this lesson, and when I asked her if she felt like she adequately had had her questions answered she replied with a hearty “yes, I did!” Mission Accomplished.
Math – Made Fun with Food Pouch Lids!
 Welcome to another STEAM Thursday! Not sure what STEAM is? Check out my STEAM page here, and peruse through all of my previous STEAM posts! Today’s topic is Math – specifically adding, subtracting, counting by 2s and 10s, geometry, and patterning. But, as usual, we have also squeezed some engineering in too… we seem to find a way to do that with everything these days!

Last fall, I shared some ideas for what to do with all those extra food pouch lids you might have sitting around your house… and today I wanted to expound on those ideas a bit. I briefly mentioned making patterns in my previous post, but Becca has been interested in making more complex patterns, so today we tried a really hard one – peach, pink, pink, pink, peach, peach, pink, pink, pink, peach. She continued the pattern correctly – pink, pink, pink, peach, peach, pink, pink, pink, pink, peach. (I didn’t get a picture).
In the process of stacking them up to make the pattern, we ended up building pyramids and cubes as well. Then we discovered that simply stacking them on top of each other makes a cylinder!
Our main focus, however, was adding and subtracting. Just like you might use a ten grid to add and subtract with counters, I simply took some scrap paper from our recycle pile and drew ten rectangles on it that we used for our pouch lids. We started out with basic equations to remind her how the ten grid works (it’s been a while since she’s seen one), but then we got more complex by adding her ten grid to mine to see how many pouch lids we both had combined, or subtracting hers from mine to see how many more I had, or reverse.
I was able to show her the physical ability of the pouch lids to cancel each other out to subtract and find the difference more quickly.
We practiced counting by twos to put the lids into groups of tens, and then counted by tens to see how many lids we have. We compared the groups to see which color we had more of, and which color had less. Then we subtracted by canceling out the groups of ten to find out how many more pinks we had than the peaches.
If you saw my post on Monday, you know that Becca considers math “kind of schoolish” and not really “summer fun…” however, she stayed so engaged with this activity that when I said, “So, did you enjoy doing math today?” She said, “If all math was like that, I’d love it every day!” HA! So, now I’m on a mission to make math much more hands on and fun for her! And you can bet that we’ll be doing a lot more with these food pouch lids in the future!!!
If you have kids who like applesauce (or anything else) in a pouch, SAVE THE LIDS!!! There are just so many fabulous things you can do with them. The possibilities are endless! Please share – what are some ways you reuse your food pouch lids?
