I have several parents of students I’ve been sharing with recently about various ways for kiddos to use Duplo for learning… so I thought I would share a few ideas here that could benefit everyone!
Write letters on Duplo!
Did you know – you can write on Duplo with sharpie marker, and it can be erased with a Mr. Clean Magic Eraser or finger nail polish remover? So you can put whatever letters you’d like on blocks and kids can use them to practice reading sight words, or building even more difficult spelling words! This idea can last all the way up through elementary or middle school as a more interactive way to practice words!
You can have your child create word family/rhyming words with Duplo, too!
Build sentences and even stories!
By writing whole words on blocks, and adding punctuation, your child can start building complete sentences and even making short stories with their Duplo blocks! Have your older child help you think of words to write on the blocks – practice which words are nouns, adjectives, adverbs, verbs, pronouns, etc… and after you write the words, your student can sort them by word types! This is also a great way to practice labeling sentence parts, etc! So many things you can do with this to meet many needs.
Add, subtract, and even multiply & divide!
Looking to use Duplo with math? Here’s an easy idea for using the dots to add, but you can also easily use Duplo to teach multiplication concepts, as well! And of course, you can always take away Duplo for math as well!! And just think – you could use it for non-standard measurement, sorting by colors or size, patterning, counting by twos, graphing, and fractions, too!
The possibilities are truly endless.
And don’t forget to let your kiddos play with Duplo to build their creativity! 🙂
ENJOY, and please – share with me any ideas you and your kiddos come up with!
Well, so if you’re homeschooling, you may not officially have a Spring Break… or if you are public/private schooling, you may have kids who are constantly wanting SOMETHING to keep them busy! Either way, I’ve got two fun activities for you that kids of all ages could enjoy this week as we prepare for St. Patrick’s Day.
First, if you’ve got kids under age 7, who are working on spelling, reading, or even just recognizing their color words, this super fun and easy craft stick rainbow activity is for you! I wrote for my kids, but for older kids you could easily practice spelling and handwriting in a small space by having them write the color words on the sticks. (Or older siblings can write for the younger ones!)
I simply had my kids squeeze glue (working on those fine motor skills!) onto the back of a thick paper plate (to provide a nice solid backing). Then, lay the labeled craft sticks in order of the rainbow. (I purchased colored craft sticks at Walmart, but you could also have them color or paint plain sticks.) Then stretch your cotton balls and glue on top. Once it is totally dry, you can cut off the excess plate and display your beautiful rainbow!
I wish I could take total credit for this next idea, but I can’t. I saw on Pinterest somewhere a cute rainbow handprint painted sign… and then I downloaded this FREE set from Teachers Pay Teachers that was created by Lindsey from The Teacher Wife. The two activities melded together well.
The thing I love about her free printable activity is that it’s very flexible for kids of all ages and stages. To make my pots, I simply cut black construction paper out around Lindsey’s pot template and then cut out the coins from her template from yellow construction paper. Becca decided she would draw her picture first, and then tell me what to write about it. She is the one who picked that it would be a friend theme – the actual writing template says “Who is worth more to you than gold?” She decided that Gray’s should have his friends, too, so I used the blank pieces from the set and just printed out pictures of him with his friends since he wasn’t interested in drawing them on the paper. I just asked him who he wanted me to include and he told me.
There are multiple other template options in the set that would work for a variety of different ages. In fact, the two blank pot pieces I used for Gray’s pictures could also easily be used in comic strip fashion and made into a pot of gold comic book by your older artists who are really dying for an engaging project this week. I would love to see how you modify this to make it your own!
The rainbow painting was simple – I just pulled out paint, painted each child’s hand for each color, and used legal length paper to fit the most handprints together on one page.
**Note – baby wipes work great to get paint off between each color, and then you can do in-depth soap and water cleaning when you’re all done. I prefer to use acrylic paints because they dry quickly, but they are prone to staining clothing, so if you prefer, use a washable finger paint or add dish soap to tempera paint before using.
It’s hard in the midst of the busyness of the Christmas season to keep the focus where it should be… So might I make a suggestion? You’re already going to be doing craft projects and activities… what if you just tweaked them a bit to make sure that your focus is on Christ? Don’t worry – I’m not suggesting you invent the wheel here! Nope, Alicia Michelle of Your Vibrant Family has already done it for you! (And no, it’s not too late to get it TODAY!)
When I found out about her Christmas system, I was excited to be a reviewer! (Full discloser – I received the set in exchange for my review – these opinions shared here are my own, and links to purchase the set are affiliate links that financially benefit our family – THANK YOU!) But once we started using the system, I started to love it even more! I read through her ideas, and something she said really hit me. I mean, I had head knowledge, but there was something about reading it… this is what she said:
And suddenly, reading this, I realized that it was ok to not cram pack every single day with activity. It was even ok to not do our annual Christmas cookie exchange this year… and instead use the funds to purchase some special craft activities that we could do together as a family, and sponsor an angel from our church’s angel tree.
Becca and I painted these wooden letters and as we did, we talked about why we chose “Joy” as her middle name, and also talked about that JOY can stand for putting Jesus first, then Others, then Yourself. It was a really fun time painting together, and a great, deep conversation!
Having this mindset and focusing on the true meaning of Christmas has helped my attitude toward the season so much! It’s amazing. I mean, it seems so simple. Because it is.
How we used the banner pieces:
Gray is 2 1/2 and LOVES to stick stickers! It’s a fabulous way for him to work on hand-eye coordination and build his fine motor skills, so I’m always looking for more sticker opportunities for him. He decorated the “Light of the World” banner piece with sparkly star stickers, and we talked about the star that shone over the stable where baby Jesus was born. We also talked about that Jesus can be called the “Light of the World.” Did he get it? I wasn’t sure. But the other night he made the connection when he made a star ornament at our church carnival and he said “It’s Jesus’ star over the manger! Is the ‘Light of the world!'” He also used stickers to decorate the “Merry Christmas” banner piece. He really enjoyed decorating – and when I got the banner hung up, he loved seeing his work on the wall!
Becca is working hard on her handwriting skills, but isn’t super fond of copywork. So – I thought it might be more fun if she could do her copywork onto banner pieces to be hung on the wall. She jumped on it and was so excited! She wrote Psalm 34:18 on the “Hope” banner piece, and on the “Joy” banner piece, she wrote “J is for Jesus” from the poem we read (also in the set!) about the meaning of the candy cane. Then she chose to draw a picture of Jesus on that banner piece as well.
I added a couple of family pictures to the other banner pieces to tie the focus to our specific family. Then, since we typically have a sign in the middle of our art display wall (I originally posted about this wall here), I used Alicia’s beautiful background paper that I printed on my color printer, and then ran it through my laser printer once it was totally dry… and developed a beautiful advent count-down calendar to fit in the frame that regularly hangs there… that we can mark with a dry erase marker! (If you purchase this set, please let me know, and as a thank you for your purchase, I will email you your FREE PDF copy of the “O Come, O Come Immanual” advent countdown calendar – that can easily be printed on top of her decorative paper! It’s not too late to start it!)
I am so pleased with how the whole wall turned out. I love that it’s visible from downstairs in our living room, and that it’s in a place where the kids will see it regularly (upstairs near their rooms) to remember where our focus should be this holiday season.
Another activity we did from this set was actually one I used with our AWANA K-2 group this week. We talked about the meaning of the candy cane, and the kids strung beads on pipe cleaners to make candy canes. They got to keep one, and take one to a friend at school – along with the candy cane poem printable from the set – as a Christmas gift to share Jesus with their friends! The kids had so much fun and were really excited to have a gift to take to friends. They colored the sheets in their classes once they had said their verses, or could take them home to color before giving to their friend. I’ll be doing the same thing with Becca this weekend – she’ll get to make candy canes to give to her friends, and can color the sheet as a Christmas card.
It’s so easy to use this set to stay on track, to keep your focus, and yet still accomplish all the goals you normally have during the holiday season! I so appreciate Alicia’s creation of this set, and look forward to using these parts (and more!) next year. I love that there’s so many different options, and I can use what works for our family now, and then still have new things we can add on or swap out next year, or the next!
Might I add… Don’t think if it’s after December 1st that you can’t start this!!!! It is never too late to get your focus right, and there’s always room to do stuff next year, but if you wait to get it, you’ll forget! So click here to get it today and use what you can, and just allow it to build in the future. You won’t regret it. That I can promise.
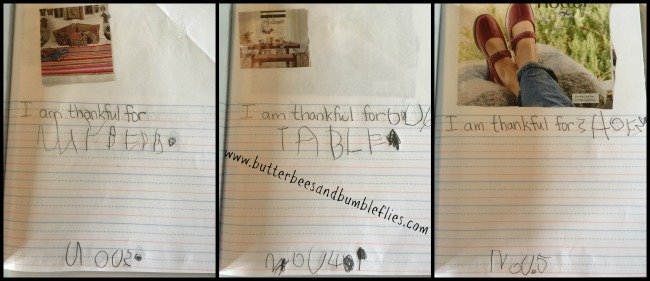
In my original post in this series, I mentioned setting up a Thankful Journal for Becca, and I showed how I put it together. I wanted to show you how my original plan evolved, and what we’re doing. Becca has decided also that she wants to do her journal every day until the book is full! So, at least for now, we’re thinking we’ll keep doing this beyond November.
I had her practice her handwriting to write the title on the cover, and then she has been having great fun looking through magazines to find illustrations for things she is thankful for. Right now, I’m writing “I am thankful for” and then she finishes the sentence and writes the date. We practice sounding out the words to figure out how to spell them, and I help her with silent letters or tricky spellings.
I love her beginning handwriting – her periods are gigantic, and so are her letters. Many of her letters are backwards, and some end up sideways. Early writing is so cute!
Another super fun writing activity that we did, I actually wrote the words, but she came up with them. We did this Thankful Alphabet activity, which is a free printable found here.
Then we hung it on the refrigerator with Grayson’s list of friends he is thankful for (See my Toddler Thanksgiving post here). The kids love having their thankful lists on the fridge!
Yup. That says “Lepidopterists” on L, and “Unicorns” on U. Because that’s the world we live in – one that is very scientific and based in fact, but dusted with glitter, fairy dust, and lots of make believe. 🙂
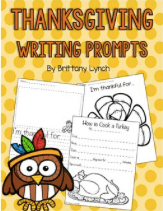
Looking for more fun FREE Thanksgiving writing and handwriting printables? Just click on the pictures below to see what else we’re working on this month!
There are a million different ways to make cards. But I wanted to do something unique with Becca. I had a package of silk leaves from Hobby Lobby, and I was wondering what to do with them. And then it hit me – leaf cards!
As you can see, they turned out beautiful. Here’s what we did, and the thoughts behind them.
Peel the plastic stem backing off of silk leaves (or collect fresh fall leaves if you have them!)
Gather card stock paper that is thick. Fold each sheet in half. (However many you decide to make is up to you.)
Mix a little bit of water in a bowl with a lot of glue – just runny enough to be able to paint with the glue. Completely cover a sheet of thick card stock with the watery glue, leaves, and more watery glue on top.
Lay them open flat to dry – on a plastic tablecloth or place mat. NOTE – they will be wet enough that if you have used colored card stock, the wetness of the glue will leave color on whatever you let them dry on… I had to Ajax my white countertop to remove the orange. Not even Magic Eraser would get it off. Thankfully Ajax w bleach did the trick. (So learn from my mistake!) They will take quite a while to dry if you’ve used enough glue to truly hold the leaves on.
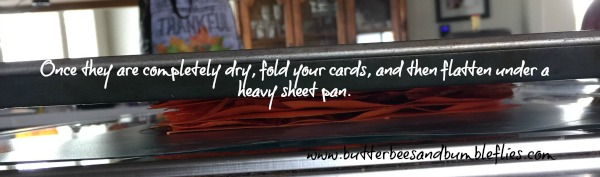
Once they are dry, fold them back closed, and place a heavy pan on top of the stack of cards for a day or so to re-crease them.
Have your child dictate (or write) thank you notes to community helpers who make a difference, send to grandparents, or to other special people that your child wants to say thank you to. (We are sending notes to our pastor, our local sheriff’s office, the guy at our post office who always helps us, and for the volunteers at our local fire department.) If you’re going to mail, you’ll need to make sure that your paper starts out small enough to fit the leaves and everything inside an envelope. Since we’re hand-delivering ours, we didn’t worry about the size, and I just used full 8 1/2″ x 11″ paper folded in half.
Looking for more Thankfulness and Thanksgiving ideas to use with your kids? Check back here on Monday, and all next week!


 The thing I love about her free printable activity is that it’s very flexible for kids of all ages and stages. To make my pots, I simply cut black construction paper out around Lindsey’s pot template and then cut out the coins from her template from yellow construction paper. Becca decided she would draw her picture first, and then tell me what to write about it. She is the one who picked that it would be a friend theme – the actual writing template says “Who is worth more to you than gold?” She decided that Gray’s should have his friends, too, so I used the blank pieces from the set and just printed out pictures of him with his friends since he wasn’t interested in drawing them on the paper. I just asked him who he wanted me to include and he told me.