Writing About Thankfulness

thankfulness-header

In my original post in this series, I mentioned setting up a Thankful Journal for Becca, and I showed how I put it together.  I wanted to show you how my original plan evolved, and what we’re doing.  Becca has decided also that she wants to do her journal every day until the book is full!  So, at least for now, we’re thinking we’ll keep doing this beyond November.

thankful-journal

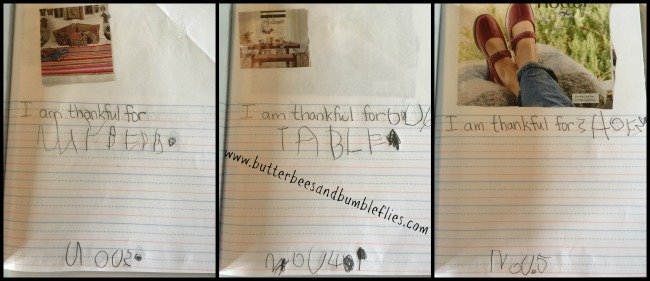
I had her practice her handwriting to write the title on the cover, and then she has been having great fun looking through magazines to find illustrations for things she is thankful for.  Right now, I’m writing “I am thankful for” and then she finishes the sentence and writes the date.  We practice sounding out the words to figure out how to spell them, and I help her with silent letters or tricky spellings.

thankful-journal-2
I love her beginning handwriting – her periods are gigantic, and so are her letters. Many of her letters are backwards, and some end up sideways. Early writing is so cute!

Another super fun writing activity that we did, I actually wrote the words, but she came up with them.  We did this Thankful Alphabet activity, which is a free printable found here.

snip20161104_2

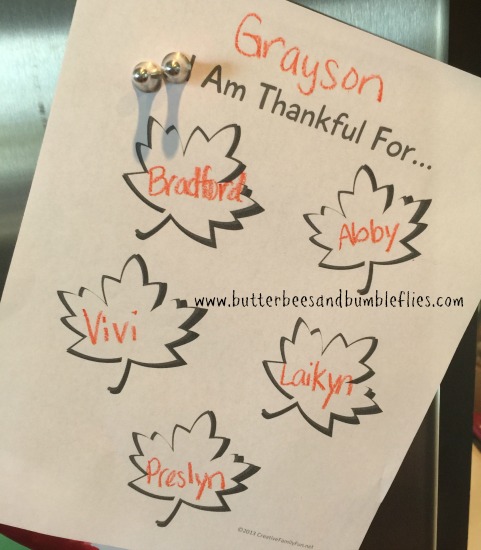
Then we hung it on the refrigerator with Grayson’s list of friends he is thankful for (See my Toddler Thanksgiving post here).  The kids love having their thankful lists on the fridge!

fridge

boo-thankful
Yup. That says “Lepidopterists” on L, and “Unicorns” on U. Because that’s the world we live in – one that is very scientific and based in fact, but dusted with glitter, fairy dust, and lots of make believe. 🙂

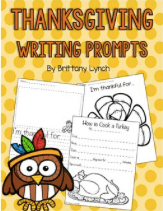
Looking for more fun FREE Thanksgiving writing and handwriting printables?  Just click on the pictures below to see what else we’re working on this month!

snip20161109_6

snip20161109_7

snip20161109_8

snip20161109_9


Thankfulness and Thanksgiving – for your Toddler

thankfulness-header

Continuing my series on Thankfulness and Thanksgiving, I wanted to give you some ideas of things you can do with your little ones – the toddlers in your house who are just beginning to get the concept of saying “thank you” when you give them something.

I started with a very basic activity for Gray – I asked him, “Who are your friends that you thank Jesus for?”  Then, I wrote each of their names on a leaf – from this free printable (shown below) and then we hung it on the refrigerator.  He was so proud of his paper!  “Those Gray friends!  I say thank you Jesus my friends!”  Get your own copy of the printable here (it’s page 4 of the free document).

gray-thankful

I also wanted him to be able to participate in some of the thankfulness art he had seen Sister doing, by letting him make some of his own Homemade Cards for his teacher at Mother’s Day Out, and for his nursery teacher on Sunday mornings.  He also wanted to make pictures for his grandparents.  I started him out by simply painting over leaves, and then once it turned into a full-on sensory activity (I knew it would – the boy loves to paint his hands!) then, I grabbed more sheets of paper and helped him make hand prints, which I turned into turkeys.

tots-say-thank-you

I have a couple of cute poems that I’ve pinned over on my Thanksgiving pin board, and I’ll select one of those to write inside the cards.  Super simple, but he had a blast feeling the paint, being tickled by the paint  brush, and feeling the silk leaves.  It was a great sensory activity that was lots of fun for him!

Note – I love using acrylic paint for kid projects because it easily washes off of skin, and dries quickly on paper.  BUT it stains clothing, so we usually do those projects either with a smock, or with him in his diaper.

Back to the original Thankfulness and Thanksgiving post.

Saying Thank You with A Handmade Card

thankfulness-header

There are a million different ways to make cards.  But I wanted to do something unique with Becca.  I had a package of silk leaves from Hobby Lobby, and I was wondering what to do with them.  And then it hit me – leaf cards!

thank-you-cards

As you can see, they turned out beautiful.  Here’s what we did, and the thoughts behind them.

  1. Peel the plastic stem backing off of silk leaves (or collect fresh fall leaves if you have them!)
  2. Gather card stock paper that is thick.  Fold each sheet in half.  (However many you decide to make is up to you.)
  3. Mix a little bit of water in a bowl with a lot of glue  – just runny enough to be able to paint with the glue.  Completely cover a sheet of thick card stock with the watery glue, leaves, and more watery glue on top.
  4. Lay them open flat to dry – on a plastic tablecloth or place mat.  NOTE – they will be wet enough that if you have used colored card stock, the wetness of the glue will leave color on whatever you let them dry on… I had to Ajax my white countertop to remove the orange.  Not even Magic Eraser would get it off.  Thankfully Ajax w bleach did the trick.  (So learn from my mistake!)  They will take quite a while to dry if you’ve used enough glue to truly hold the leaves on.
  5. Once they are dry, fold them back closed, and place a heavy pan on top of the stack of cards for a day or so to re-crease them. folded-cards
  6. Have your child dictate (or write) thank you notes to community helpers who make a difference, send to grandparents, or to other special people that your child wants to say thank you to.  (We are sending notes to our pastor, our local sheriff’s office, the guy at our post office who always helps us, and for the volunteers at our local fire department.)  If you’re going to mail, you’ll need to make sure that your paper starts out small enough to fit the leaves and everything inside an envelope.  Since we’re hand-delivering ours, we didn’t worry about the size, and I just used full 8 1/2″ x 11″ paper folded in half.

Looking for more Thankfulness and Thanksgiving ideas to use with your kids?  Check back here on Monday, and all next week!

The original Thankfulness and Thanksgiving post is here.