Fall Tree Activities

There are a ton of fabulous fall tree activities out there, but I’ve really been striving to be somewhat original in my activities.  All of my ideas are of course spurred from something I’ve seen online, and in no way am I saying I’m the first to ever do these this exact way… because I’m sure I’m not.  But here are three activities we’ve done in the past couple weeks to create fall trees different ways, modifying someone else’s ideas.

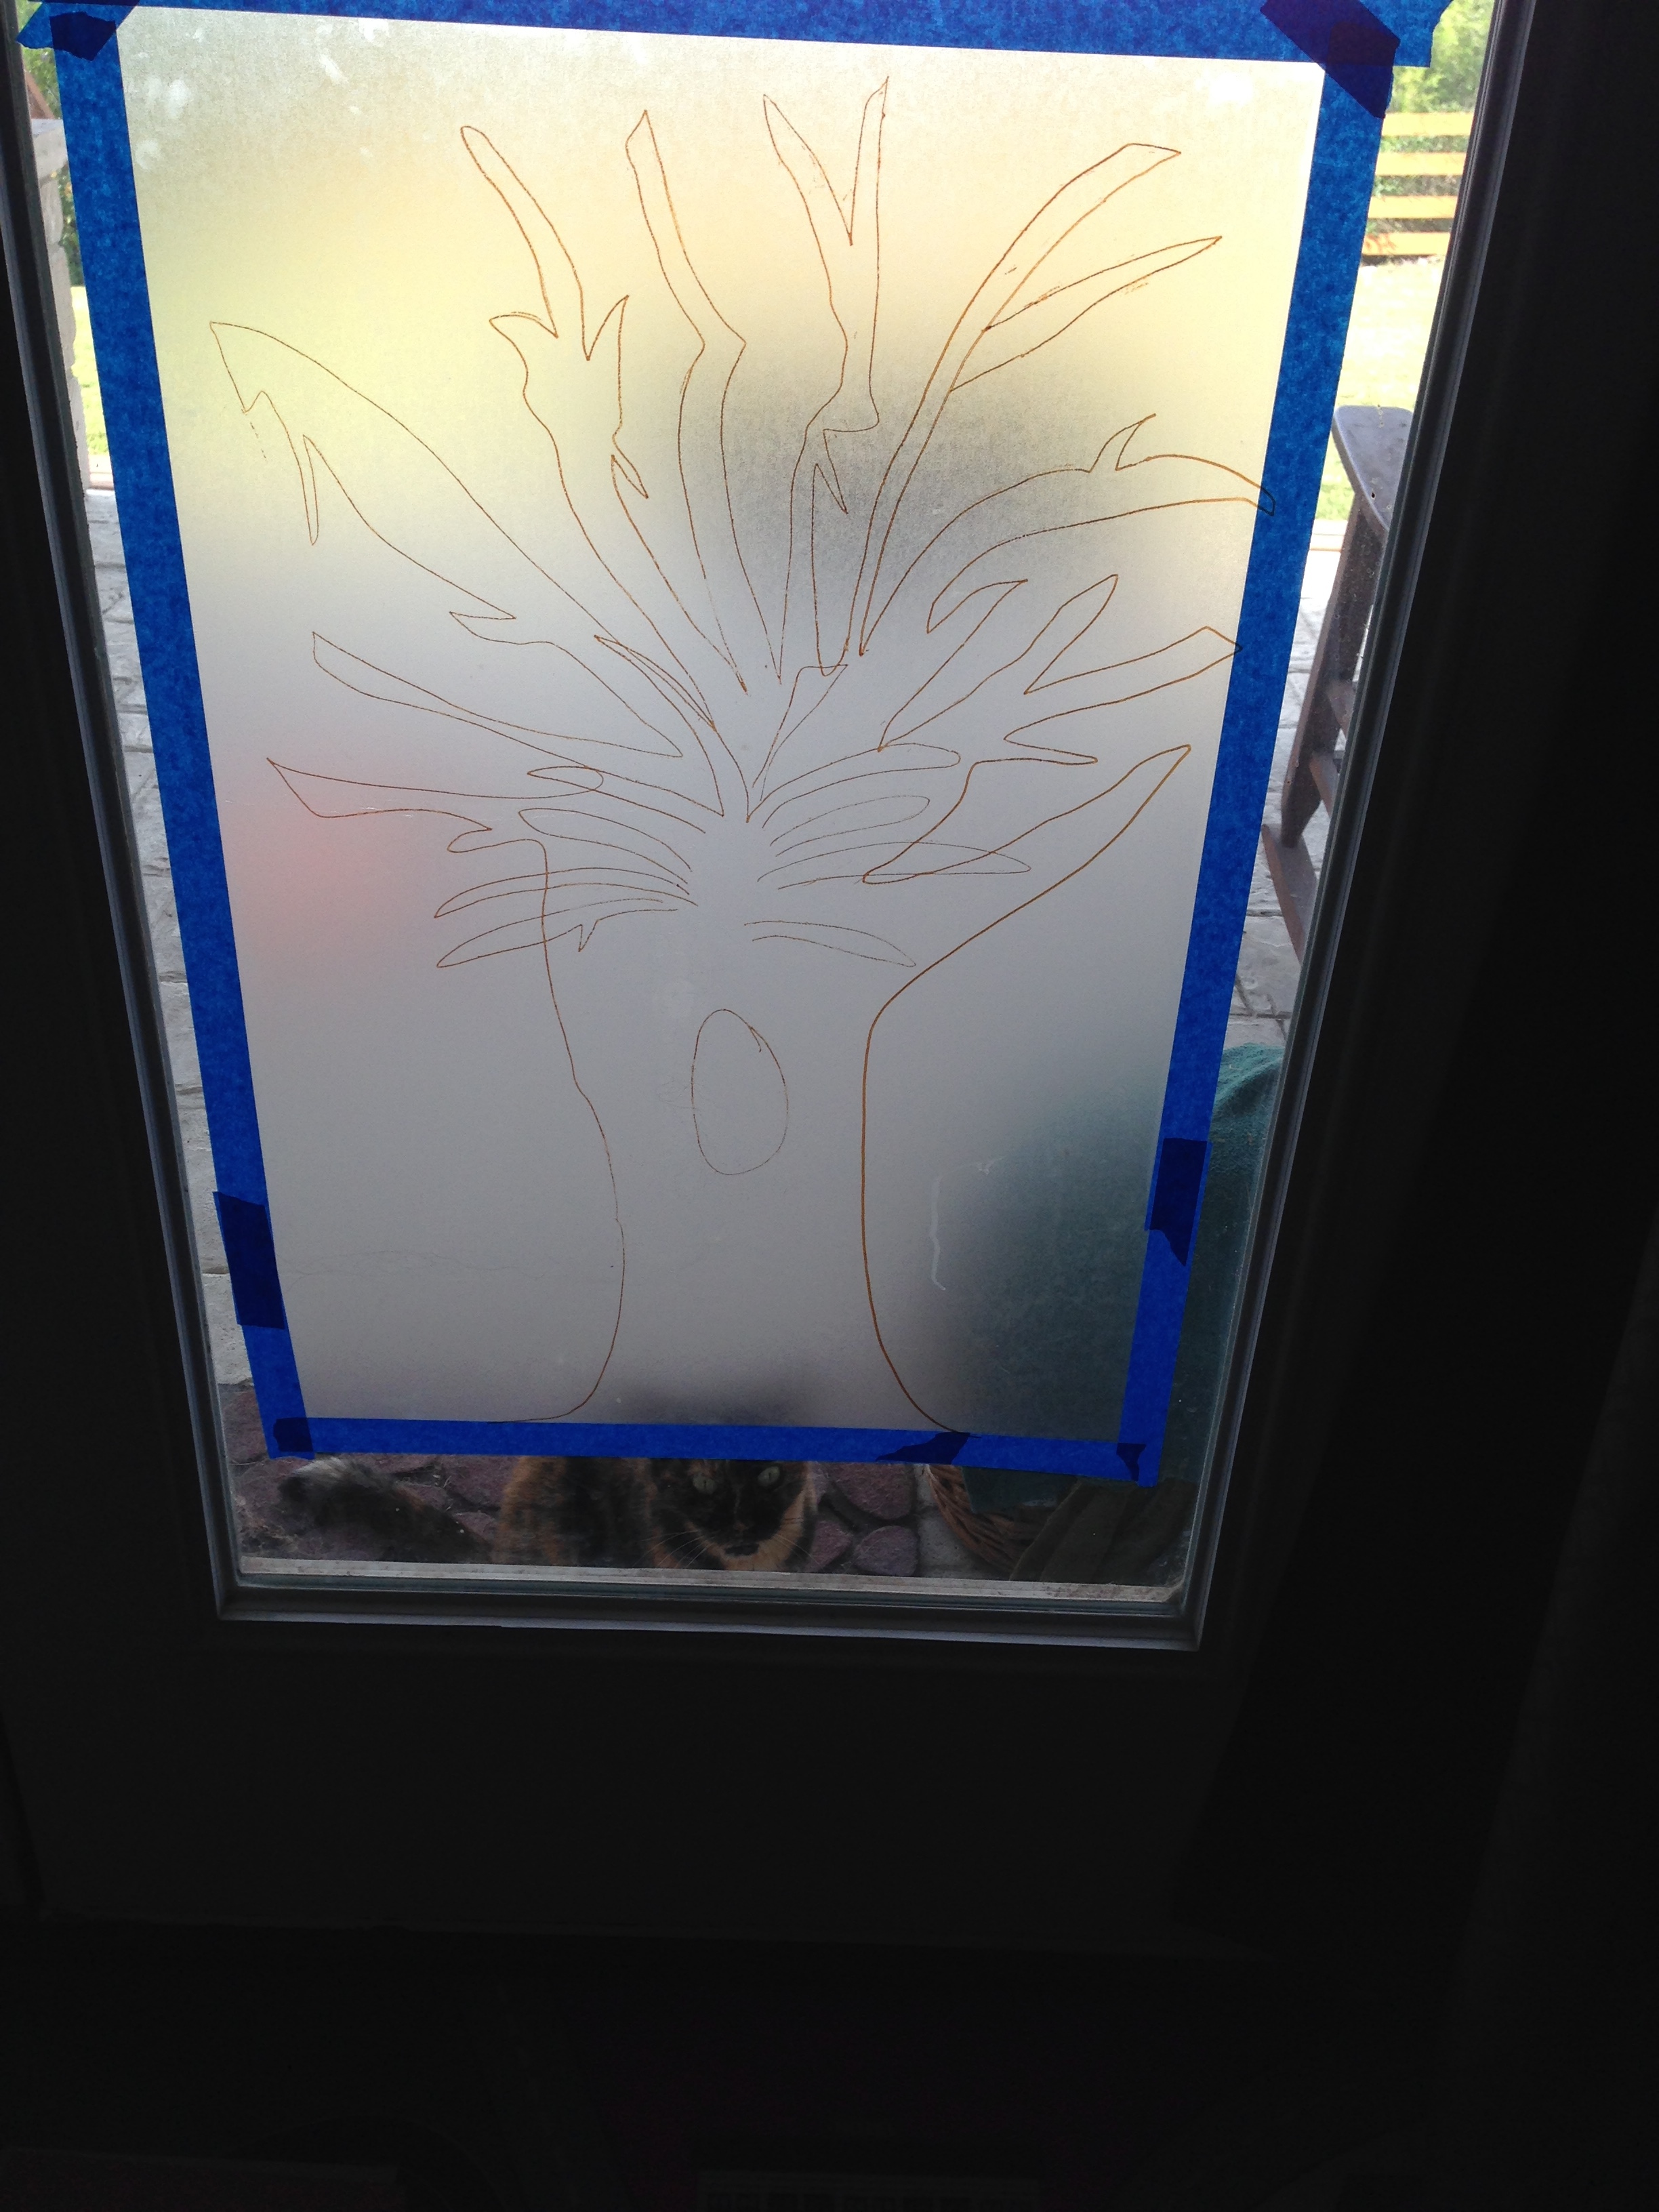
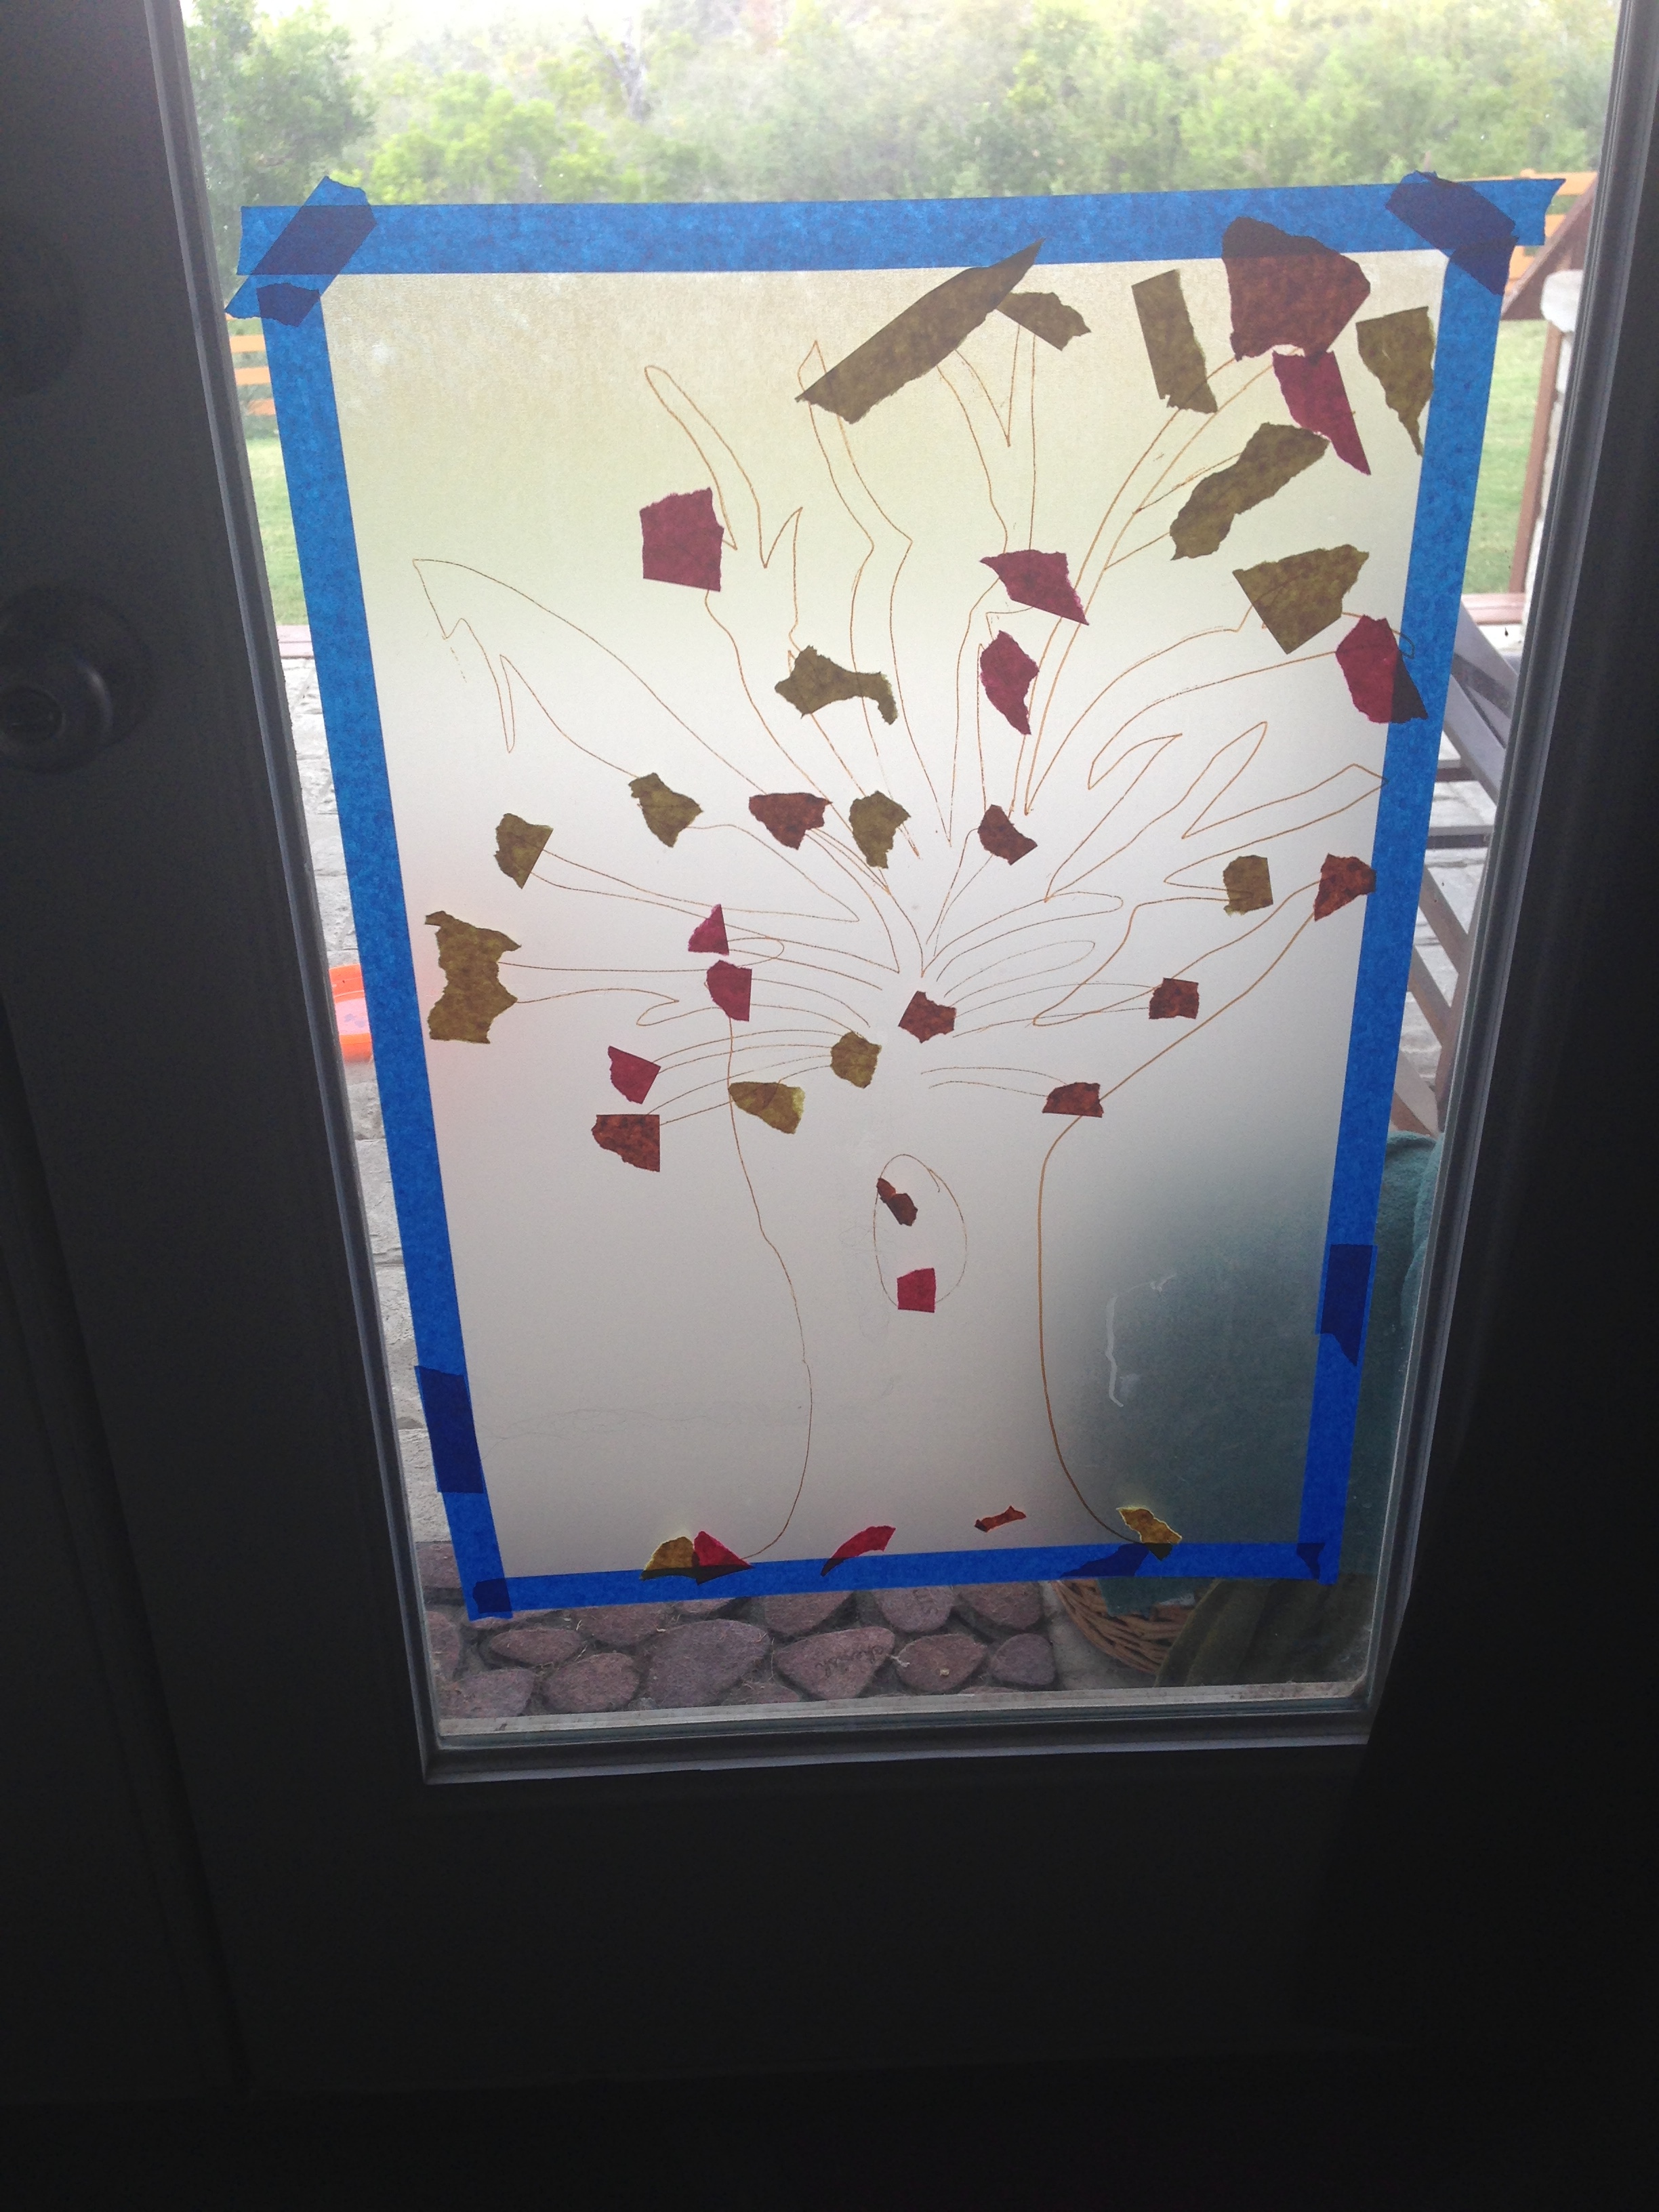
I’m loving contact paper activities.  I saw this post from Allison over at No Time for Flashcards, and it really got me thinking.  One of the fine motor activities I haven’t really done with Becca is paper tearing.  So, I gathered three sheets of construction paper – one each of red, yellow, and orange, and I did something I’m horrible at… I drew a tree on contact paper.  (Draw it on the non-sticky side.)  Then, I got out my painter’s tape and taped it – sticky side out – to one of our back door windows.  And I taught Becca how to tear paper!  We had a blast tearing our paper leaves, and sticking them on the tree.  And, I left the paper where she could access it throughout the past couple weeks, and she has added more leaves as time has gone by.  Despite my disdain for my drawing abilities, she immediately knew it was a tree, and has been very proud of her fall tree!  So, I count this one as a success!

 IMG_9203 IMG_9208 IMG_9210 IMG_9224

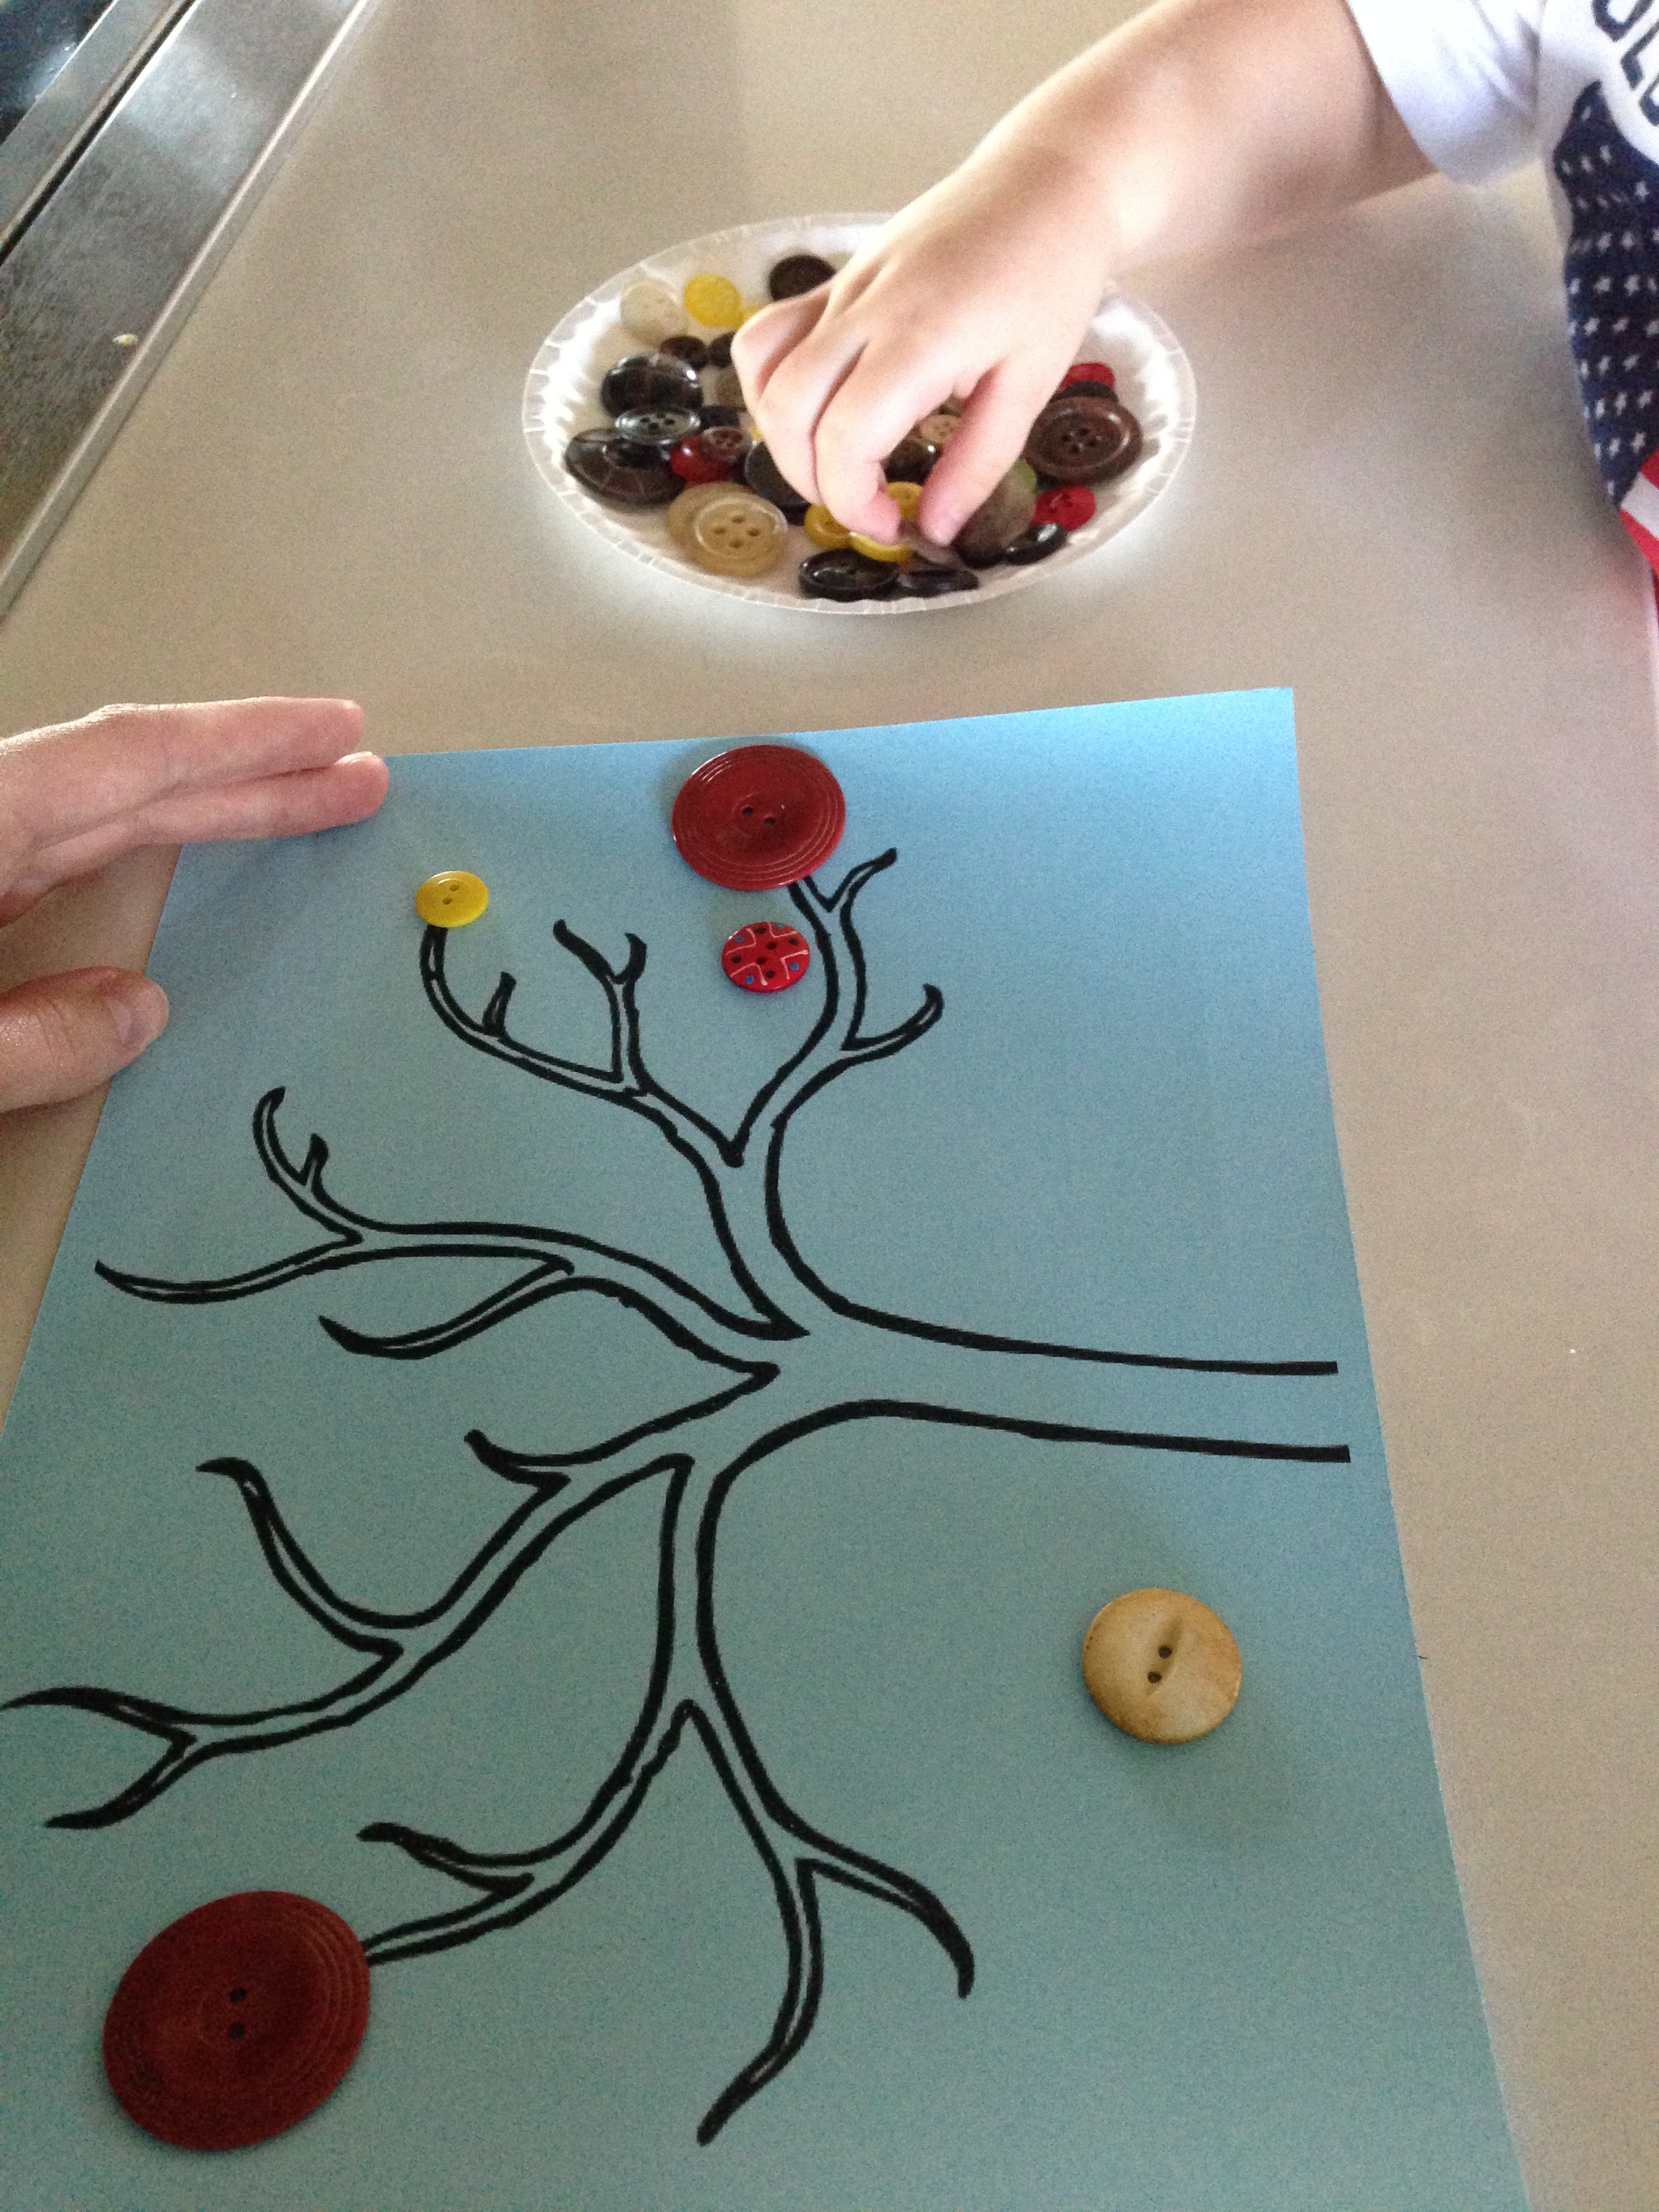
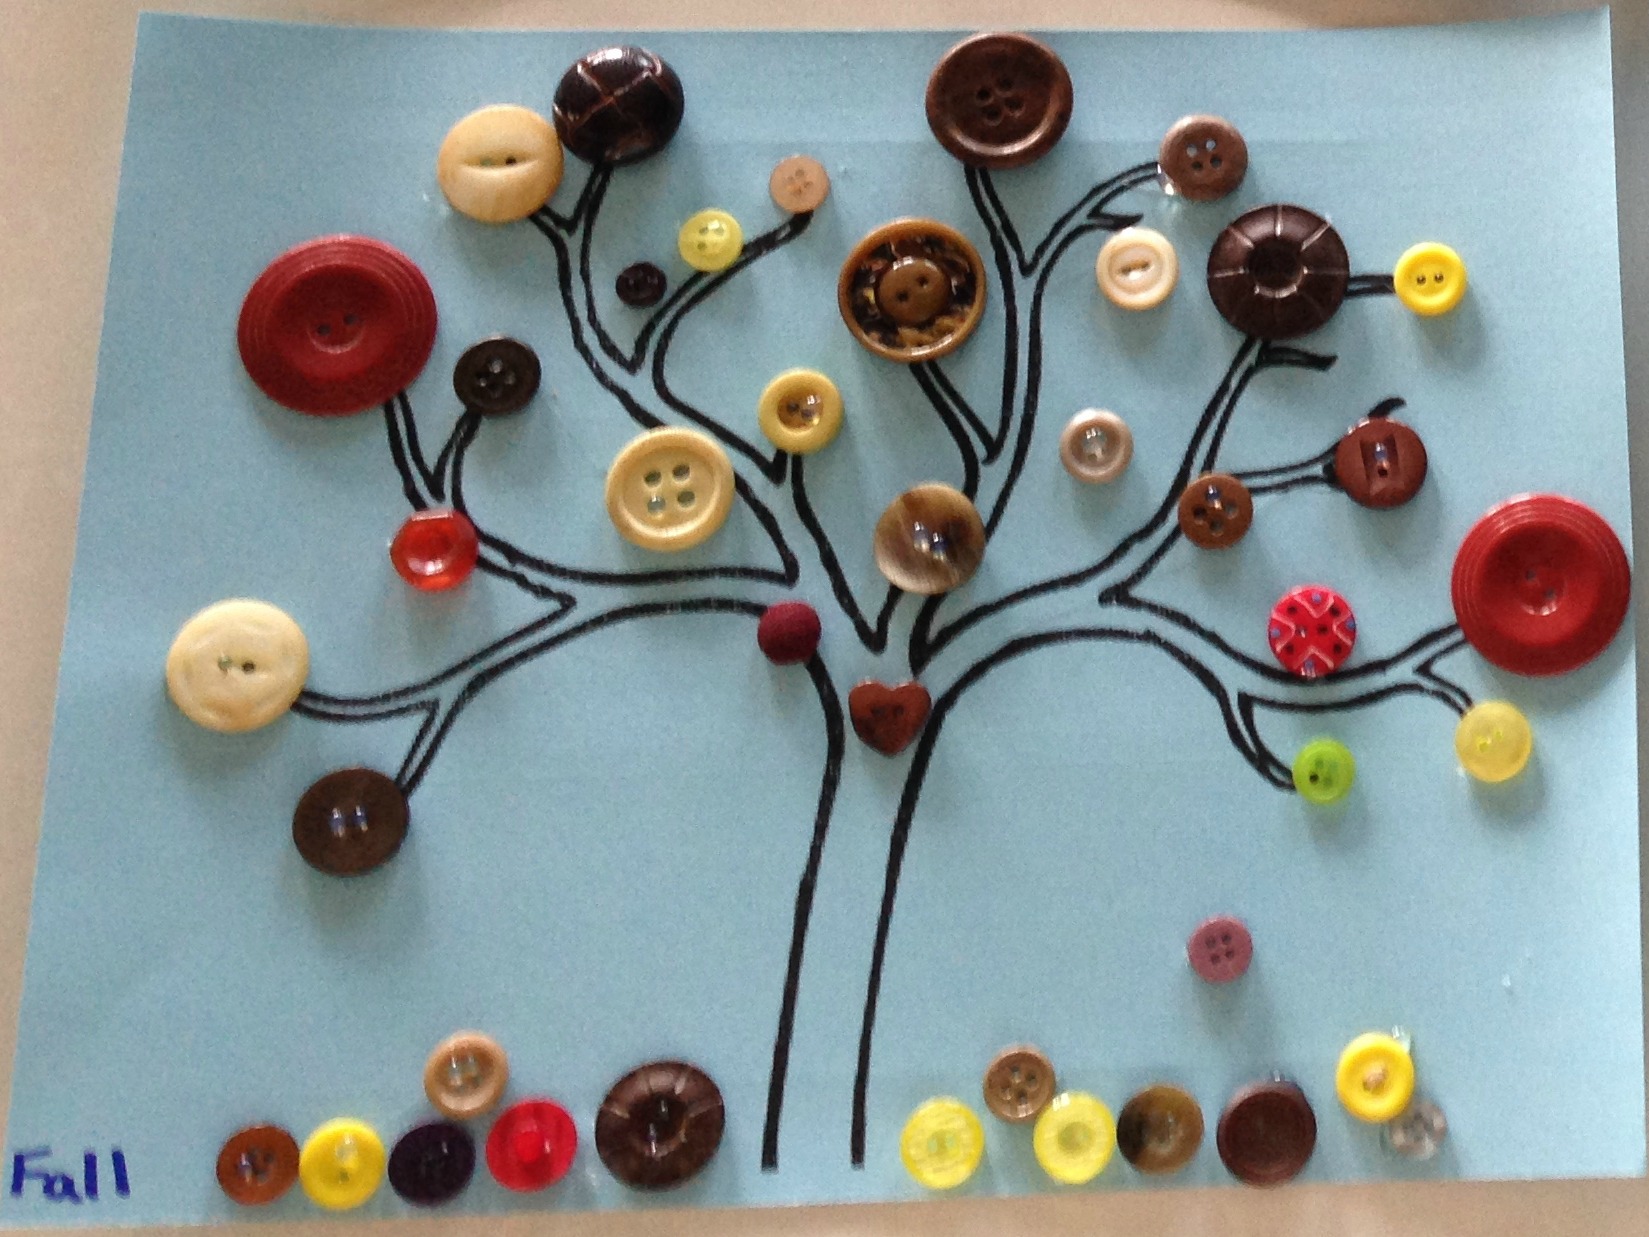
I love buttons.  Like seriously LOVE buttons.  As a kid, I loved going over to my Grandma’s house, pulling out her button drawer, and playing with all the buttons – sorting them, stacking them, whatever.  Just digging my hands into them.  I guess it was my very own “sensory bin” back before that was even a term.  HA!  The cool thing is that I now have a button box – that includes all of Grandma’s buttons, all of Cody’s Mima’s buttons from her sewing table, and quite a few new buttons that I’ve added myself.  It’s an awesome resource, and a ton of fun!  So I saw this post from Maggy at Red Ted Art, and it got me thinking – I could create a button tree with Becca that was specifically fall!  So, I found a tree clipart online (after having learned my lesson on the contact paper tree… Mommy can do lots of things, but drawing just ain’t one of them!), and printed it on some beautiful textured blue card stock.  (Want your own tree?  Get the free printable here!  I simply typed “winter tree clipart” in Google and found this tree from ClipartBest.com and made it fit like I wanted on my document… I’m saving you the work!)  And after the tree was printed, we sifted through the button box, found some fabulous buttons, and then set to work.  Becca placed each button where she wanted it, and I used the hot glue gun to stick them down.  We had some serious fun making this tree, and I think it turned out simply beautiful.  She is so proud of her button tree!

 IMG_9235 fall tree

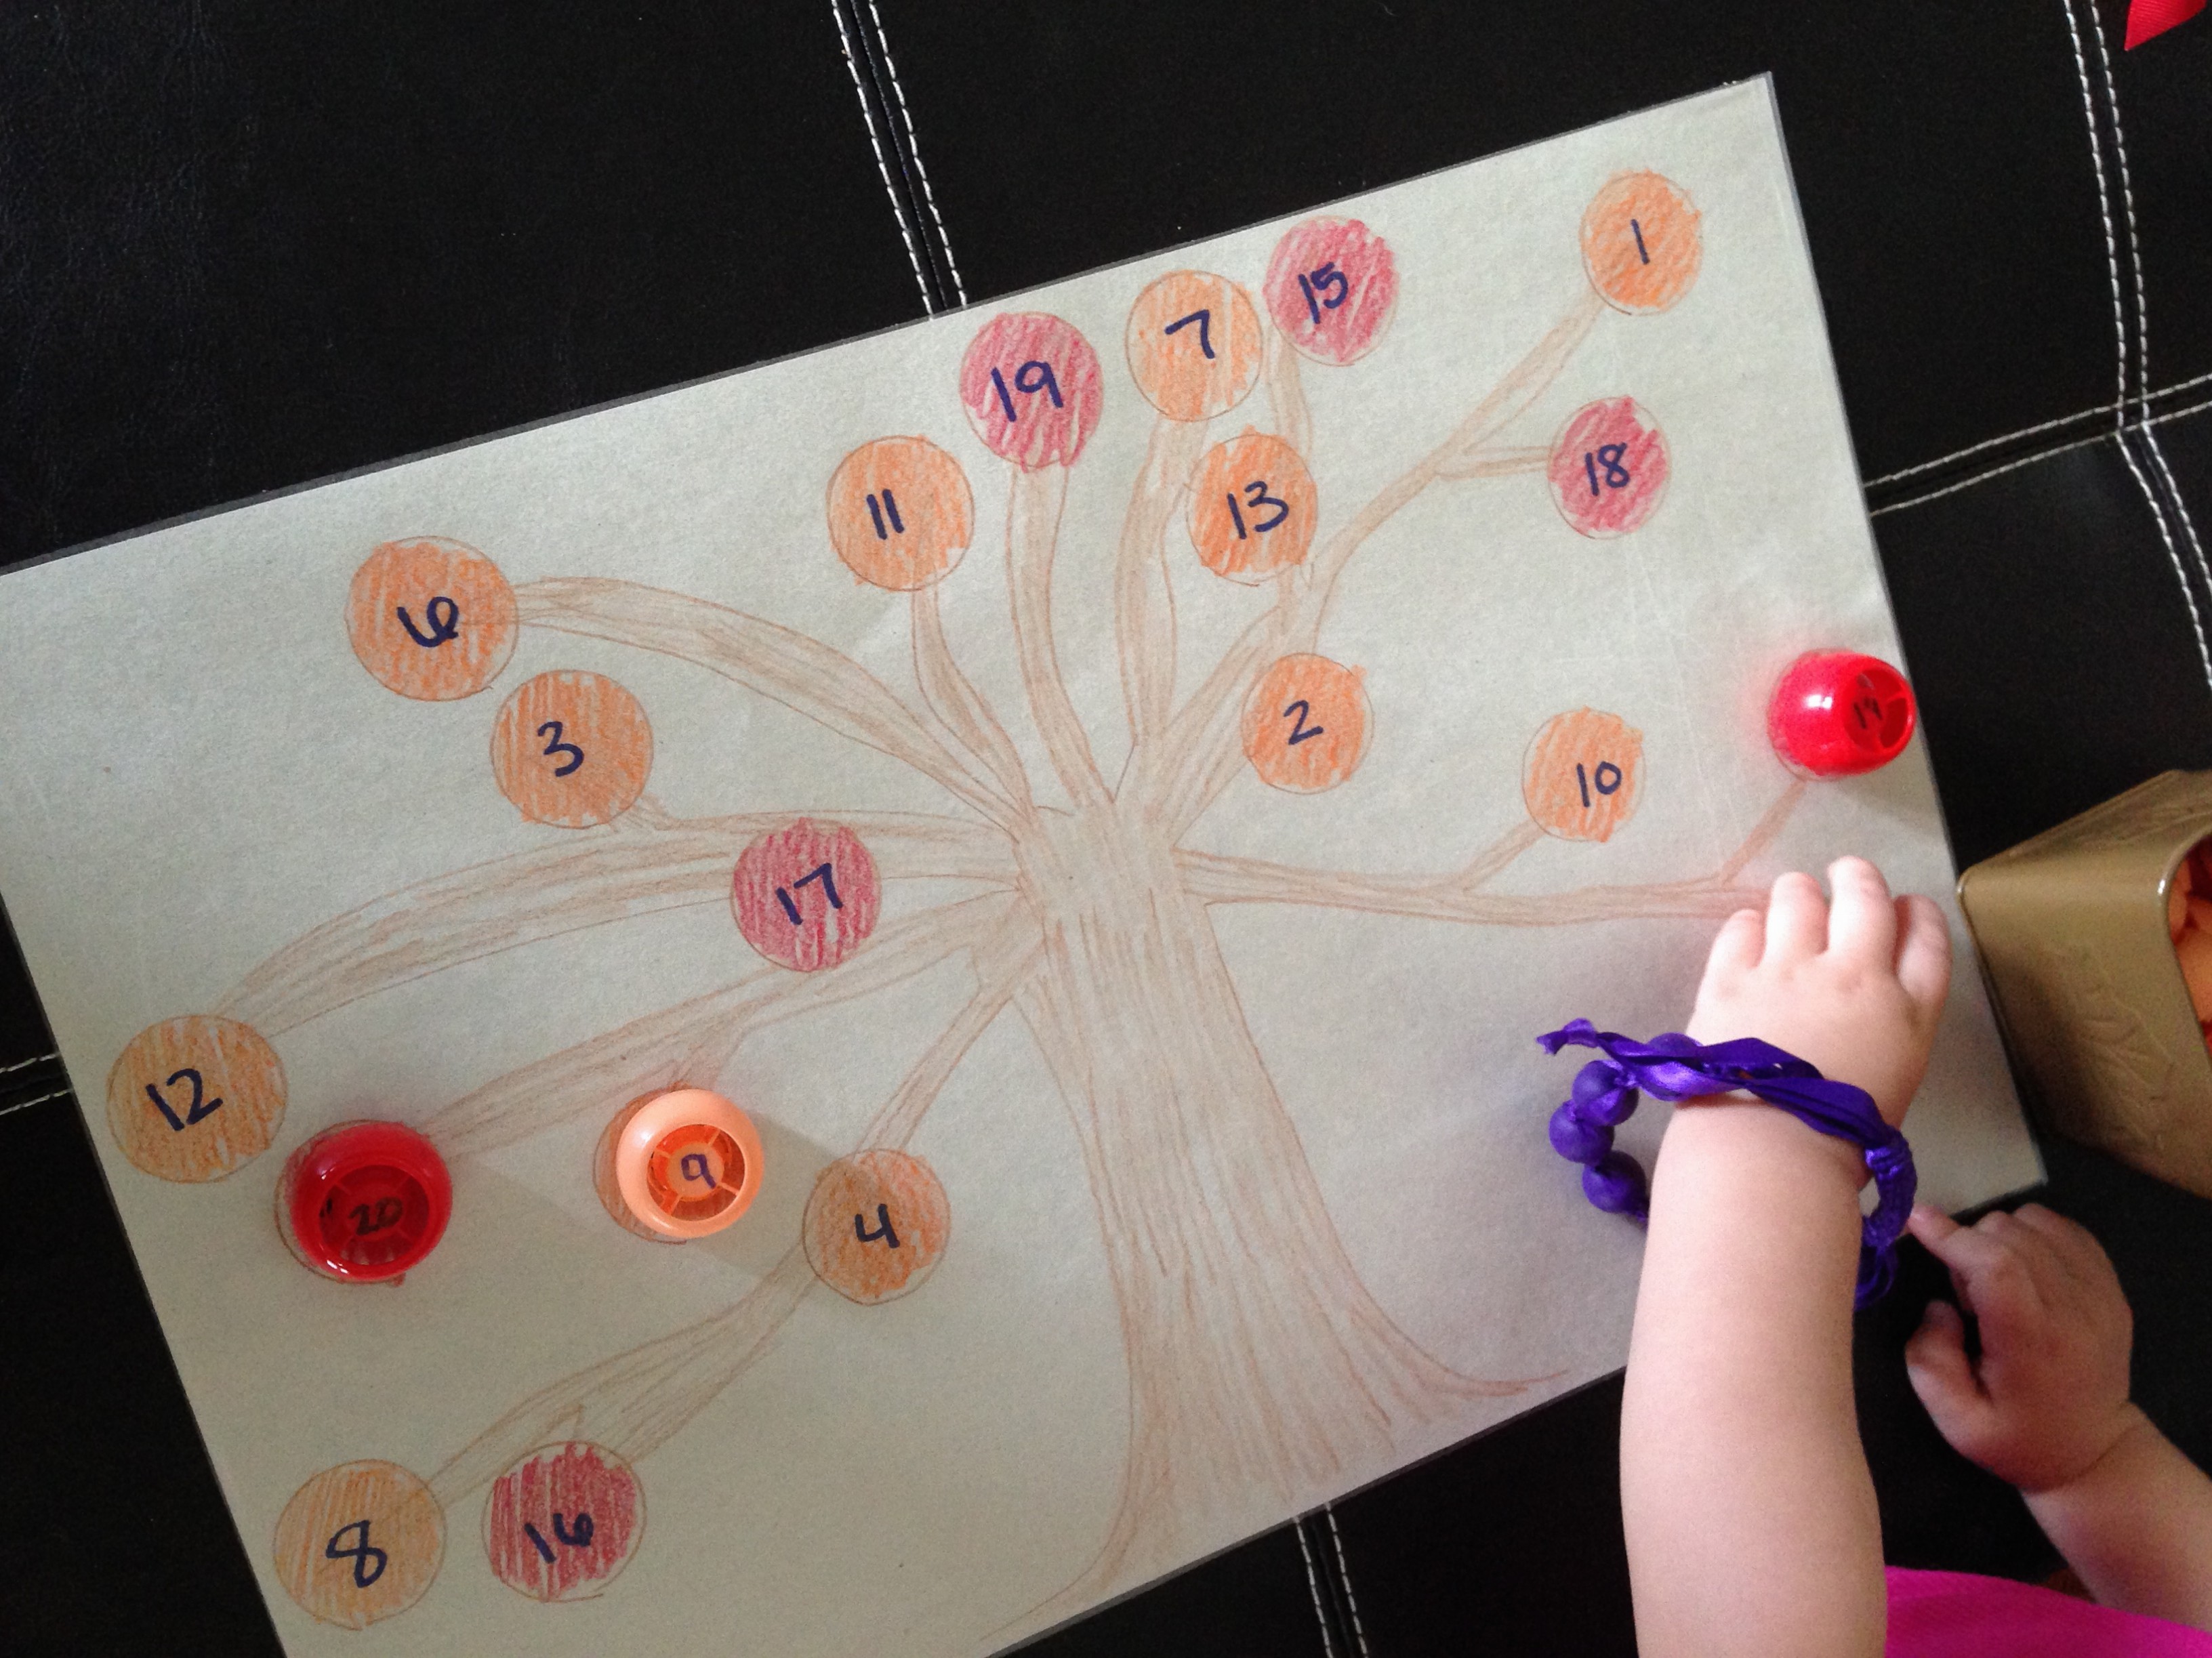
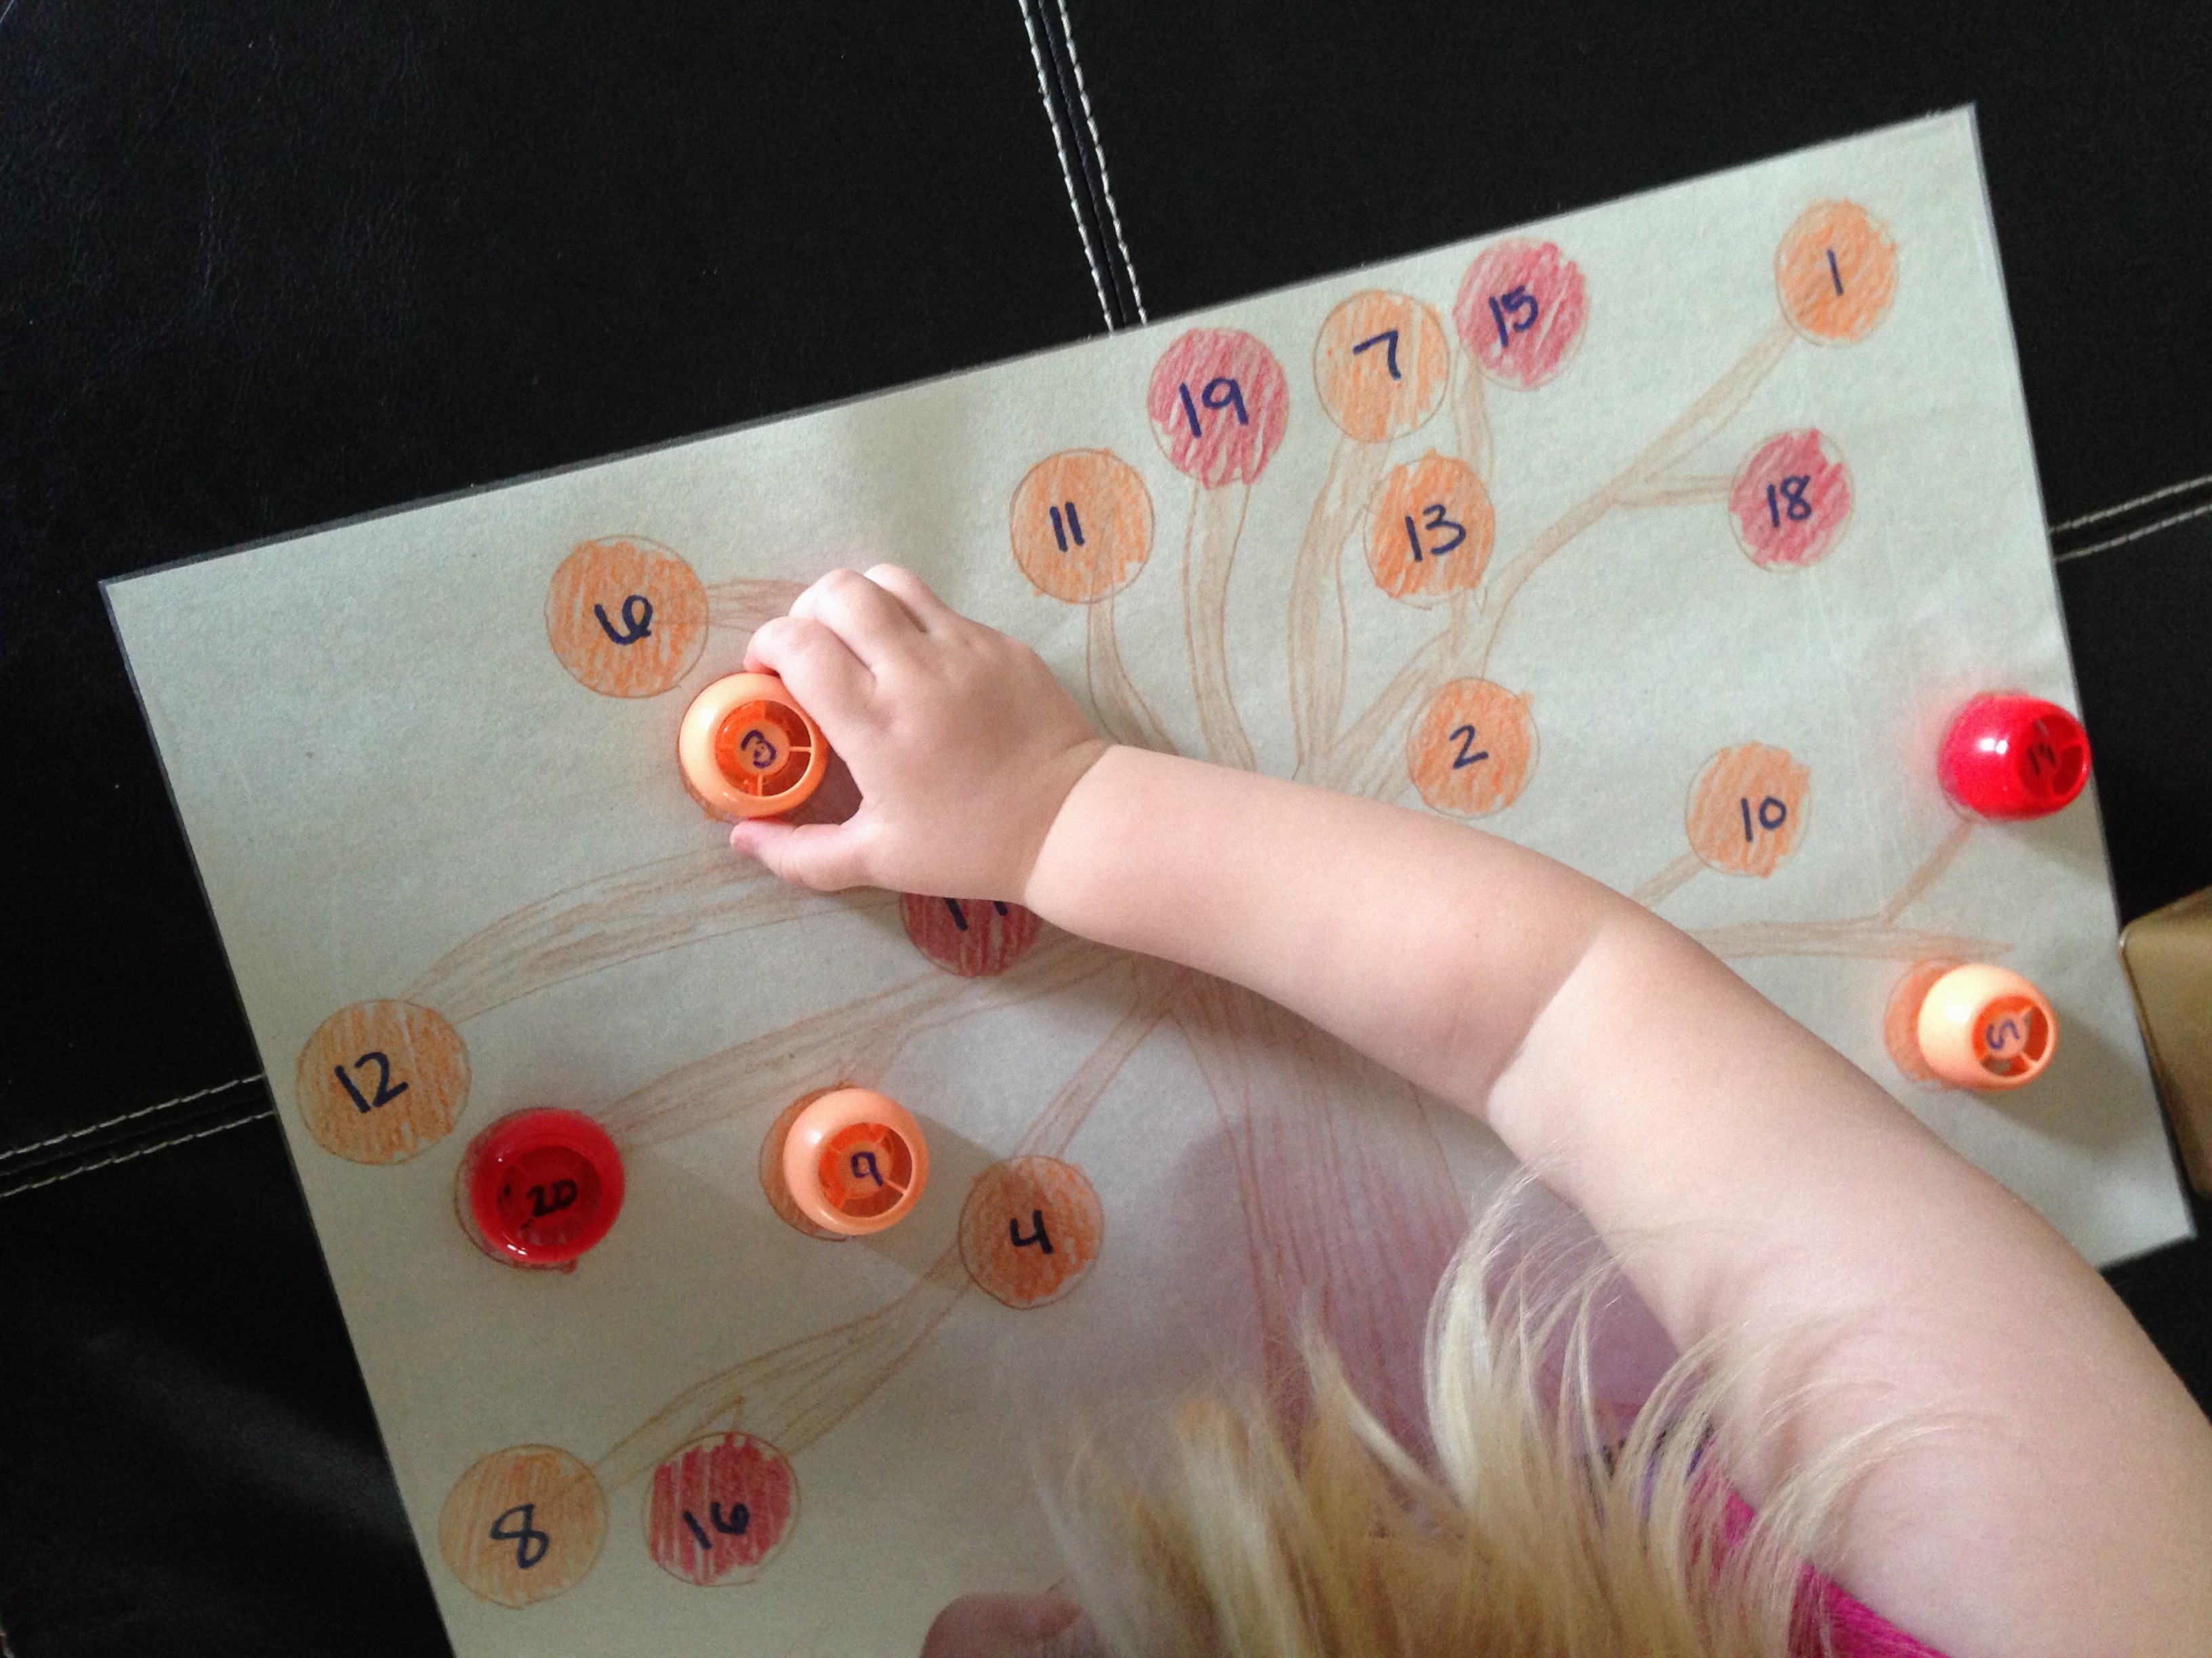
I knew I was going to do this post, so I stretched myself, and said, ok what’s at least one more way I can do a fall tree?  I had to dig deep for this one.  But, I used what we had laying around – tops to Becca’s favorite applesauce pouches (thank you, HEB!) and decided to work on her random number matching skills.  The girl can count – like mad.  But sometimes just seeing a number (beyond ten), recognizing it, and then being able to match it to itself out of order… well, that’s still a little rusty.  So here’s what I did.  I drew on a large sheet of construction paper (again, apology for my lack of drawing skills, but she knew it was a tree, so who cares?) a tree, and then traced around a pouch cap to be sure my circles were the right size.  I covered the whole sheet in contact paper since laminating and using twenty mins later wasn’t an option… Then I labeled each pouch cap with a number, and colored the circles on the tree random colors… and labeled them with numbers as well.  It helps a little because they aren’t all one color, so she knows that the orange ones on the paper will be from the peach applesauce pouches, and the red ones on the paper will be from the plain applesauce pouches – so it helps her check the numbers and make sure she’s on the right track.  She keeps going back to this activity and pulling out new numbers.  I’ve found that she likes to start the activity in the morning before we go anywhere – she’ll place one or two pouch caps – and then later in the day she’ll place three or four more, come back later and place a couple more… she just doesn’t have the energy or patience to do all twenty of them at one time.  Which is fine with me.  I plan to stick these pouch caps in a bag, and pull this back out next fall – when she should be able to do all of them in one setting.

IMG_9282 IMG_9283 IMG_9284

A Trip to the Bee Ranch

Becca has had a fascination with bees almost since the beginning.  We chose to decorate her nursery with classic Pooh stuff – and a friend helped paint a gorgeous mural on the wall – with Pooh and Piglet floating with their blue balloon away from a hive of overprotective honeybees.  This helped Cody’s mom to determine that she would call Becca “Honeybee.”  So that’s part of it – the early indoctrination.  But, she also loves the little kids show about friendship and family called “The Hive” – where the main character is a little honeybee named “Buzzbee.”  If you haven’t seen it, it really is adorable, and the accents are great – they are all British.  You can find it on Disney Jr, or on Netflix Kids.

But then there’s the other aspect of honeybees that Becca loves, and that’s what they produce – honey!  We go to the farmer’s market at the Pearl Brewery downtown (on the Riverwalk) every Saturday morning and participate in a CSA group with a local farmer.  In walking back and forth to their booth every week, we passed several times (ok, passed every Saturday for like 10 months – I’m ashamed to admit) a booth that I finally stopped at one day.  And man, am I glad I did!!!  The Gretchen Bee Ranch bottles and sells at the market LOCAL honey!  If you’ve been to a grocery store in San Antonio, you know that the closest “Local” you can find is sourced North of Austin… which isn’t local at all since it’s over three hours away and I guarantee you those bees aren’t flying anywhere down here to gather their pollen!  So, if you’re looking for truly local honey to help with allergies, the Gretchen Bee Ranch is the place.  I love that they even have a type of honey sourced in the county where we live – since we live about an hour West of where the ranch is.  It’s awesome too – that every Wednesday they open up their shop for anyone!  No age restrictions!

So I decided it was time to take my little honeybee out to the ranch to meet Mr. Mark (the bee keeper) and to learn some more about honeybees!  You’d have thought I gave her a million bucks.  She has talked about those bees and all the honey she got to taste so much!  She’s also super excited that we’re going back as a family to take Daddy when they have their open house in November!  Here are a few pictures of our experience.  I wish I had taken more!

IMG_9066 IMG_9067 IMG_9069

We got to look at some “sleepy” bees on their tray, and then in the display case, Mr. Mark pointed out the queen bee, and Becca enjoyed following her around with her finger, and went back a few times to find her again.

IMG_9071 IMG_9078

I think she could have stood there and watched those bees all day long!

IMG_9073 IMG_9077

She and George followed Mr. Mark over to see the bee hives (from a distance).
She enjoyed looking at the beeswax products, and tasting several kinds of honey!  If you live anywhere near Seguin, it’s worth a trip!

On the way home, she asked me a few questions about the bees, which we typed up together and sent in an email over Facebook, and Mr. Mark’s wife kindly answered them for us.

Here’s what we asked about the bees:

Dear Mr. Mark,
Thank you for showing us the bees and the honey today! I have a couple of questions for you.
How old are the bees? I’m two.
Does the queen have a name? My name is Becca.
How many bees live in a box? We have four people in our house. And two dogs and two fish and our kitty lives outside.
What is a bee’s favorite weather? I like sunny days.
Thank you!

Her Reply/What we learned:

Hello Christy and Becca,
Thanks for visiting the Bee Ranch this morning. Mark is working out in the bee yards so I will help by answering your questions.
The bees all vary in age and depending on the time of year, their life span may be as short as three weeks in summer and three months when it’s winter.
The queen bees do not have names. With over 150 queens, we call them all Queenie.
During summer and at the height of honey production and food availability, a hive can grow to 100,000 bees! During cold times when there is not much to eat on, the queen knows to reduce her colony down to as low as perhaps 20,000.
Bees adapt fairly well to weather but they do love the warm sun so that they can fly out to forage for food! You are just like a honeybee.
Take care and enjoy every day.

Halloween Sensory Gel Bag

Becca loves sensory gel bags… and they are super easy to make!!

You’ll need:
a strong freezer bag (quart size is perfect)
clear book/box tape
clear hair gel – clear works best for this b/c you’re going to be adding your own color… I found a great big bottle at Dollar Tree and used the entire bottle in this bag.
food coloring
stuff to go in it – So I made mine orange, and just used a bunch of sparkly black sequins I had – to make it sort of Halloween-ish.  I saw an idea online that used google-eyes of various sizes.  Or, you could get a bunch of little spiders (I saw them at Dollar Tree) to put inside, or leaf confetti (also at Dollar Tree) if you wanted to make it fall, but NOT Halloween.  So there’s lot of fun options!

Make sure before you put ANYTHING inside that you secure all three closed sides with book tape to prevent little holes and leaks.  Then, fill with your gel, food coloring, and stuff.  Squeeze as much air out as possible, and zip closed, then fold the top down and secure with more tape.

Becca has been enjoying hers not only for picking up and squishing, but also for viewing on her light box!  And how awesome does it look with the light shining thru?

IMG_8860

Apple Theme Center

apple theme center

This post contains affiliate links.  Thank you for your participation!

I’m all about quick, easy ideas that I can throw together in just a few minutes.  This center was not one of those ideas.  So if you are just starting with sensory activities for your kiddos, this is not the place to start.  BUT – any one of these ideas on their own IS a fabulous start.  You just might not be ready to put them all together on one day to create a center.

If you’ve read my blog much, you know that Becca is typically satisfied for quite a little bit the first time I intro an activity, and then beyond that, it usually only gets about 5-10 mins of play in a day, every now and again.  The great thing about this center is that she has really been glued to it for quite a while, and will go and select a different activity different times… which makes me happy since I did take about an hour to put it all together.  (As an aside – I’ve started this week going around and putting away old activities – storing them in labeled Ziploc bags – so that in a couple months I can pull them back out and they will be new again.  Sneaky Mommy! 😉 )

The first thing you’ll need for your center is a place to put everything.  Maybe you have an adorable little bookshelf that everything goes on fabulously.  Or maybe you have a water table like ours (aff link) that is just waiting to be filled…

Here are the activities in my Apple Theme Center:

Word Building/Reading
Apple Sorting/Tossing
Rock Dumping/Shaking
Ten Apples Up On Top Reading/Building

IMG_9045

Word Building/Reading
This activity has been in my brain for  a while, but I hesitated to do it with her because I actually don’t have a set of magnetic letters.  And then it hit me – I DO have magnet tape!  So, I wrote the words I wanted on index cards, and cut out the letters.  Then I stuck tiny pieces of magnet tape on the back!  This little sheet tray I got at Dollar Tree in the cooking section.  It’s also the perfect size for her little hands to haul out of the center and over the automan or couch for more intense play just focused on this activity.  She has begun to try to read the words as sight words, and is doing really well.

IMG_9043 IMG_9044

Apple Sorting/Tossing
Again with Dollar Tree – I found these little green and red apples in the home decor section, and then I pulled the red and green buckets from her Farmer’s Market Set (Get Yours Here – Aff Link) and she can sort them.  She has also enjoyed setting the bucket on the ground and stepping back to toss the apples into the correct bucket – making it a great gross motor activity, as well.

IMG_9192 IMG_9052

Rock Dumping/Shaking
I read somewhere that you could make rocks or other hard materials scented by adding tea leaves to them (I honestly don’t remember where), so I got these green rocks, again, at Dollar Tree in the home decor section – literally right next to the apples – and I added Apple Crumble Black Tea to it – so they smell like apples!  I had thoroughly cleaned and dried out a coffee creamer bottle, which is absolutely perfect for this activity.  She loves to use the funnel and scoop to put the rocks into the bottle, then close the lid, shake it, and then open the lid and shake the rocks back into the bowl.  It’s turned into a super fun activity that covers several of the senses.  (SO IF YOU’RE JUST SELECTING ONE OF THESE ACTIVITIES TO START WITH, THIS IS A GREAT ONE!)

IMG_9045zoom

Ten Apples Up On Top Reading/Building
We LOVE the book Ten Apples Up On Top.  So when I saw this idea from Ellen over at Cutting Tiny Bites, I just new we HAD to do it.  Here’s how we extended her activity a tad.  I printed up this sheet (FREE PRINTABLE HERE!) of ten apples, and let Becca paint them.  (I had planned to do red, green, and yellow, and then discovered we were out of paint.  So that might be an extension you’d want to add.. so that as you build, you can build a pattern!)  After they had dried, I cut them out and taped them onto ten blocks.  We only had nine that matched, so the tenth one is the “roof,” as Becca calls it.  So here’s how you do it – as you read the book, you stack an apple block on top each time that the animals in the book add an apple.  It’s super fun.  Although if you pick a heavy top block like we did, you’ll end up with all ten apples up… and then dropping.  But, that just adds to the fun!
Looking for the Ten Apples Up On Top Board Book? Here you go! (aff link)
Looking for wooden blocks? Try this set! (aff link)

IMG_8762 IMG_9193

Fyi – your Apple Theme Center will not stay looking like my top picture for very long.  After lots of love, it might look something like this… IMG_9061but just know that this means its being well loved, and your child is getting lots of benefit from it… and if your magnet board looks like ours, you’ll know your hubby has been playing as well. 😉

IMG_9061zoom

Total Mommy Prep Time: All told, it probably took about an hour to put it all together – maybe a little longer?
 Total Becca Play Time: She spent about 45 minutes here the first day, and has easily spent 15 minutes every day since then on these activities.  VERY beneficial and well worth my time to put it together!

Apple Volcano

There are LOTS of blog posts out there about how to make apple volcanoes, but if you haven’t done this with your kids, you really really should.  It’s super fun to make the apple “explode.”  Simply cut the core out, leaving the bottom in tact.  Pour baking soda down inside the apple, and replace the core.  Then, place it on a tray and pour vinegar over top!  That simple!  Becca enjoyed sticking her hands inside the “bubbles” and feeling the volcano.  Then, she found the vinegar smell interesting, and enjoyed playing in the soap in the sink to help her hands smell better.   All in all, it was a super fun after dinner activity!

IMG_8770