Calendar Art… It’s Time!!

art

If you’ve been following my blog for a while, you already know about the Christmas gift of the century that Becca and I created last year for her Pappy, PawPaw, and Daddy.  I nearly killed myself trying to get it all done in time.  So I decided to blog about it starting back in January, and start working on the art work – and give you ideas so that you could create your own calendars with your kids.  If you didn’t see the original post, it’s here.

Maybe you’ve been working on your amazing artwork all year right along with us, or maybe you’re just now getting started.  The beautiful thing is, it’s still August.  YOU HAVE TIME.  If you haven’t started yet, TODAY is the day!  It’s TIME!!  If you’ve got your artwork ready, and you’re just waiting for the calendar printout I promised, it’s HERE!  Click HERE to download your FREE 2016 printable calendar ready to print out and stick in those calendars.  free calendar 2016

In a couple of weeks I’ll sit down and get to the nitty gritty of actually how I put them together.  Because you’ll want to know the lessons I learned from my mistakes, I’m sure. 🙂

My challenge for myself this year has been that I did a bunch of art with Becca early in the year, and I just flat out haven’t been brave with Grayson really yet.  So in the next few weeks, I’m going to bring out some of our favorite art painting techniques and let Grayson try them!  So for those of you with Baby Bees, you’re about to see this mama get really brave… It’s Toddler Painting Time in the Hinnant House!  My goal is to have enough artwork to make every third month a collage of Grayson’s art.  Next year we’ll start in January with both of them and do every other month in the calendar as work from each child.  This year Becca will be a lot more involved in making the collages, too.  I’m really excited about starting on them – I’ve gotten a few of them started with her over the course of time, but haven’t fully finished any of them.  This is such a fun project, and I’m excited about planning an art time into our “school” day each day – for both kids.

Here are links to some of our favorite “Fun with Art” ideas that we’ll be revisiting in the next few weeks with Grayson:
Painting With Cars
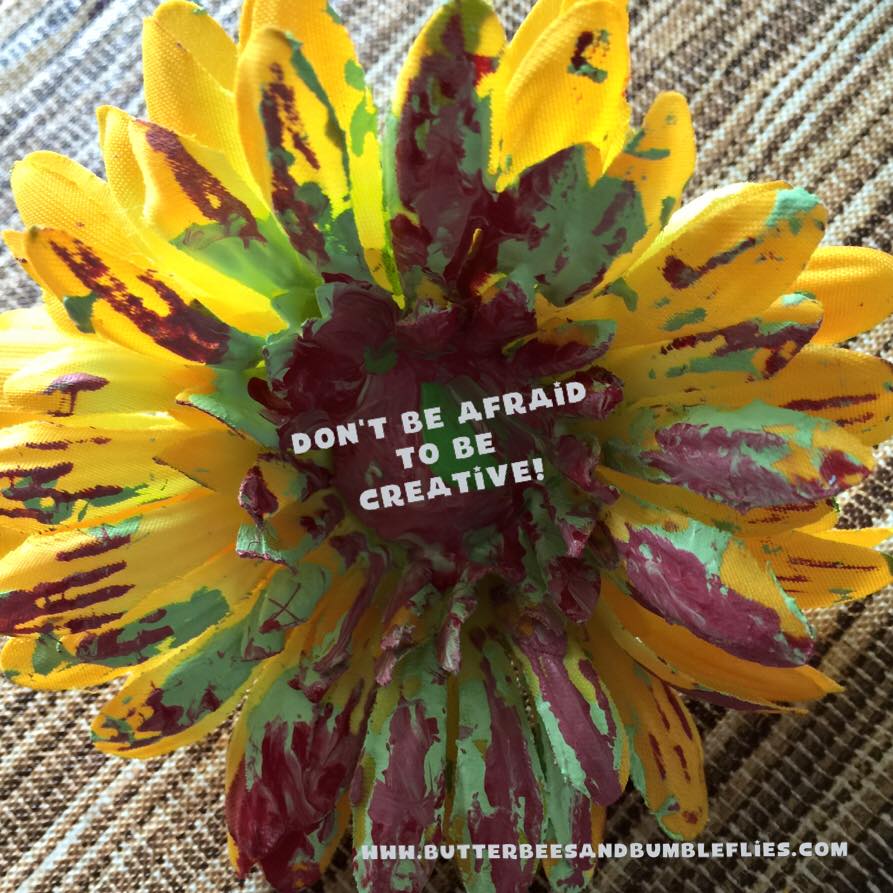
Kitchen Brush Flowers
An Invitation to Scrape

Plus check back here next Friday for a super fun idea for Toddler Bees AND Big Butterflies that uses those millions of toilet paper rolls you throw away every week!!

Custom Penpal Art Cards

Yeah, this post totally isn’t a normal Wednesday “From the Heart” post, but since I intended to have it post yesterday and didn’t get it finished, I decided to just do it today!  Enjoy!
A few years back, I came across an Etsy shop that looked neat.  What has happened since then is nothing short of a love affair with cards.  I’ve always been fond of custom cards, and I enjoy scrapbooking and styling my own cards occasionally.  But printed cards have never been within my realm of expertise.  Enter Jessica Bates, from Jack and Ella Paper Press.  
10171242_708295029239776_6808279950453688934_n
Over the past several years, she has designed custom Christmas cards for our family, has created an entire custom line of “thank you” stationery for my travel clients to meet a variety of needs, and now this- all to my design specs.  She’s talented, sure… a mind reader?  Most definitely!!!  I can send her my ideas and somehow it’s like we’re on the same brain wave length.  It always turns out perfect.
other cards
This project was no different.  I wanted Becca to be able to start writing to friends and family – via mail.  Granted, she could have done so on construction paper, but I thought Jessica would be perfect for this project, and she was!  (We’re already discussing modifications for additional cards!)
So I wanted a big circle on the front.  Becca normally creates her art on a blank paper.  I wanted to see how many different places she could go with a circle.  (We’re contemplating triangles and squares coming soon!)  I also knew that to begin, I’d be writing.  But soon, she’ll be writing more on her own and she’d need plenty of space, and some guidelines for her words.  I drew up my design idea and sent it over to Jessica, who of course made it better than I could have imagined!  I love that they are of heavy paper so she can do any type of art she likes- acryllic, glue, watercolor, anything.
penpal art
For her first two cards, Becca chose to paint with acryllics.  She made a sprinkle donut and a butterfly.  She wanted me to help make zigzags on the butterfly wings and make the sun, so I held her hand.  She did the movements herself- she has much more talent for hand movements than she realizes.  We let them dry, and the next day we sat down to write our messages.
We talked about our two penpal families, where they live, how many kids they have, etc.  She decided which design of card needed to go to which family, and told me what to write to them.  We talked about letter structure- how if we want them to write back, we need to not only tell them something, but ask questions to learn more about them and show that we care.  She was very good at coming up with questions!  Then she had me help her draw a heart for her salutation, and she wrote her name on each card.
I showed her the parts of the envelope, and we discussed where the recipient address goes, where our address goes, etc.  She stuck the stamps on, and then added some stickers for a little added Becca flair.  She was super excited to mail her cards and she’s anxiously awaiting her penpal notes back.  She already has ideas for more cards she wants to make and send to more people.  So I don’t think we’re anywhere near the end of Project Penpal!
Have you done penpal projects with your kids?  If you’re interested in having some custom penpal cards like these for your kiddos, be sure to contact Jessica and I know she’ll be glad to hook you up!!  (Fyi, she’s not paying for this “ad” in any way… I’m just writing this simply because I love her work and know you will too!!)
Be sure to let her know you heard about her from Christy, and that you are interested in some penpal cards!

Sauce Painting for Baby Bees

artRemembering that every child is super different has been hard for me.  I’m sure every mom struggles with it.  I’ve heard myself say “Why aren’t you like your sister?” And then the guilt comes washing in like waves beating up the seashore.  I don’t WANT my Baby Bee to be like his sister.  But certain similarities sure would be nice.  Like if he would get over this need to put EVERYTHING in his mouth!!!!  By this point with my Big Butterfly I was doing arts and crafts and sensory bins and more… Because she didn’t put things in her mouth!!

But I realized (finally) this last week that I need to get over that.  He isn’t his sister.  And I don’t want him to ever be… So, one of the main ways he explores his world is with his mouth.  He’s still majorly teething, and he needs to feel textures with his mouth to help combat his pain.  That’s why he licks touch-and-feel books.  That’s why he gnaws on everything.  Because his mouth isn’t finished doing a lot of really painful work, and he’s very aware of how it feels.
So, all of that is ok because it’s who he is.  However, it does make my life quite difficult.  I want him to be able to do fun things like I do with his sister… And he will in time.  Until then, I had to find a way to let him do things his way- that were safe for him.  Enter food.
I know there is a lot of controversy about using food as a manipulative for anything other than eating, but when you get desperate to provide experiences for your oral child, food is a FABULOUS way to safely allow participation – and exploration!
sauce painting
Sauce Painting is probably the easiest activity I’ve ever had to prep… Don’t buy anything!  Just set up your child’s highchair tray with a variety of sauces you already have, put them in the chair in just a diaper, and be prepared for a bath afterward!  It’s so fun to watch as your child experiments with the different textures, colors, color mixing, and of course, tasting!!
I will add here, however, that for once Gray never put his hands in his mouth!  Had I used paint, I’m sure he would have had it head to toe – including internally… but since I used yummy sauces, he of course decided not to indulge.  He truly keeps me guessing!!
For the painting aspect, I just grabbed a piece of scrap paper (this isn’t going to be the Van Gough you hang on the wall, mom – it’s going in the trash after you take a picture of this fabulous work of finger paint art… so don’t waste good paper on it!!) and let him paint!  He also got “paint” all over the place mat and the table, so a plastic table cloth taped down ahead of time might be worth the prep time if you are really picky about messy activities.
Sauces I used: Tarter Sauce (he LOVED the chunks!), Ketchup, BBQ sauce, Spicy Brown Mustard, and Honey Mustard.  You could use anything you’ve got that is paint consistency.  Mayo, regular Mustard, anything like that would work.  Remember that if you’ve got an oral kid, there ARE ways around it, and you can totally still provide them with art experiences… you might just have to experiment and step outside your “normal” box of crayons, markers, and water colors.

Mystery Messages

steam activities header

A super fun way to spread the word… about anything… is to make it a mystery!  Whether your child makes the message, or you do, there’s nothing quite so exciting as taking what appears to be a blank white sheet of paper and turn it into a special message!  Becca simply loves doing these crayon resist water color paintings, and with this activity your options are truly limitless!mystery messagesJust take your white crayon and write a message on white cardstock, then paint over it with water colors to reveal the mystery message!

Your mystery message could be a simple Bible verse, an I love you note, a reminder of your home address/phone number, or a sign for your child’s door!  You could easily make math fact cards or illustrate the life cycle of a butterfly.  The awesome part is the science lesson behind it all – water won’t stick to wax!  The colored water just beads and rolls right off.  Becca has decided that next we need to try mystery messages on other colors of paper.  So we’ve been trying to pair up the right shades of crayons to our paper stash to see if we can make mystery messages in more than just white!

Have you already tried crayon resist paintings with your kids?  Well, what about glue resist?  It’s a little more complicated – make your glue design and then allow it to dry thoroughly before painting.  You’ll have to also try different kinds of glue – what sort of results do you think you’ll get trying Elmer’s vs hot glue?

It’s so fun to get your kids to predict and then check their hypothesis!!  Introduce the scientific method early and often to your kiddos and they will learn to love science… as well as see how much it relates to everything in our world!


Painted Flower Bouquet

art

It’s time for another Friday segment of Fun with Art!!  We have been doing a lot of fun things lately, but she’s been on a big dry erase/crayon book/scribble on paper mode, so I haven’t had a ton of art ideas to share with you.  This idea came from several weeks ago when we were painting and she grabbed a silk flower and wanted to paint it… and for some odd reason, I said ok.  What she made turned out beautifully, and you might have seen it if you follow my Facebook page.  Here is the one she did:

1460161_1640435956171695_7179374873264105346_n

It was already yellow, and had a large “diamond” in the middle, which she completely covered in paint.  So anyway, since she enjoyed it, when we were at Dollar Tree one day, I picked up a bouquet of white silk flowers, thinking she could really get creative with them.  This morning we finally pulled out the paints and painted them.  I think they turned out absolutely gorgeous!!painted flower bouquetHere are a few tips/tricks for painting success when it comes to silk flowers:

1. Buy them cheap.  The cheaper the better.

2. Use a good acrylic paint because it’ll go on very easily and not make the petals so wet that they stick together.  (It also dries relatively quickly.)

3. Carefully pull the flowers off of the stem to paint them.

4. Let them dry individually on a paper plate before putting them back on the stem.

5. Be creative!!  Remember that you don’t have to use a million colors to make some beautiful flowers.

6. Paint the stems and leaves too, if you want!  Why not?

7. HAVE FUN!!!

8. Please SHARE your painted flower bouquets on my Facebook page!  I’d love to see the ones that you create!

These would be a fabulous birthday/Mother’s Day/teacher appreciation gift that can be customized to the recipient’s favorite colors, could be tied with a ribbon and/or placed into a small vase!