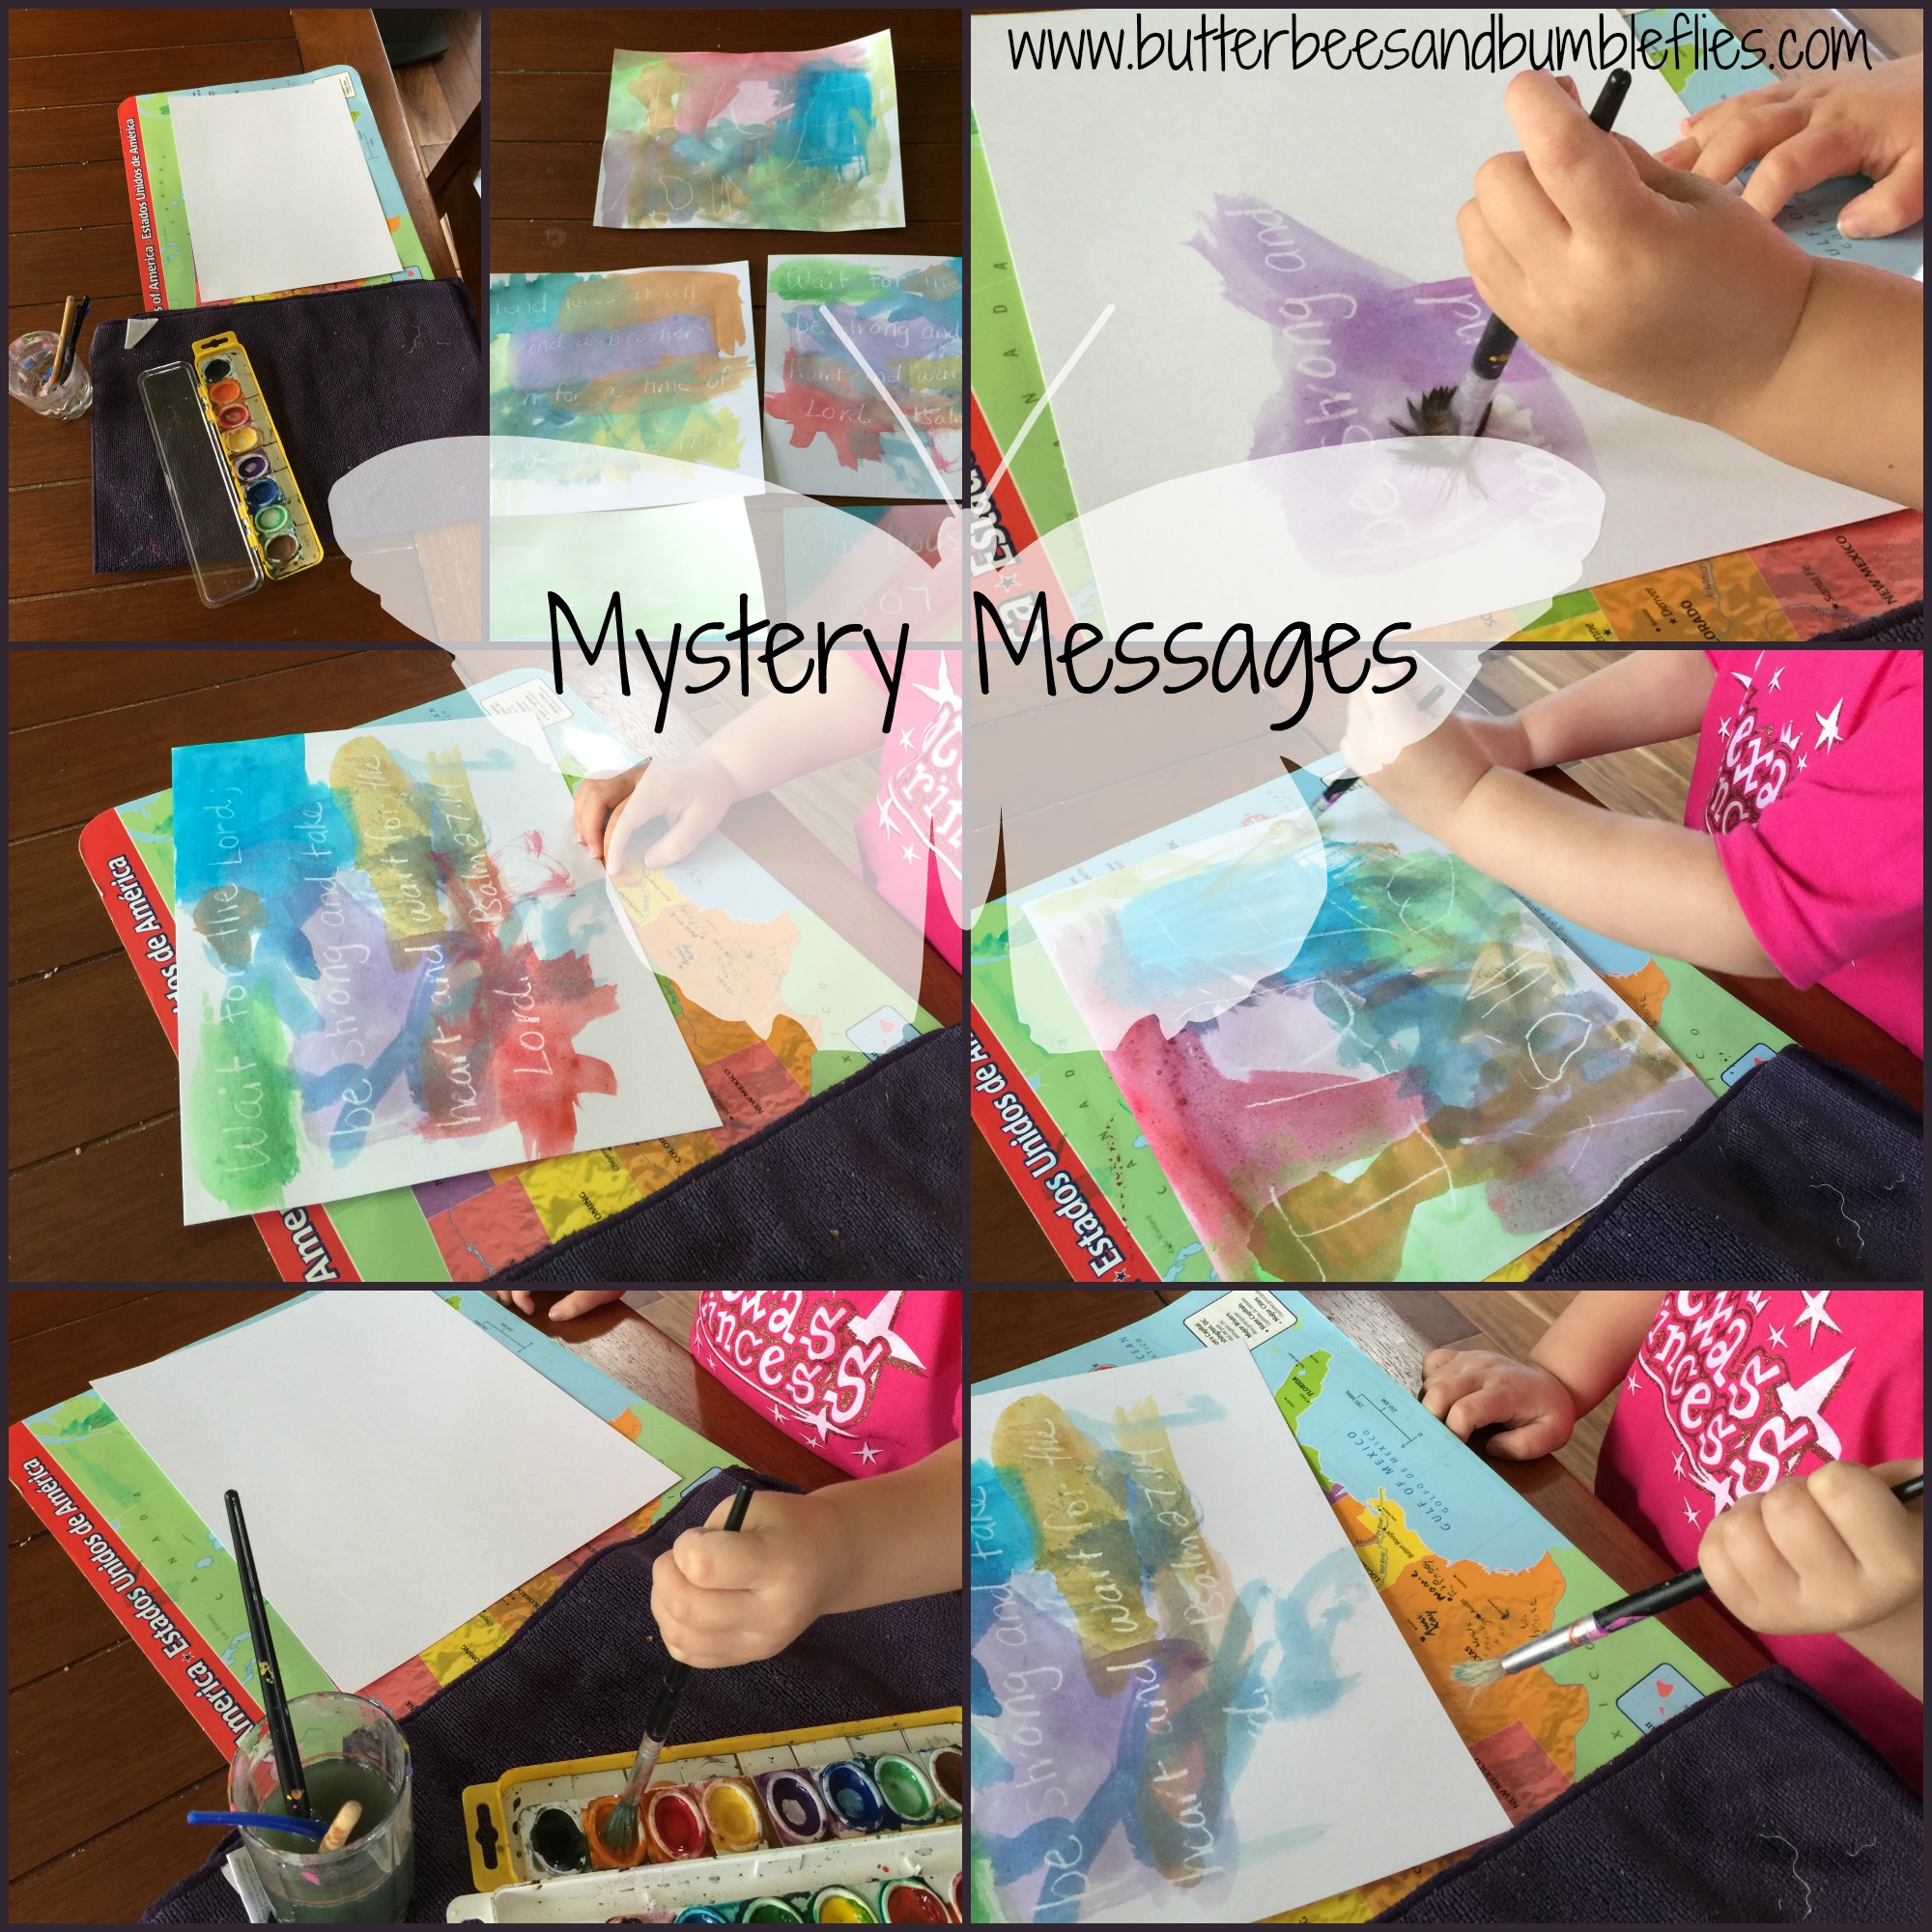
Today’s Theme: Science, Tech, Art, Math
(yup, 4 for the price of 1… and technically, you could say it’s Engineering too if you use your items collected to build something…!)
With my life as crazy busy as it has been lately, I’m going to be perfectly honest with you that we’ve been doing a lot of super free, unplanned play. Like watching a lot of Sesame Street. And Creative Galaxy. And Super Why. And building train sets. And marble runs. And working puzzles. And coloring in coloring books and on plain paper. Ya know, the ordinary, unexciting activities that make up MOST of our normal lives. Not a whole lot worth blogging about and saying “wow, isn’t this fantastic? Don’t you want to do this with YOUR kids?” HA! But, I know that one of the things my readers comment on the most is how they feel inspired by what I share. And honestly, that is humbling. And it helps hold me to a higher standard for my own kids. And I appreciate that. Maybe it’s something about turning 31 today (really? 31? I remember when 30 seemed ancient… and now 50 doesn’t sound that old…), or maybe it’s just because my life has been so crazy that I’ve had to think about hitting the “reset” button on our school time… but for whatever reason, I came up with a super fun, EASY activity to do with Becca this past week that she absolutely loved. And hopefully your kids will too! (And hopefully I can come up with some more fun ideas very soon! Might be time to pull out my Raising Creative Kids book again and snag some more ideas from Colleen!! Have you gotten her book yet? OMG. You need it. You really do. The link is on the right hand side of this page… or at the bottom if you’re on a mobile device. And yes, it’s an affiliate link, so I make some dough from your purchase – THANK YOU!)
Wow. That might well have been the longest run-on paragraph I’ve ever written here on my blog. Thank ya’ll for sticking with me through that! HA!
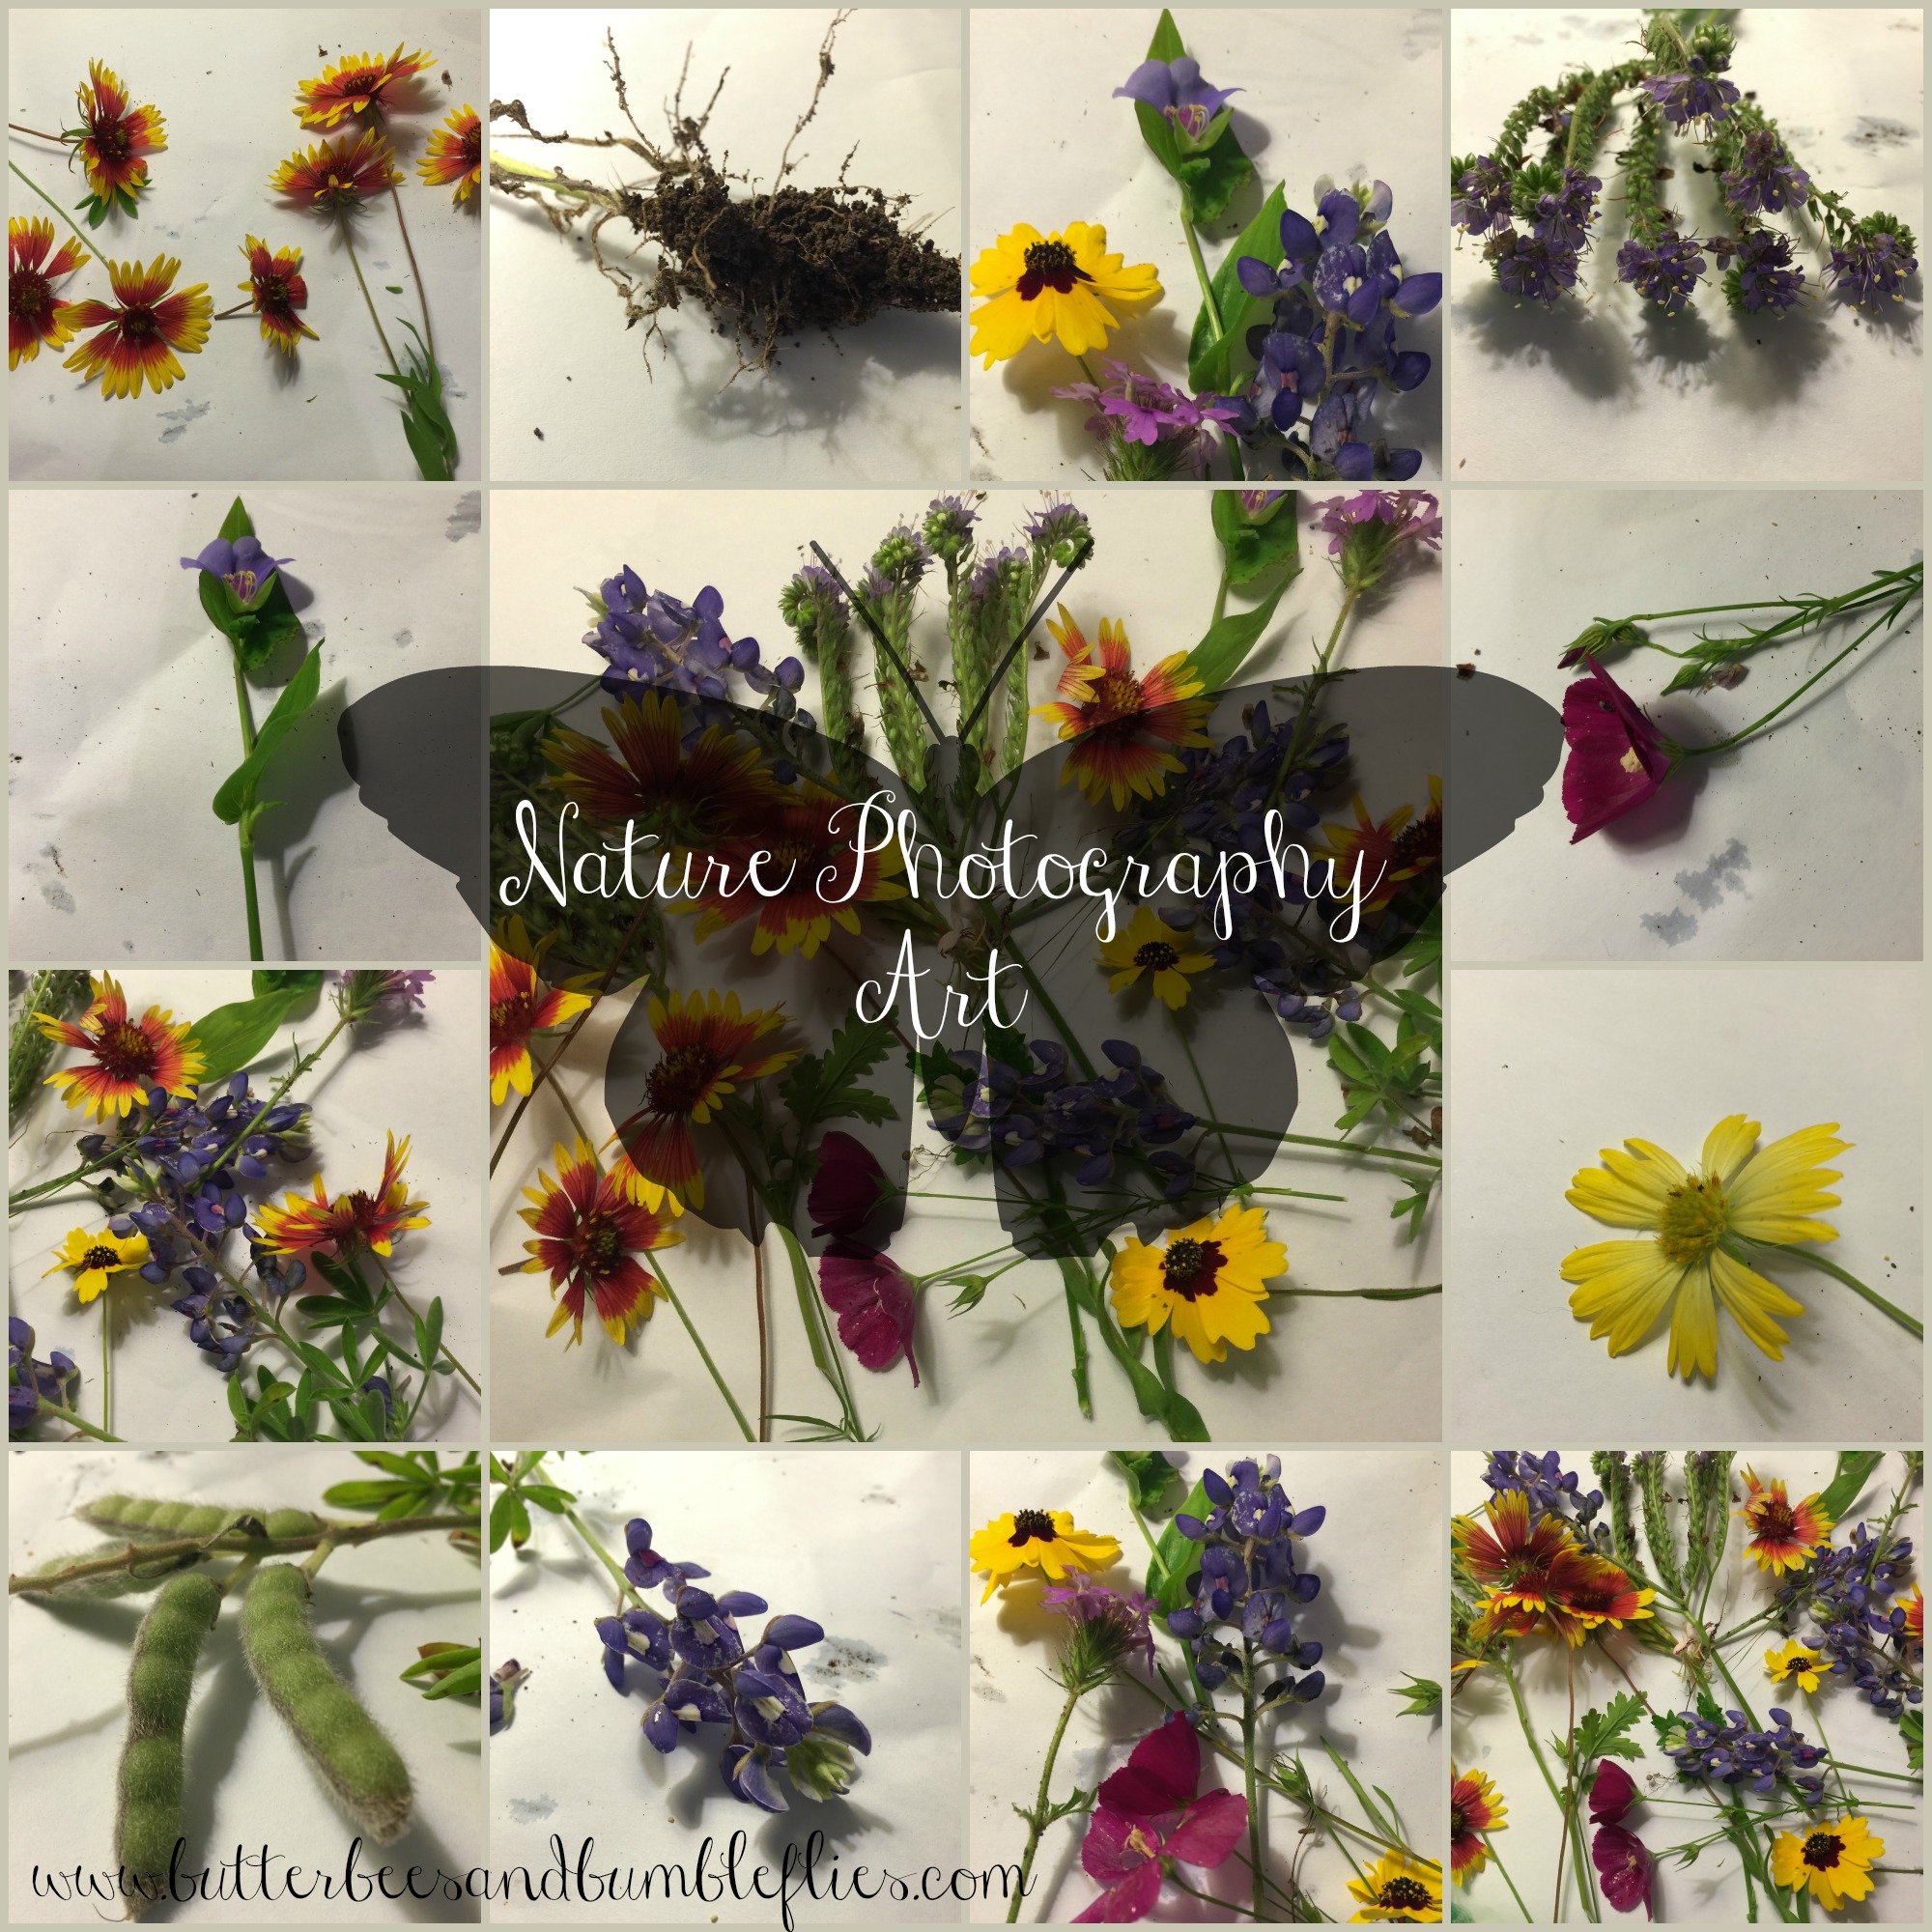
And now to the nitty gritty – Nature Photography Art!
Becca LOVES to get out in our yard and explore. We are so blessed to have some amazing land for her to roam around on, and even more blessed that we’re on the edge of Texas Hill Country, so our wildflowers each Spring are just simply incredible. With zero work on our part. God just paints our land every single year for us, and we are so blessed! Cody and I both love to take nature photos – it’s one of the things that we first found that we had in common when we met. So our kids see us take pictures of flowers and trees and butterflies and random rock formations ALL. THE. TIME. And Becca often asks me if she can take the picture. But I hesitate to let her hold my phone outside – especially on a day like the one when we did this activity – because the ground was moist and there are random rocks… ya know, my luck I’d hand her my iPhone 6 Plus and she’d drop it face down into a mud puddle with rocks at the bottom (I know Apple Care is great, but…)! So I came up with this idea to get her involved, let her take nature photos, and yet do it in a structured environment.
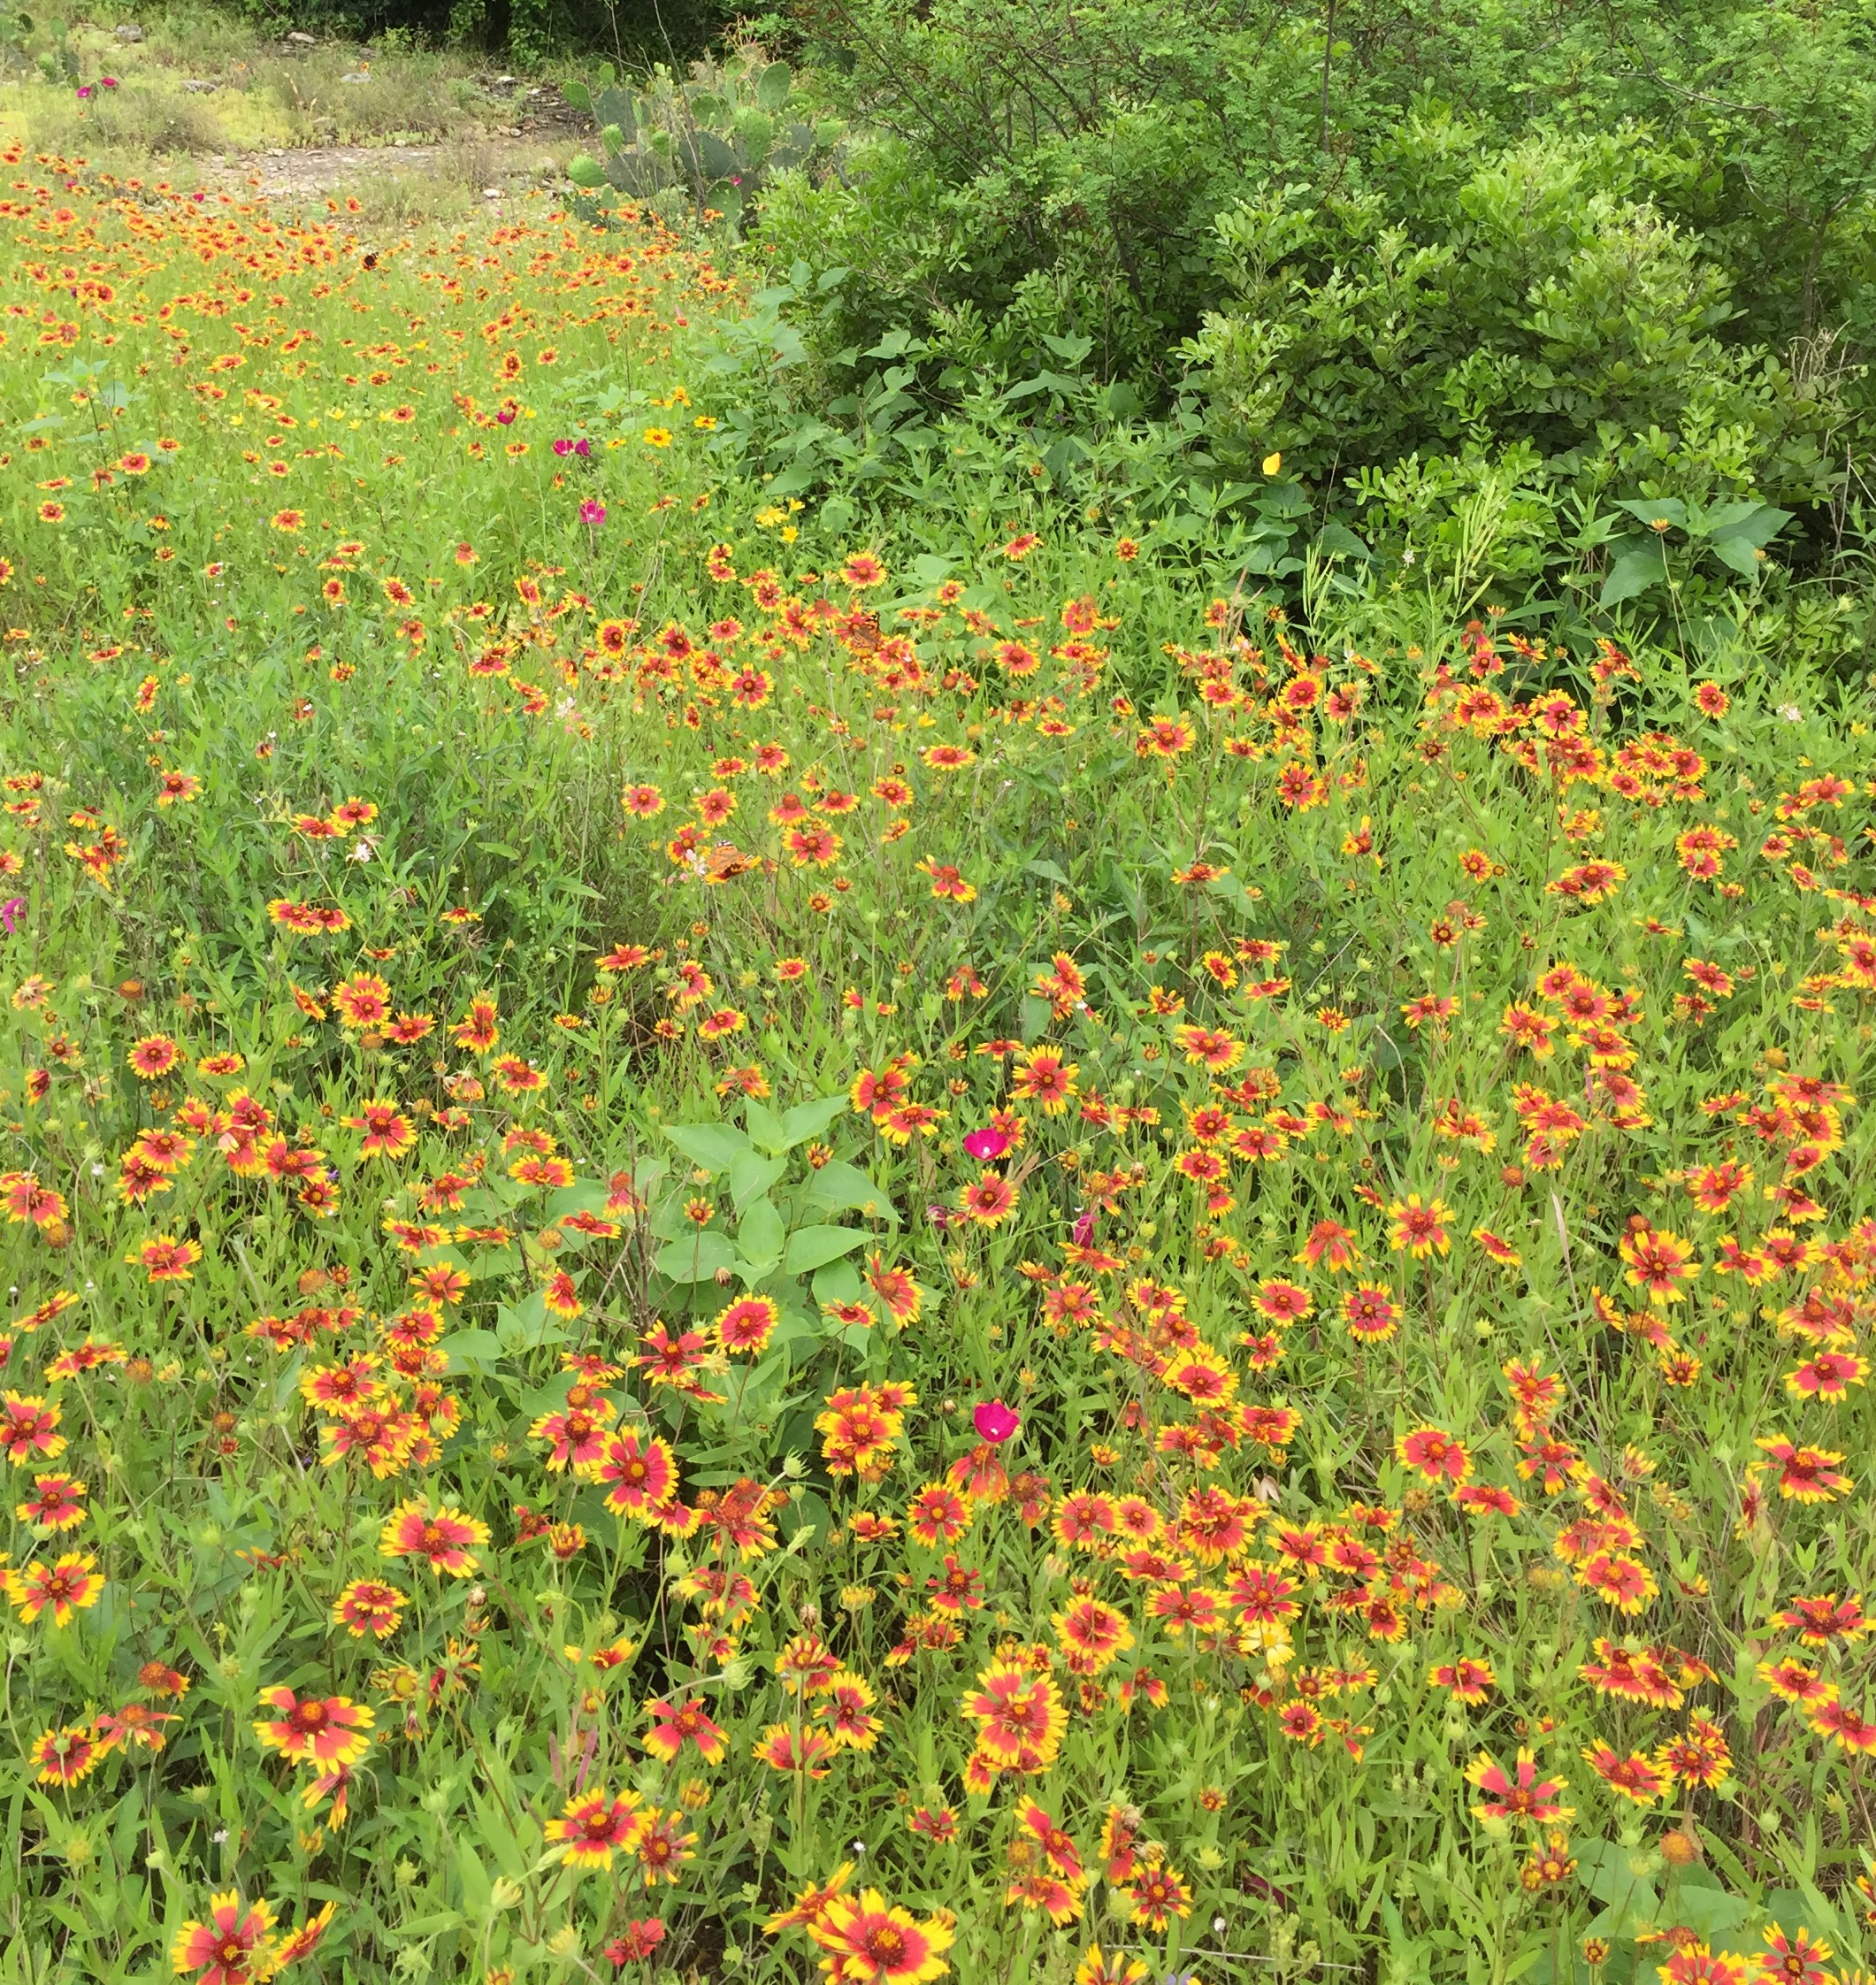
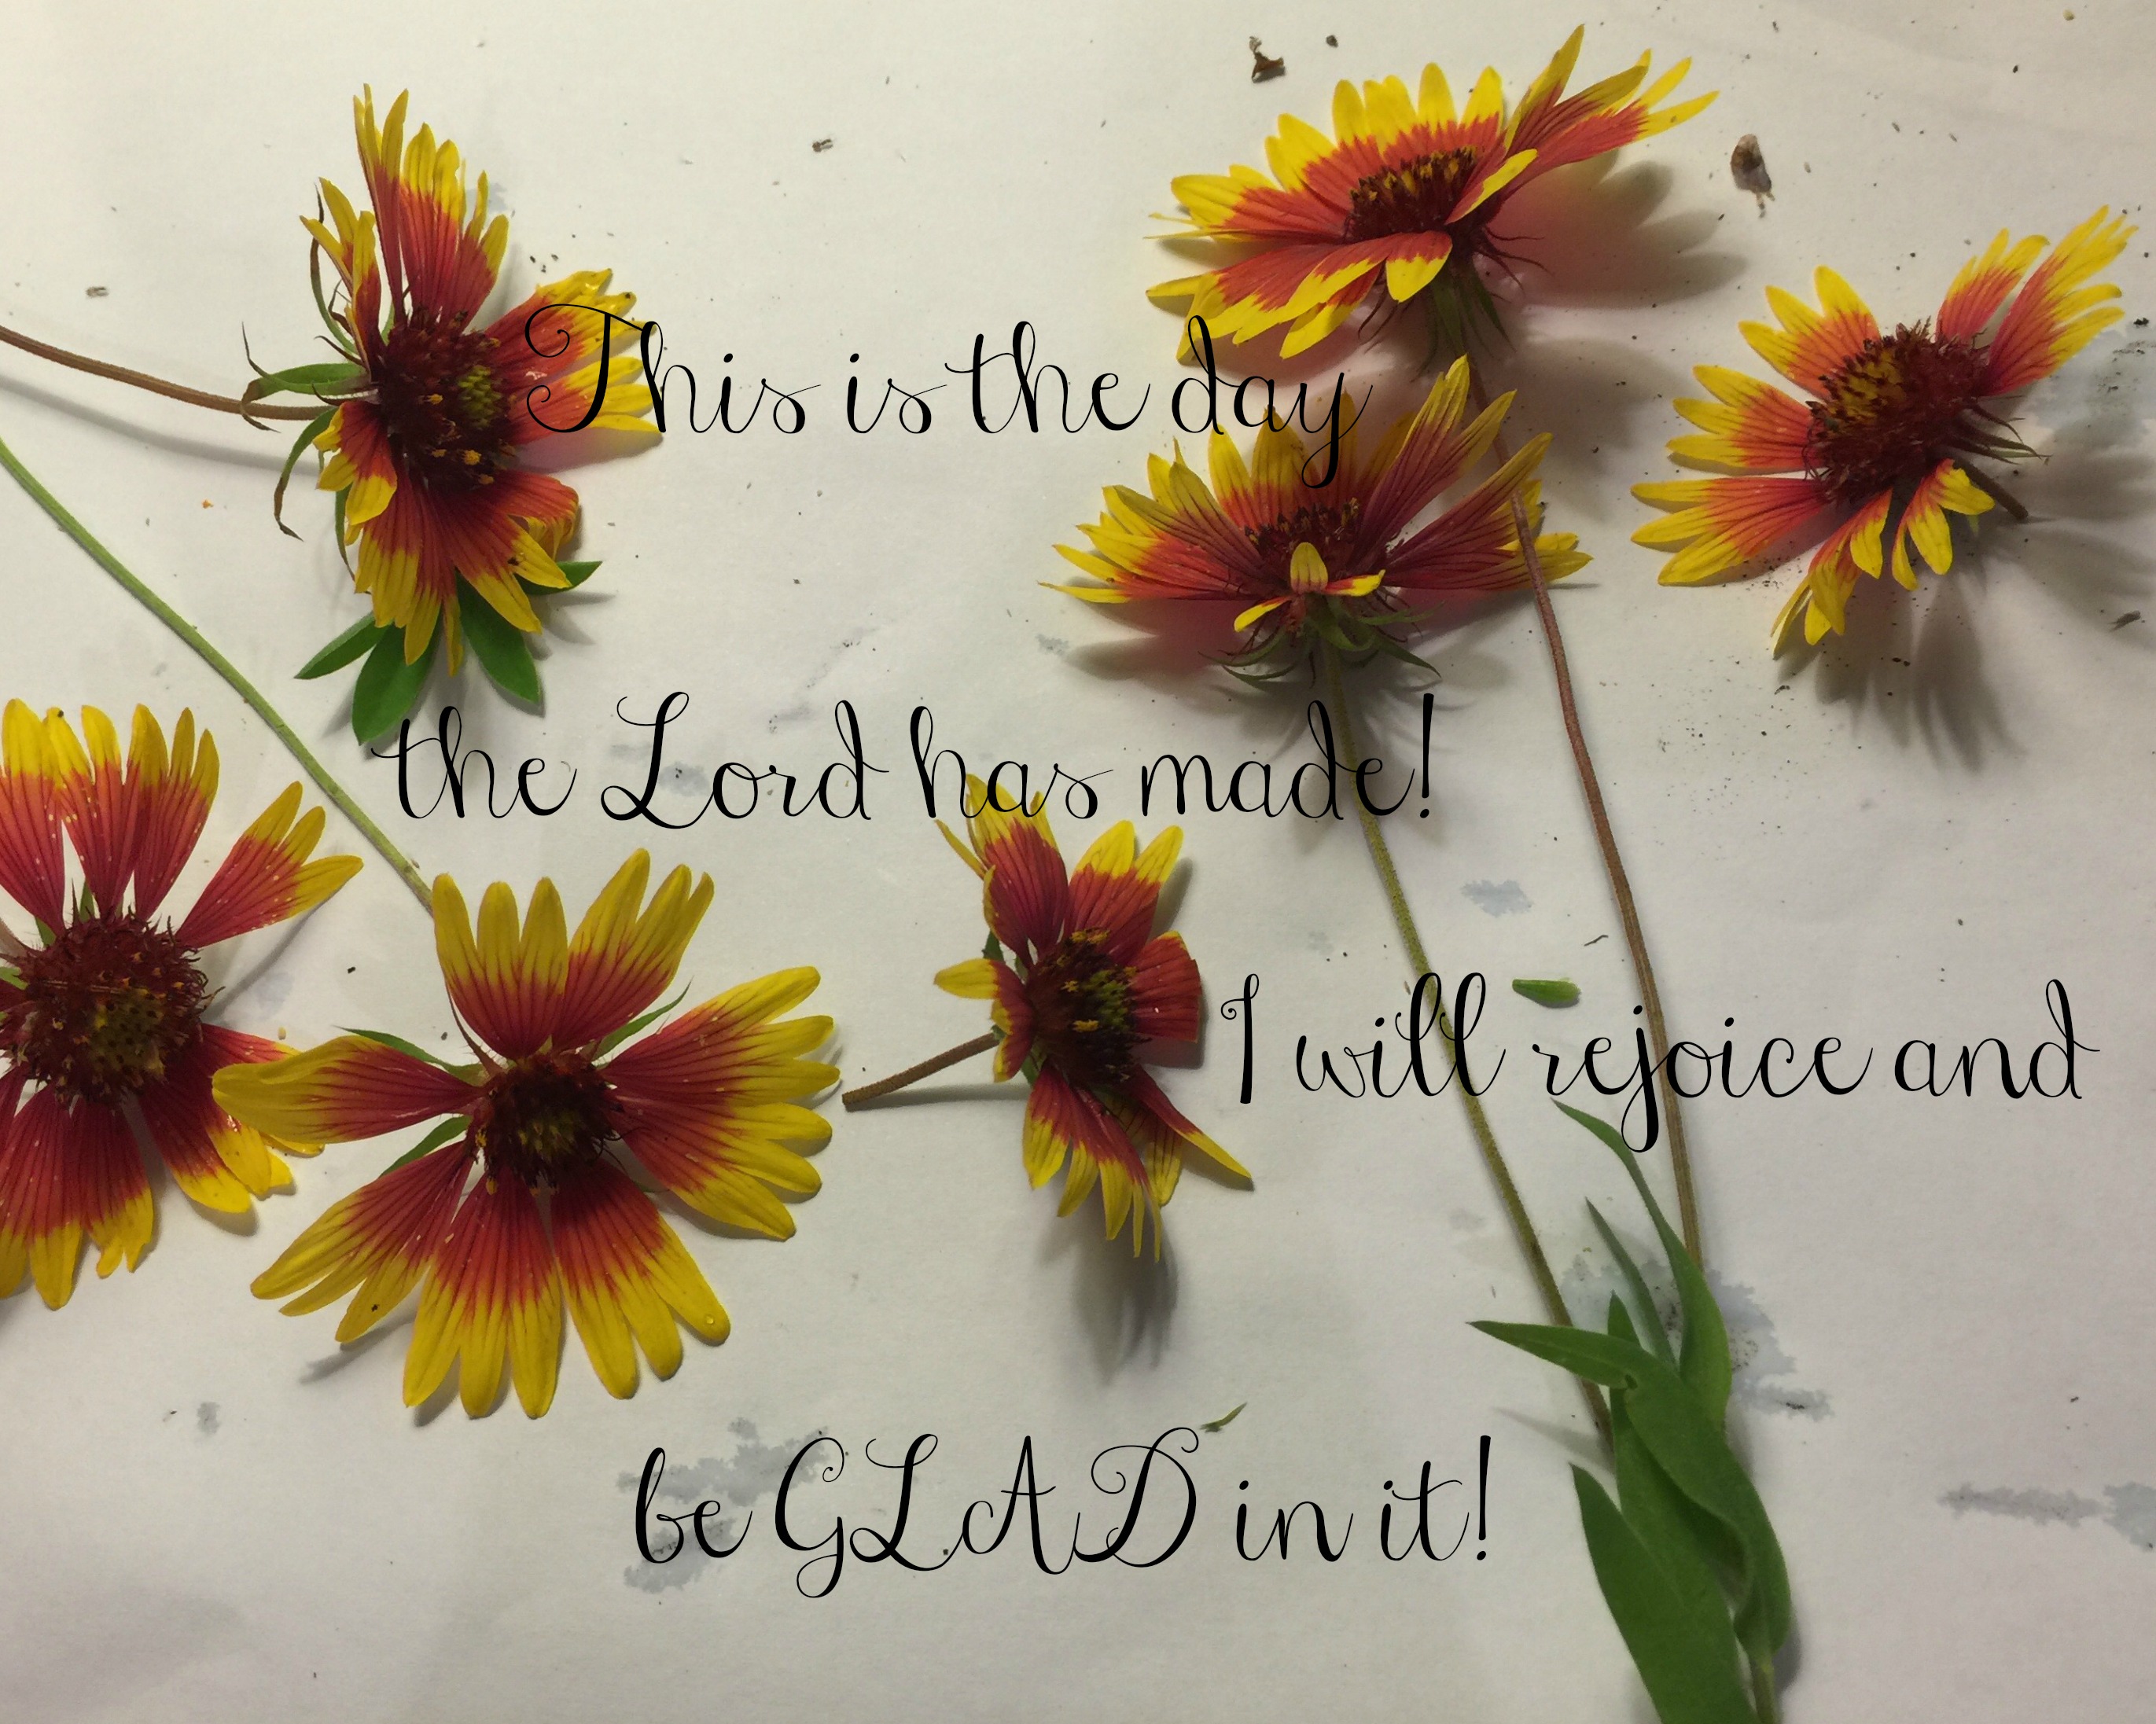
 I took this photo in our front yard while we were working on collecting our flowers for this project. The butterflies were fluttering EVERYWHERE, and the Indian Blankets are just gorgeous!
Here’s what you’ll need to do this activity:
A bucket or basket of some sort
A source of wildflowers, leaves, grass, or rocks
A sheet of white butcher paper
A good lamp
A magnifying glass
A digital camera of some sort that you are willing to let your child use
Optional extension: A computer with internet for photo editing (I use PicMonkey.com)
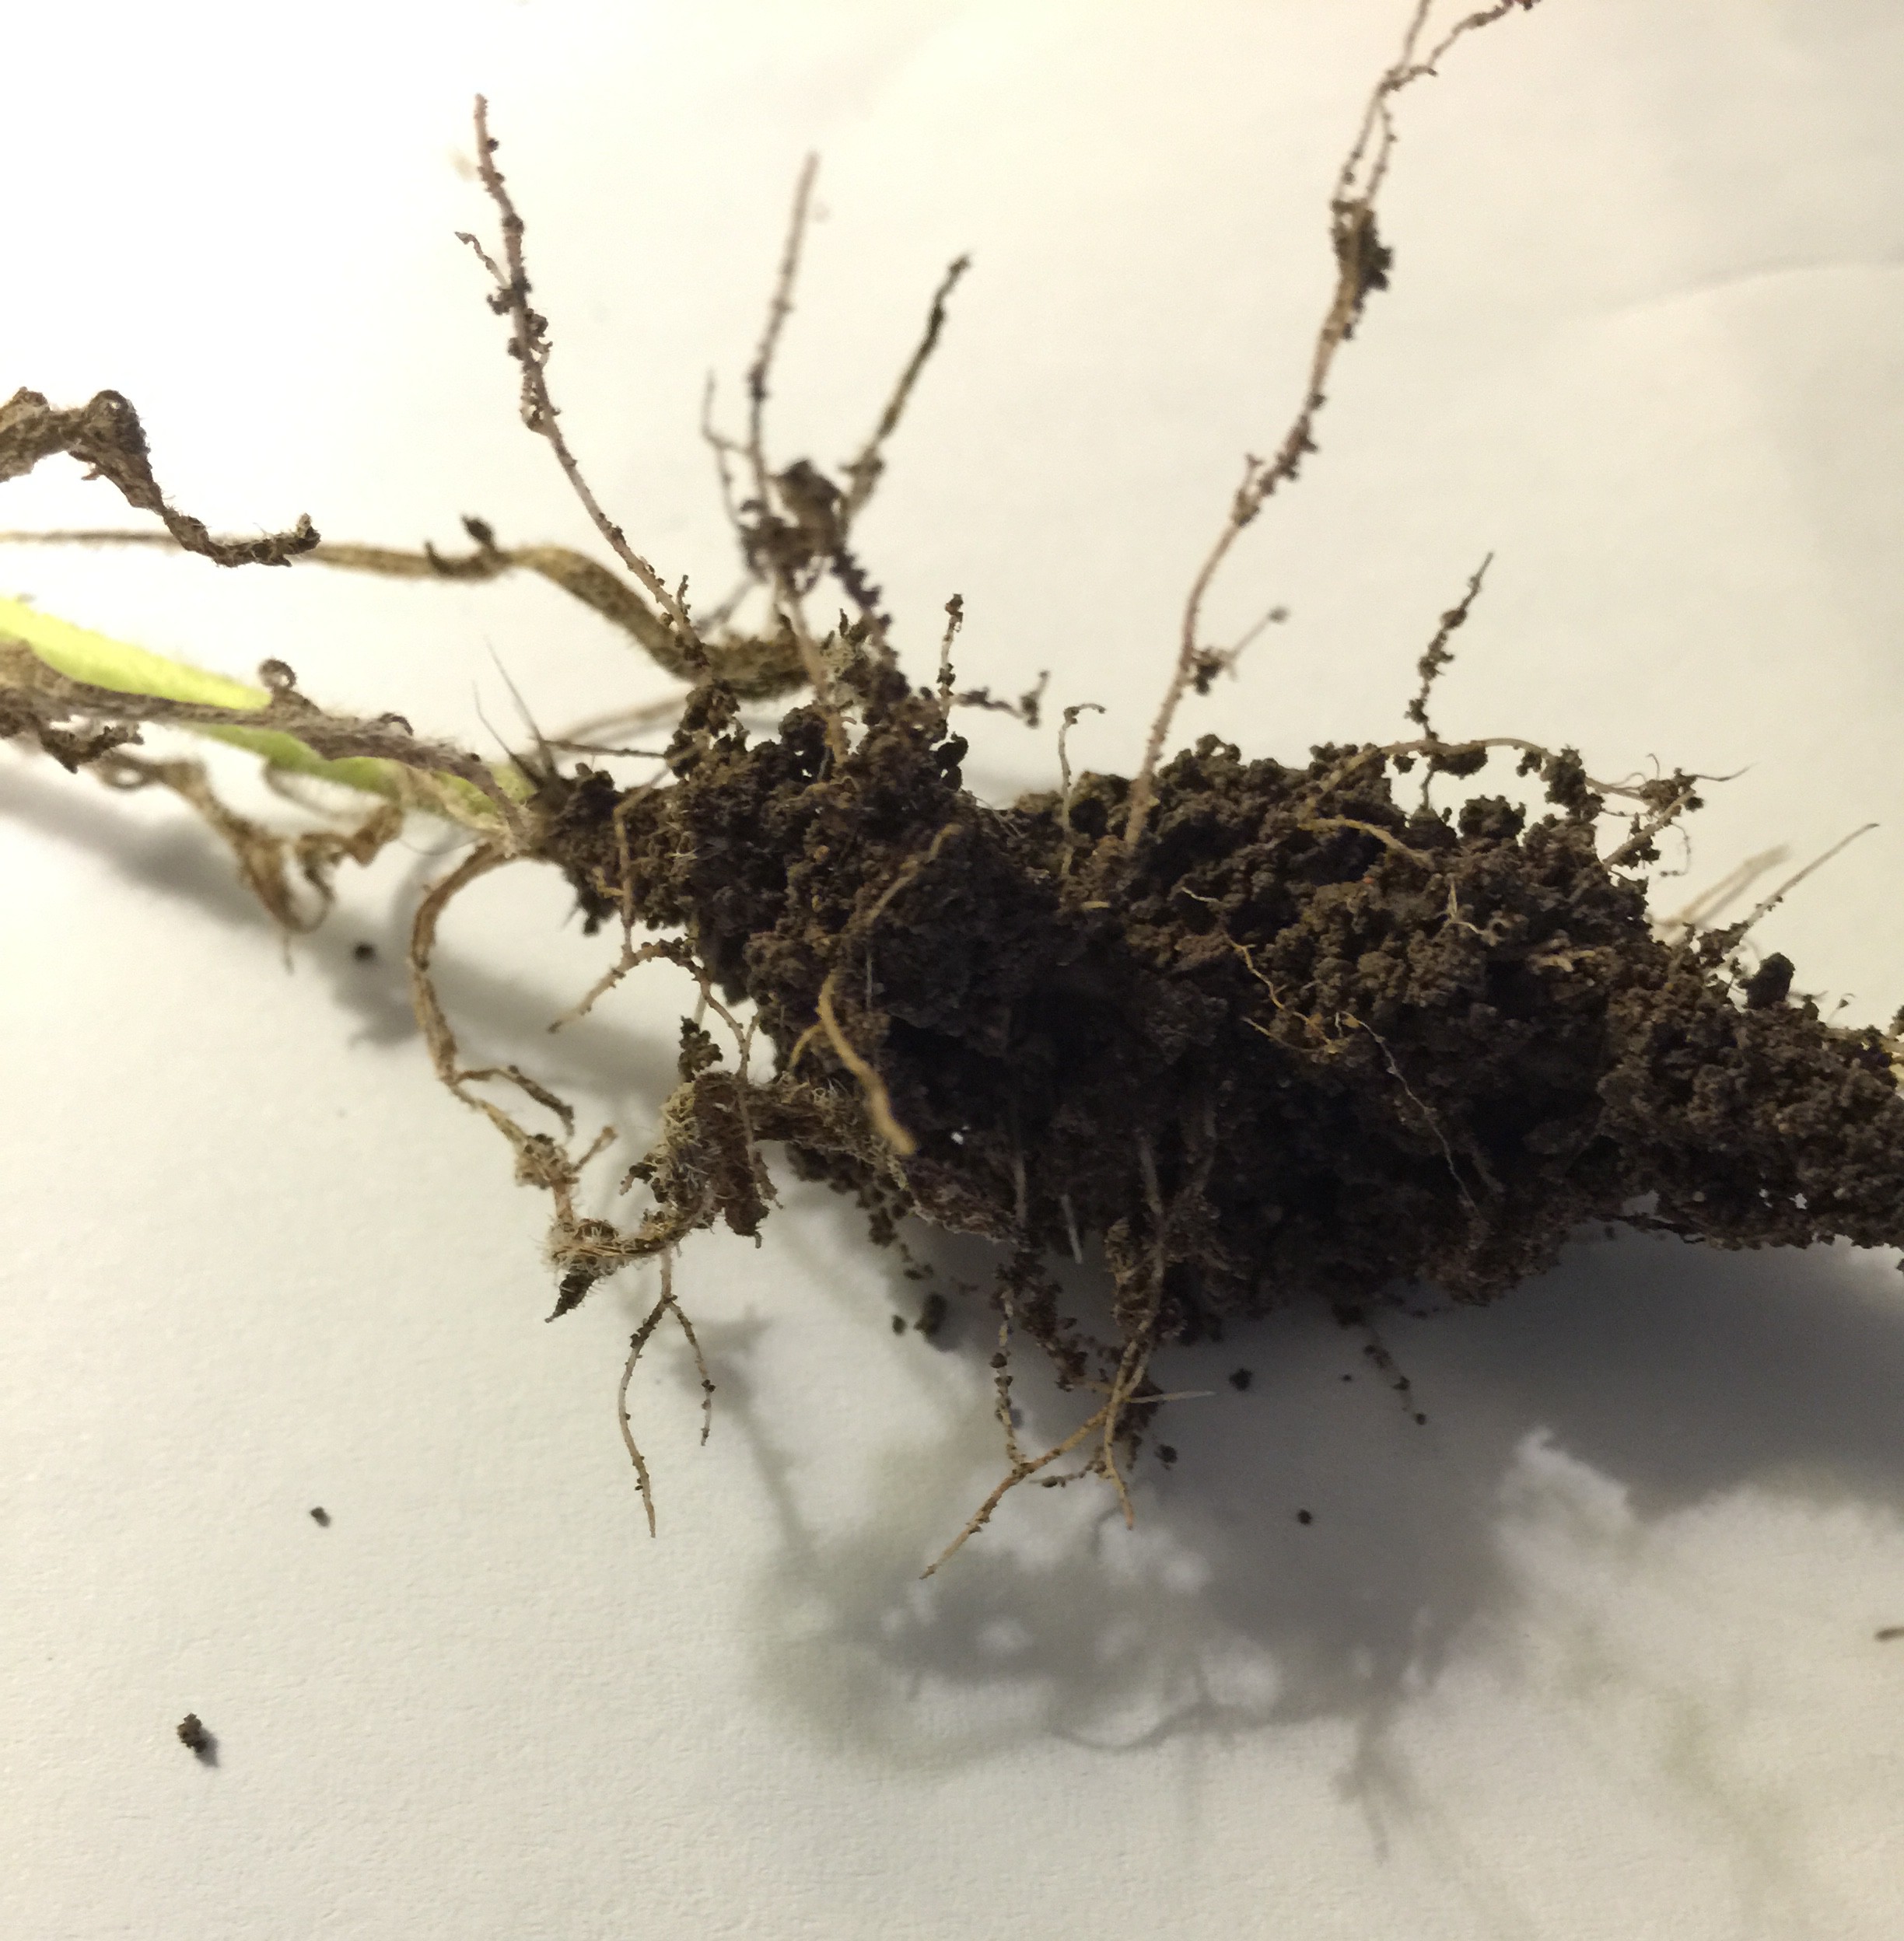
So just take your bucket to your source of nature, and collect objects. It can be ANYTHING. Any small piece of nature can be a fabulous source for photography. Keep in mind that live objects such as caterpillars are harder to photograph – especially for kids – because they are a moving target. So encourage your child to select STILL LIFE objects. You can explain that still life is a type of art that depicts objects that are alive, but not moving. Flowers don’t get up and walk away. Nor do rocks or grass. So they work great for this project. Try to pull an entire wildflower plant up – root and all – to examine with your child. If that’s not possible, no worries, but it certainly extended our conversation GREATLY to have a couple full plants. We talked about the parts of the plant while out there in the yard, and also again once we got into the house – a fabulous science lesson. You can totally do this with rocks as well, and get into discussing and sorting the features of the rocks, and create a rock collection box.
Once your basket or bucket is full, head inside and lay out your white butcher paper. Set up your lamp and grab your magnifying glass and camera – the fun is about to begin! Start laying out your objects on the paper. You can talk about their shadows, their colors, examine them close up, and watch the paper closely with your magnifying glass as lots of teeny tiny little bugs will crawl off of the flowers and begin to explore your paper. This is a fabulous time to talk about the features of the camera with your child – especially how to make it focus. If your little one has shaky hands and you’re using a phone for your photos, work as a team – you hold the phone, let your little one select where on the screen to focus, and push the shutter button to snap the picture (that’s what we did).
Try laying your objects out in all different ways – you can get as creative as your child wants. You could spell nature words with your objects, you could spell your child’s name, you could build something with your rocks, or you could just do random grouping nature shots. Encourage your child to try holding the camera closer to an object and farther away to see the difference in the two shots. How does the shadow look on the screen? Can you move your camera to a different location to make the shadow longer or shorter? Etc. The possibilities with this activity are ENDLESS. And totally repeatable!! Just collect different objects each time, and you can do this activity over and over and over.
If you want to extend the activity further in the tech area and your child is really into it, you can easily upload your photos to your computer and check out www.picmonkey.com (totally not an affiliate link, I just love them so much and use their site for everything!). Try making a collage of your photos together, or even play around with their favorite photo to make a sign for their bedroom door, an inspirational saying for their bathroom mirror, or add text to several of the photos to create a book that you can print out and stick in a 3 ring binder for them. You could also do this activity throughout the seasons and use these photos instead of paintings for your 2016 calendar! You could also add some math to this activity by measuring each flower and sorting them by length! The possibilities of where you can go with this activity are truly limitless, and think of the OWNERSHIP your child will have in this project – and the fabulous opportunity to do something one on one with your child. (I know I’m frequently looking for something special I can do with JUST Becca so that she feels special and grown up. We did this while Grayson was napping. If your younger child doesn’t nap anymore, you can easily have them go on the hunt with you and collect their own items in a separate basket, then give them white paper as well and let them play with the objects. They could draw ovals around them with crayons, count their objects, and sort by color, just to give you a few ideas.)
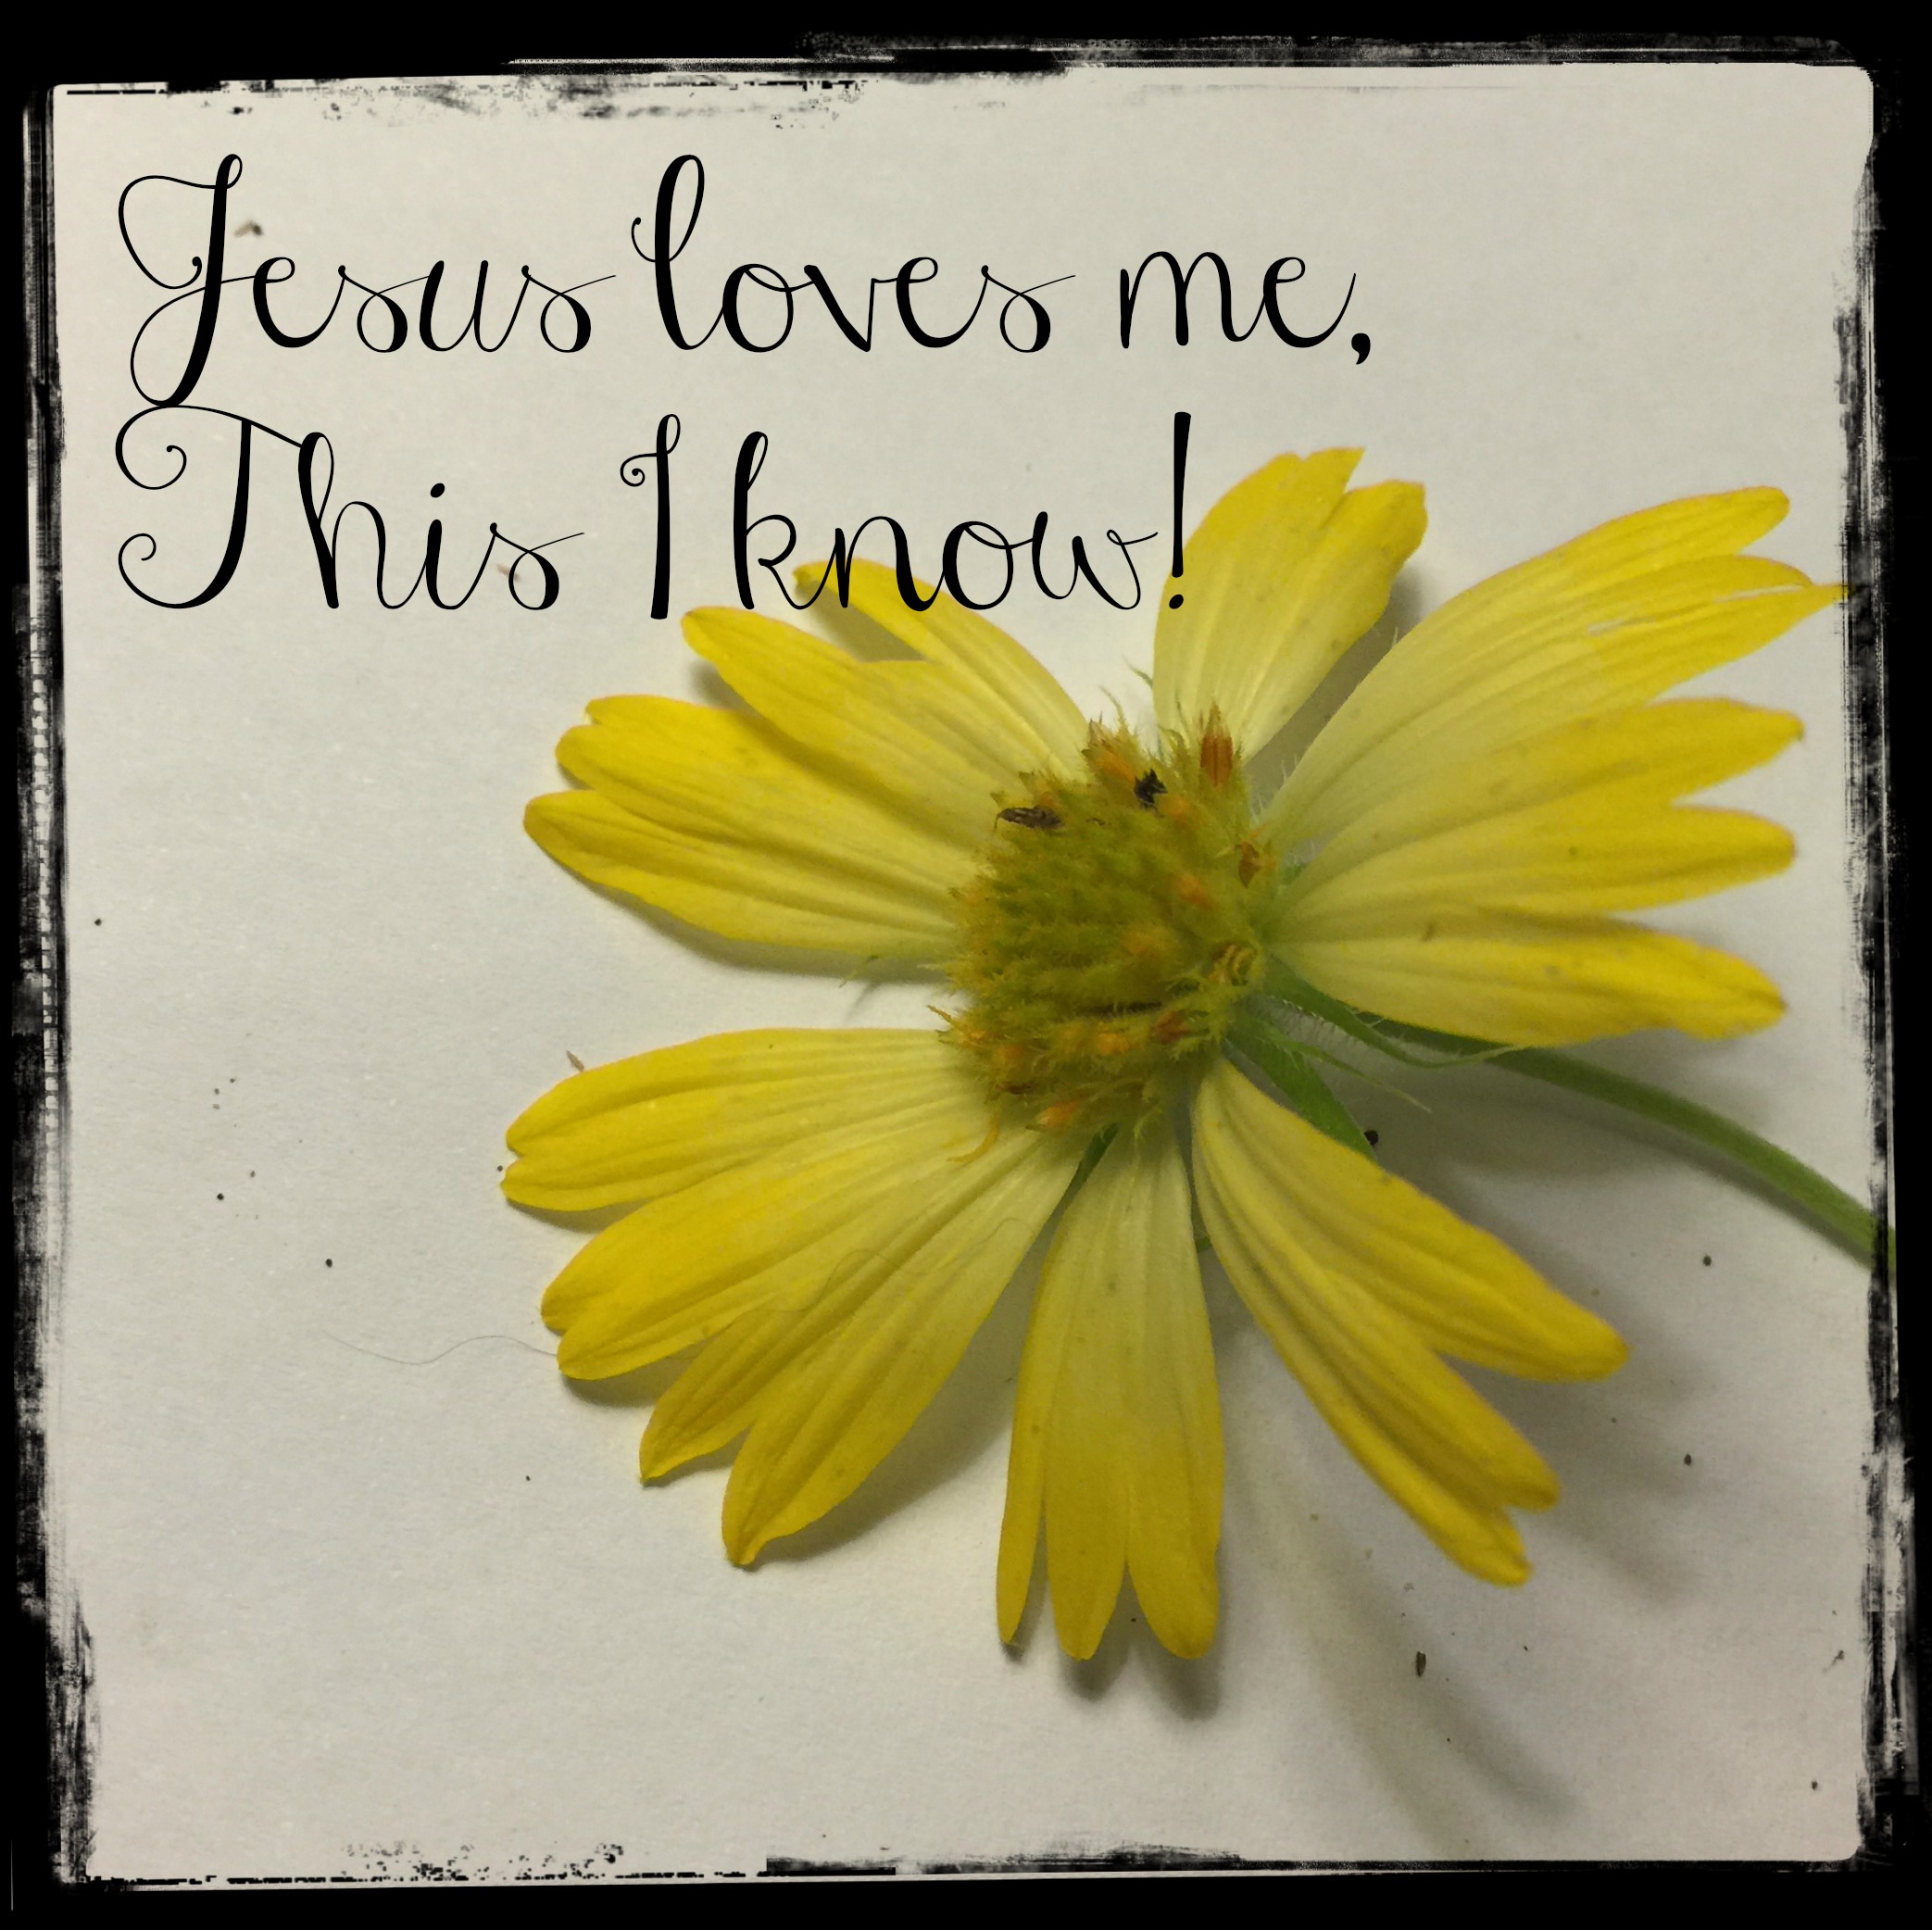
Here are some of the beautiful pieces we came up with together:


 I am truly so excited about this activity, and I can’t wait to do it with her again with other objects and different flowers!! I especially loved her root picture (she wasn’t that fond of it, but she loved examining the roots and playing with the shadows!)
I hope that you will try this activity with your kids, and that you’ll SHARE your results on my Facebook page!!! I would love to see what you are doing!!! Check back next week – I’m hoping to get more posts up before then for the start of our next new month!!

 Then, we took a regular cardboard box from our recycling pile, and took it apart. We found where the seam was, and “unglued” (her word) it. Then, she enjoyed decorating the inside with some custom artwork, and she helped me re-glue the box back together – inside out. We used a little tape to help the glued flap stay closed.